Key Takeaways
- The XTool P2 is a CO2 laser cutter that is powerful and user-friendly, making it suitable for anyone looking to start a laser cutting and engraving business or upgrade their existing diode laser.
- The machine features dual positioning cameras for accurate and detailed work, as well as an autofocus laser that eliminates the need to specify material thickness.
- It's ideal for working with acrylics or glass engraving and offers a number of accessories for engraving cylindrical objects or cutting larger materials.
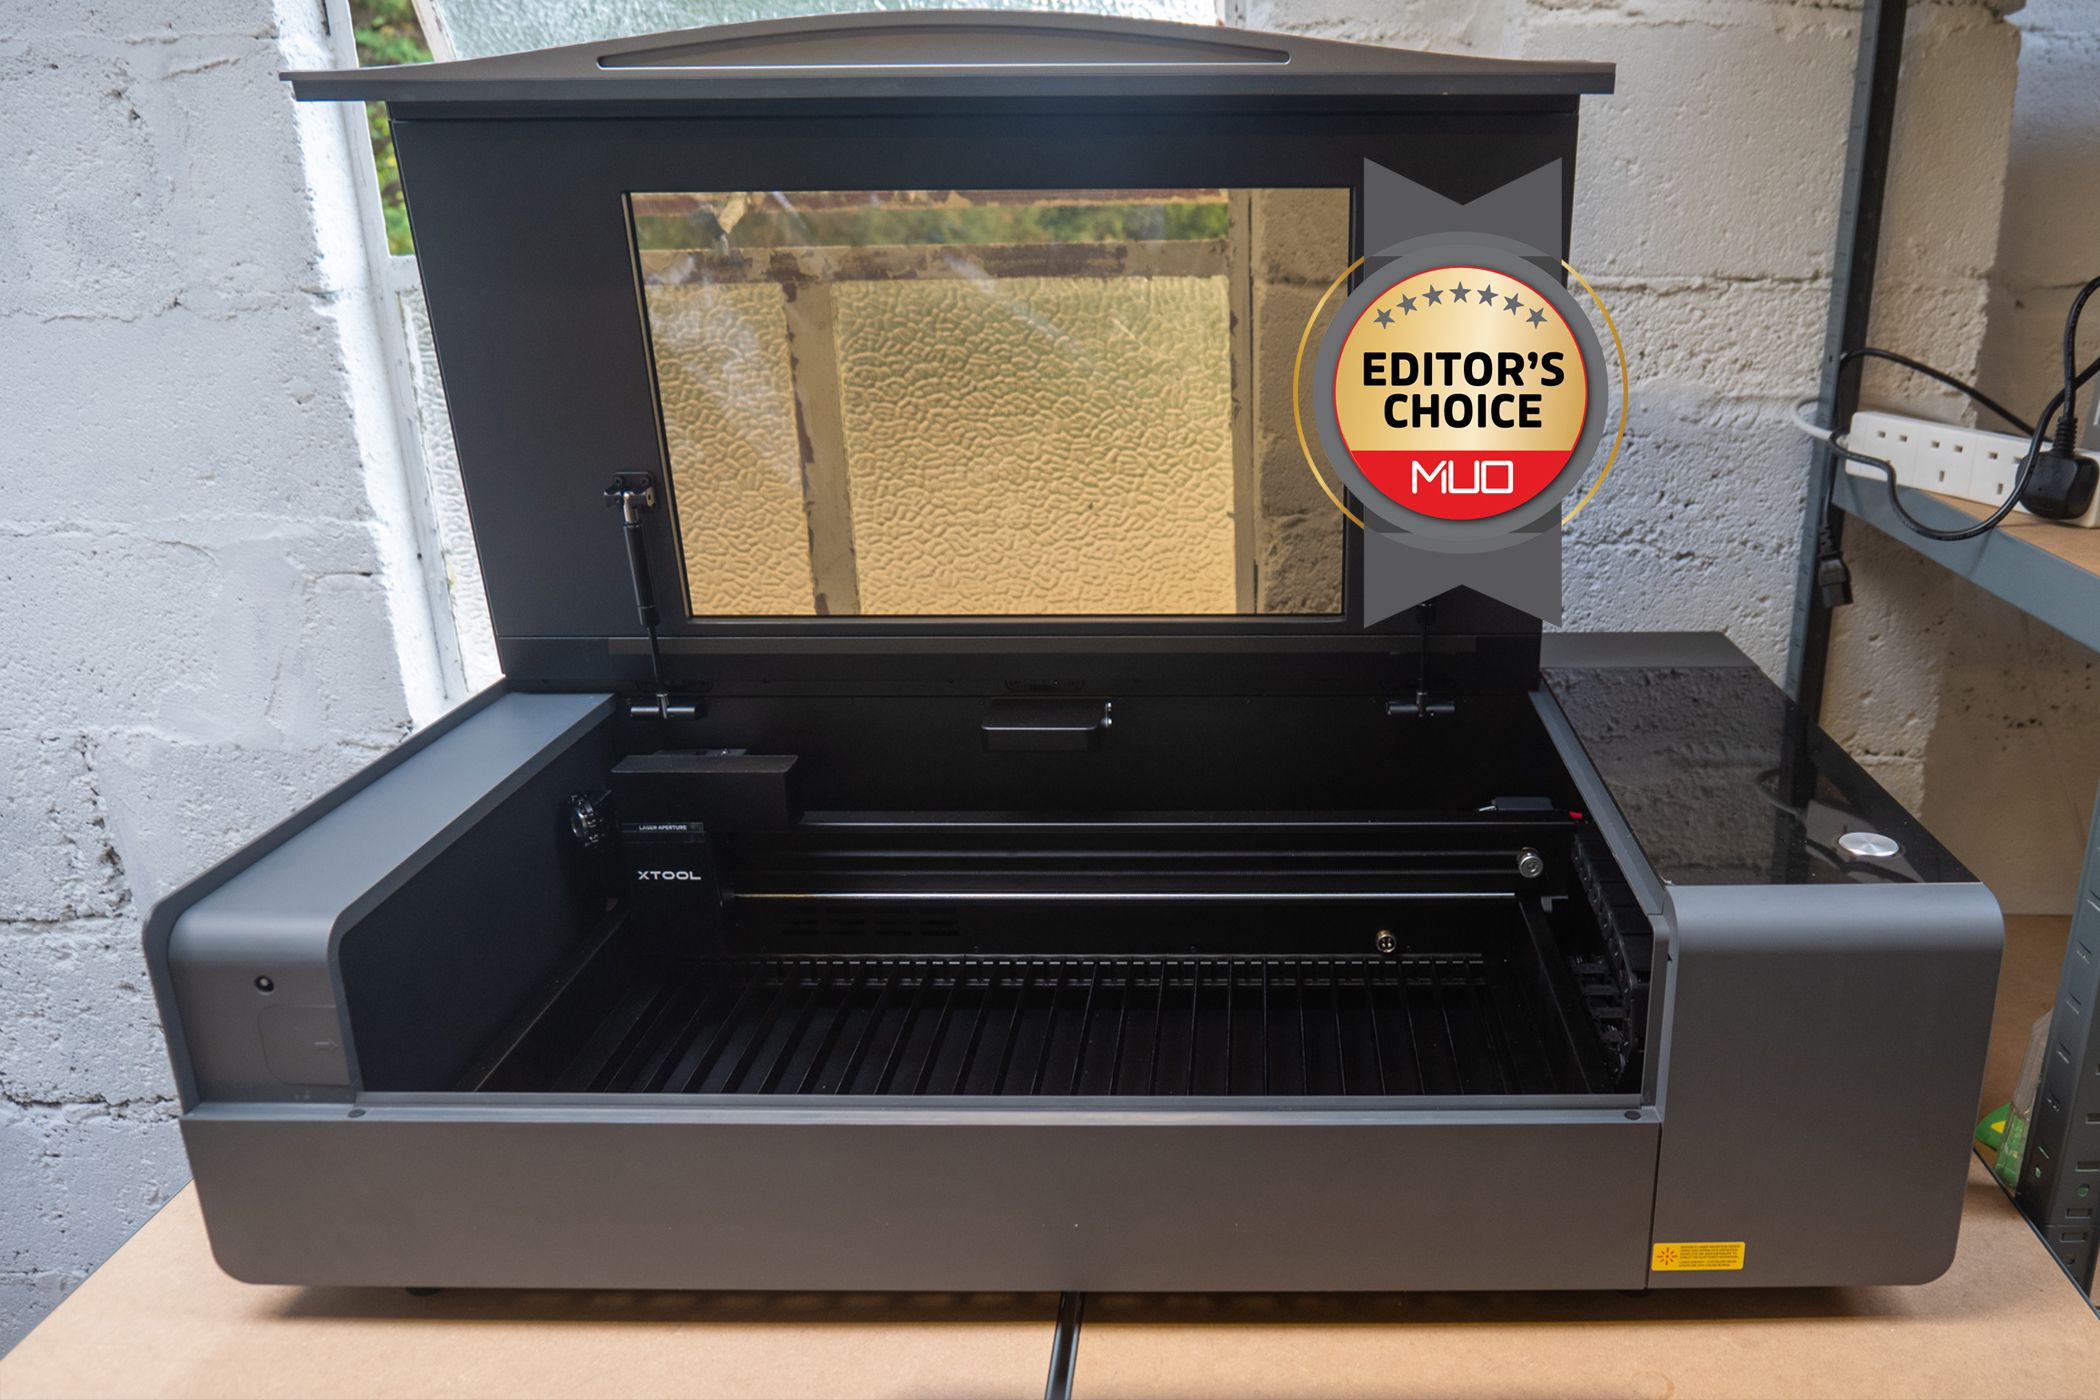
The XTool P2 is a CO2 laser cutter suitable for anyone, thanks to an easy-to-use custom software package combined with powerful, safe, and reliable hardware. It's ideal for those looking to start a laser cutting and engraving business or upgrade their existing diode laser to a more capable model, and several accessories are available to let you engrave on cylindrical objects or cut even larger materials. It's a pricey investment but well worth it.
Read on to find out what makes the XTool P2 such a brilliant machine for all types of users, and exactly what you can do with it.
Xtool P2
The XTool P2 an incredibly powerful laser cutter, paired with the same user-friendly XCS software package used on all the XTool machines. The dual positioning cameras ensure accuracy for details, even down to engraving on a toothpick. Meanwhile, the autofocus laser means you'll rarely need to specify material thickness.
It's an ideal upgrade for those looking to work more with acrylics or glass engraving. A number of accessories are available for engraving cylindrical objects and working with huge sheet materials, as well as an air purifier.
- Brand
- XTool
- Laser Power
- 55W CO2 laser
- Working Area
- 23.6 x 12.1 inches (600 x 308mm)
- Software
- Xtool Creative Space (lightBurn compatible)
- Positioning Camera
- Two - one for overview and one for close up details; plus an autofocus laser.
- Powerful laser ensures clean and accurate cuts
- Two positioning cameras for ultra-detailed work
- User-friendly desktop software
- Software is lacking features if you're used to LightBurn
Design and Specifications
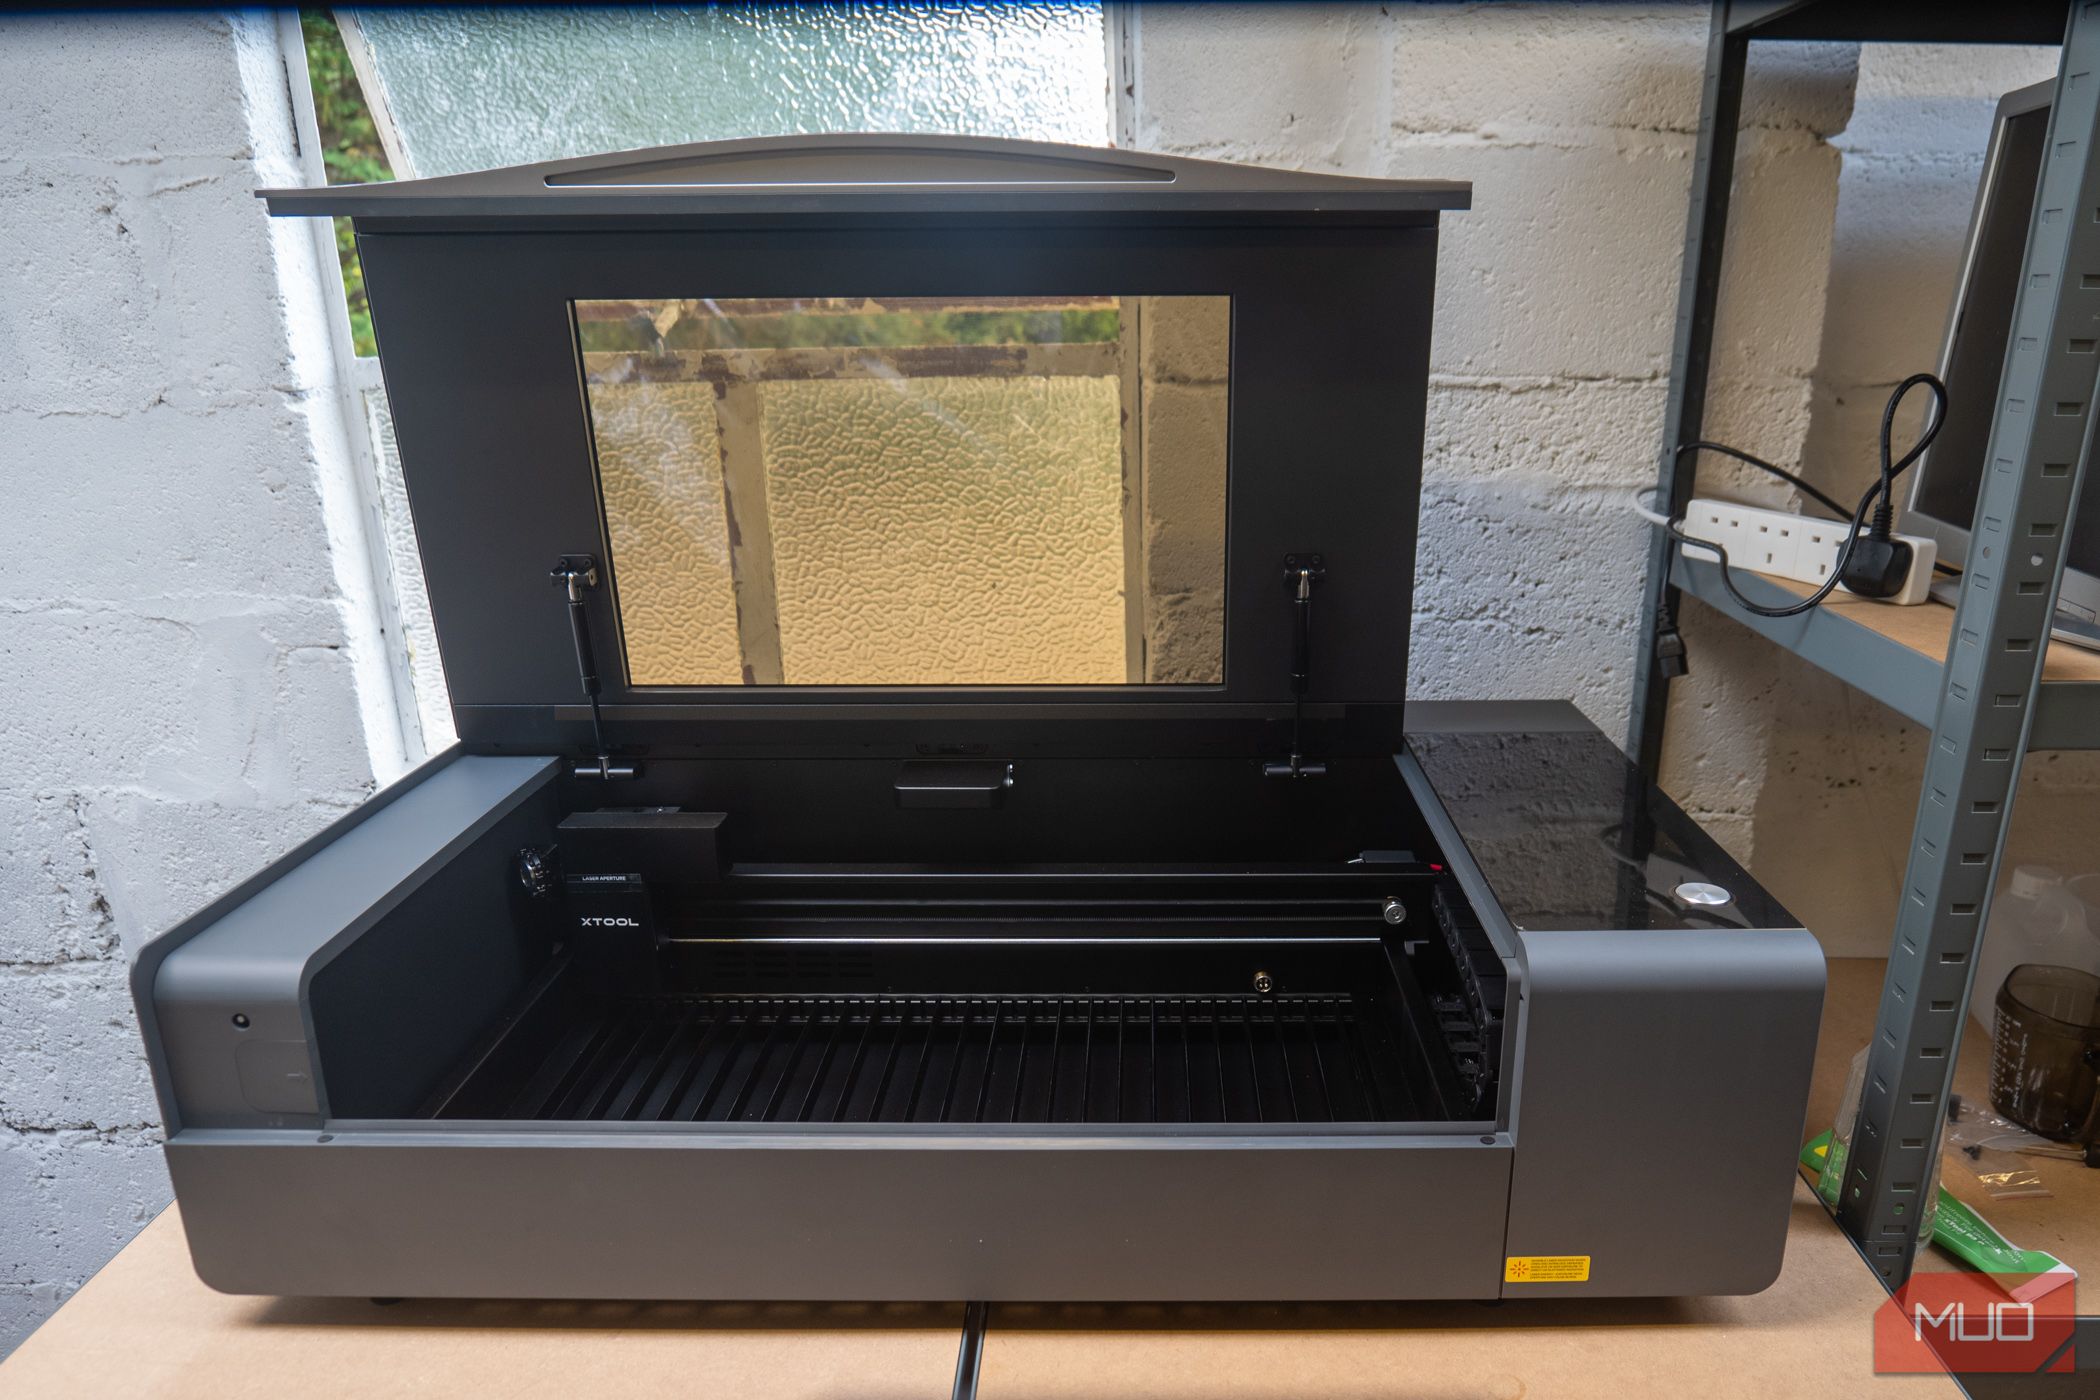
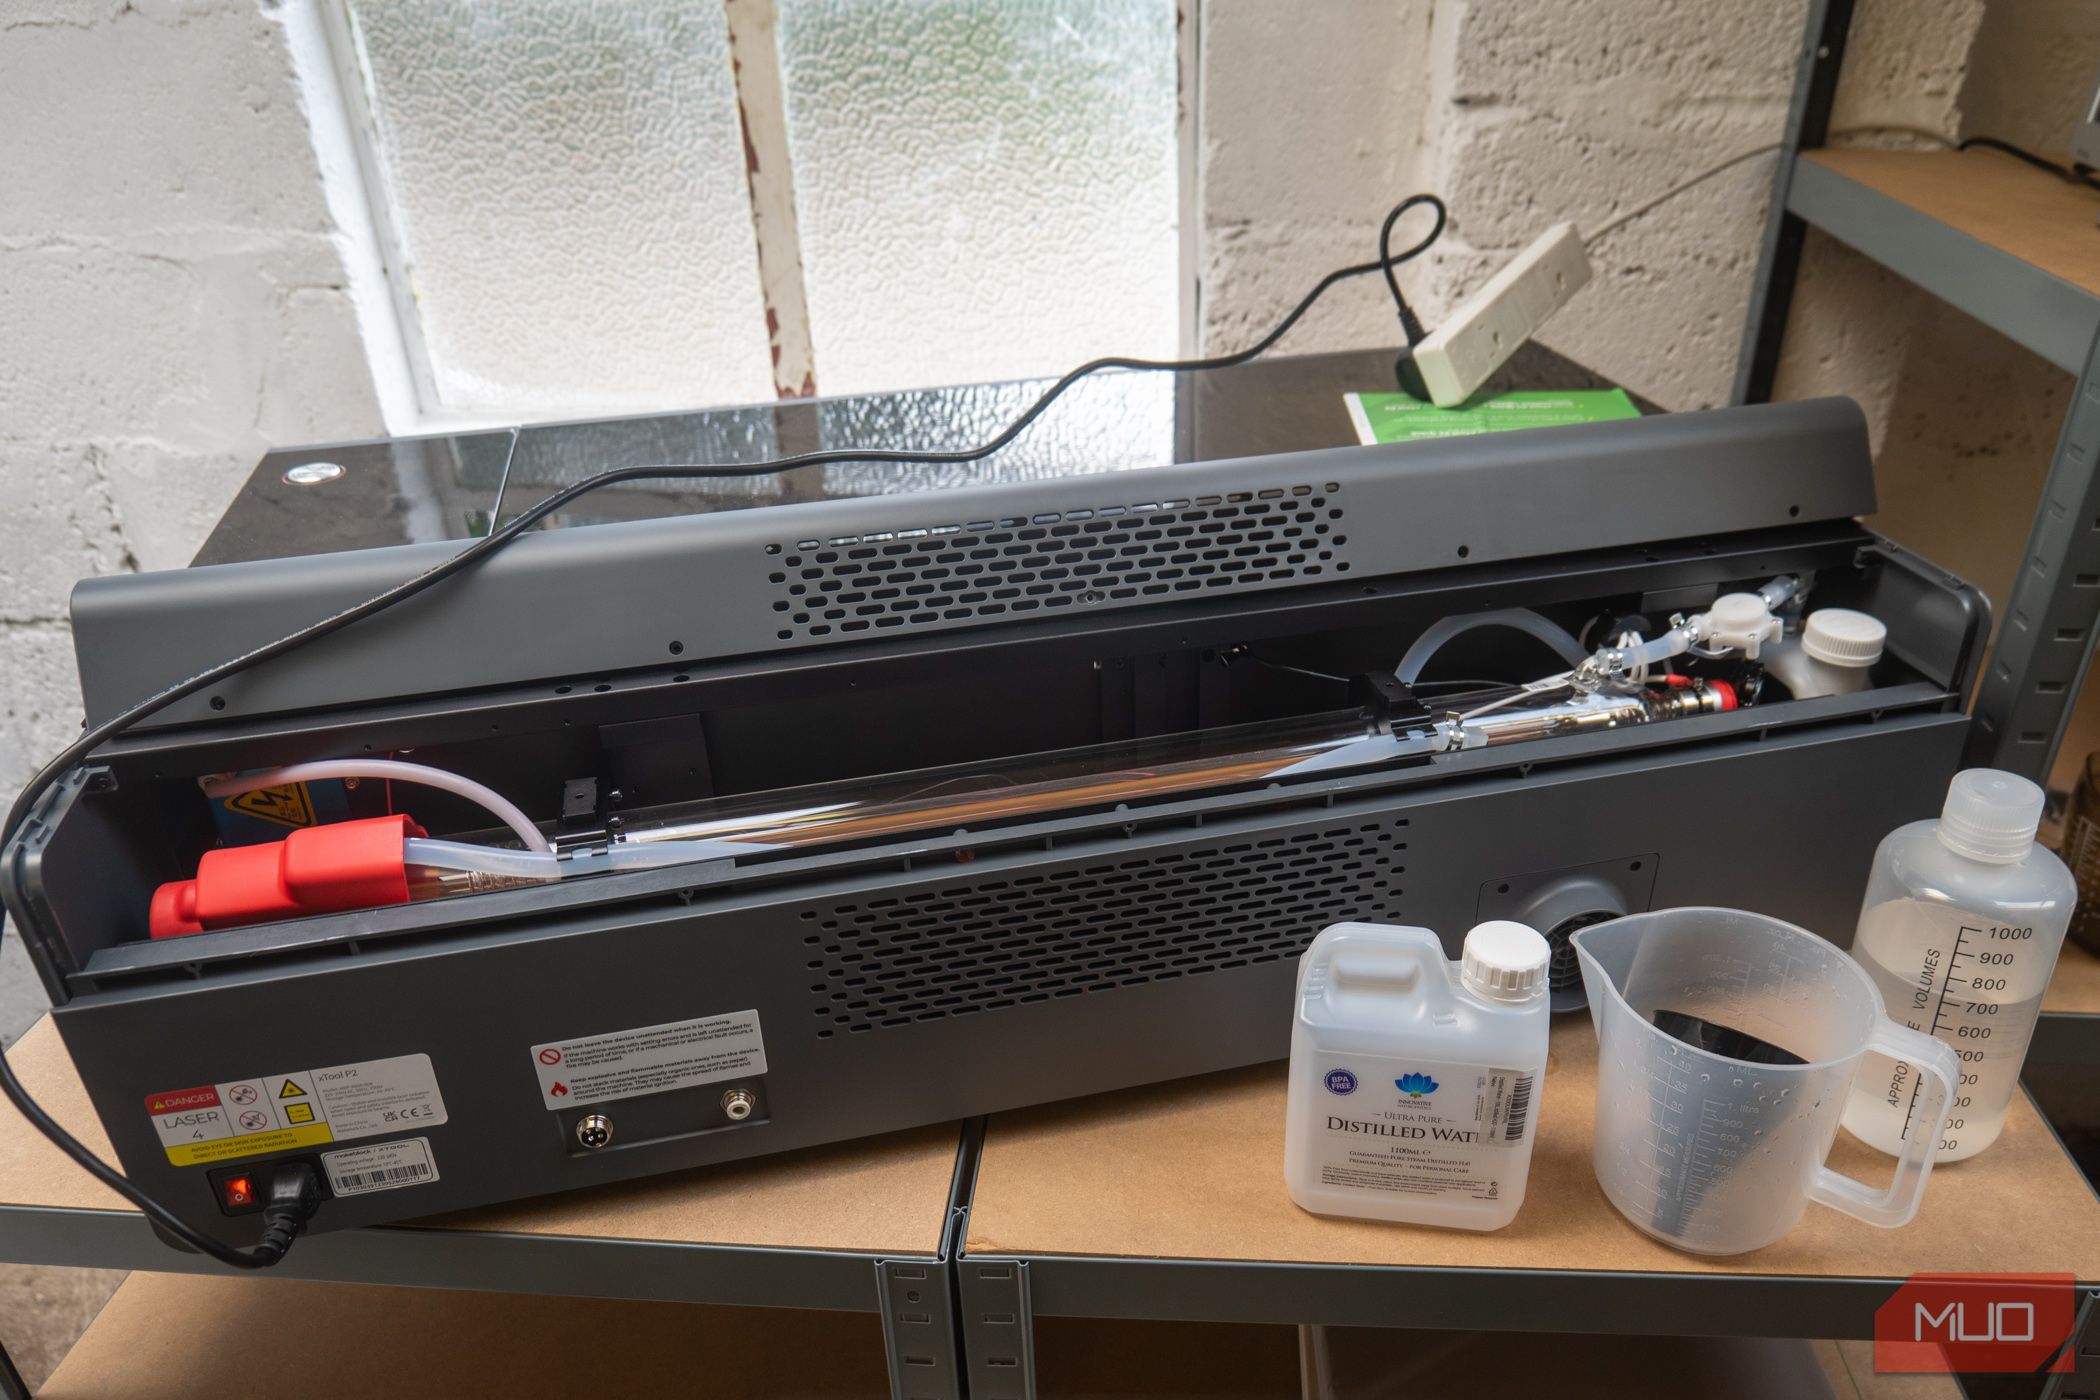
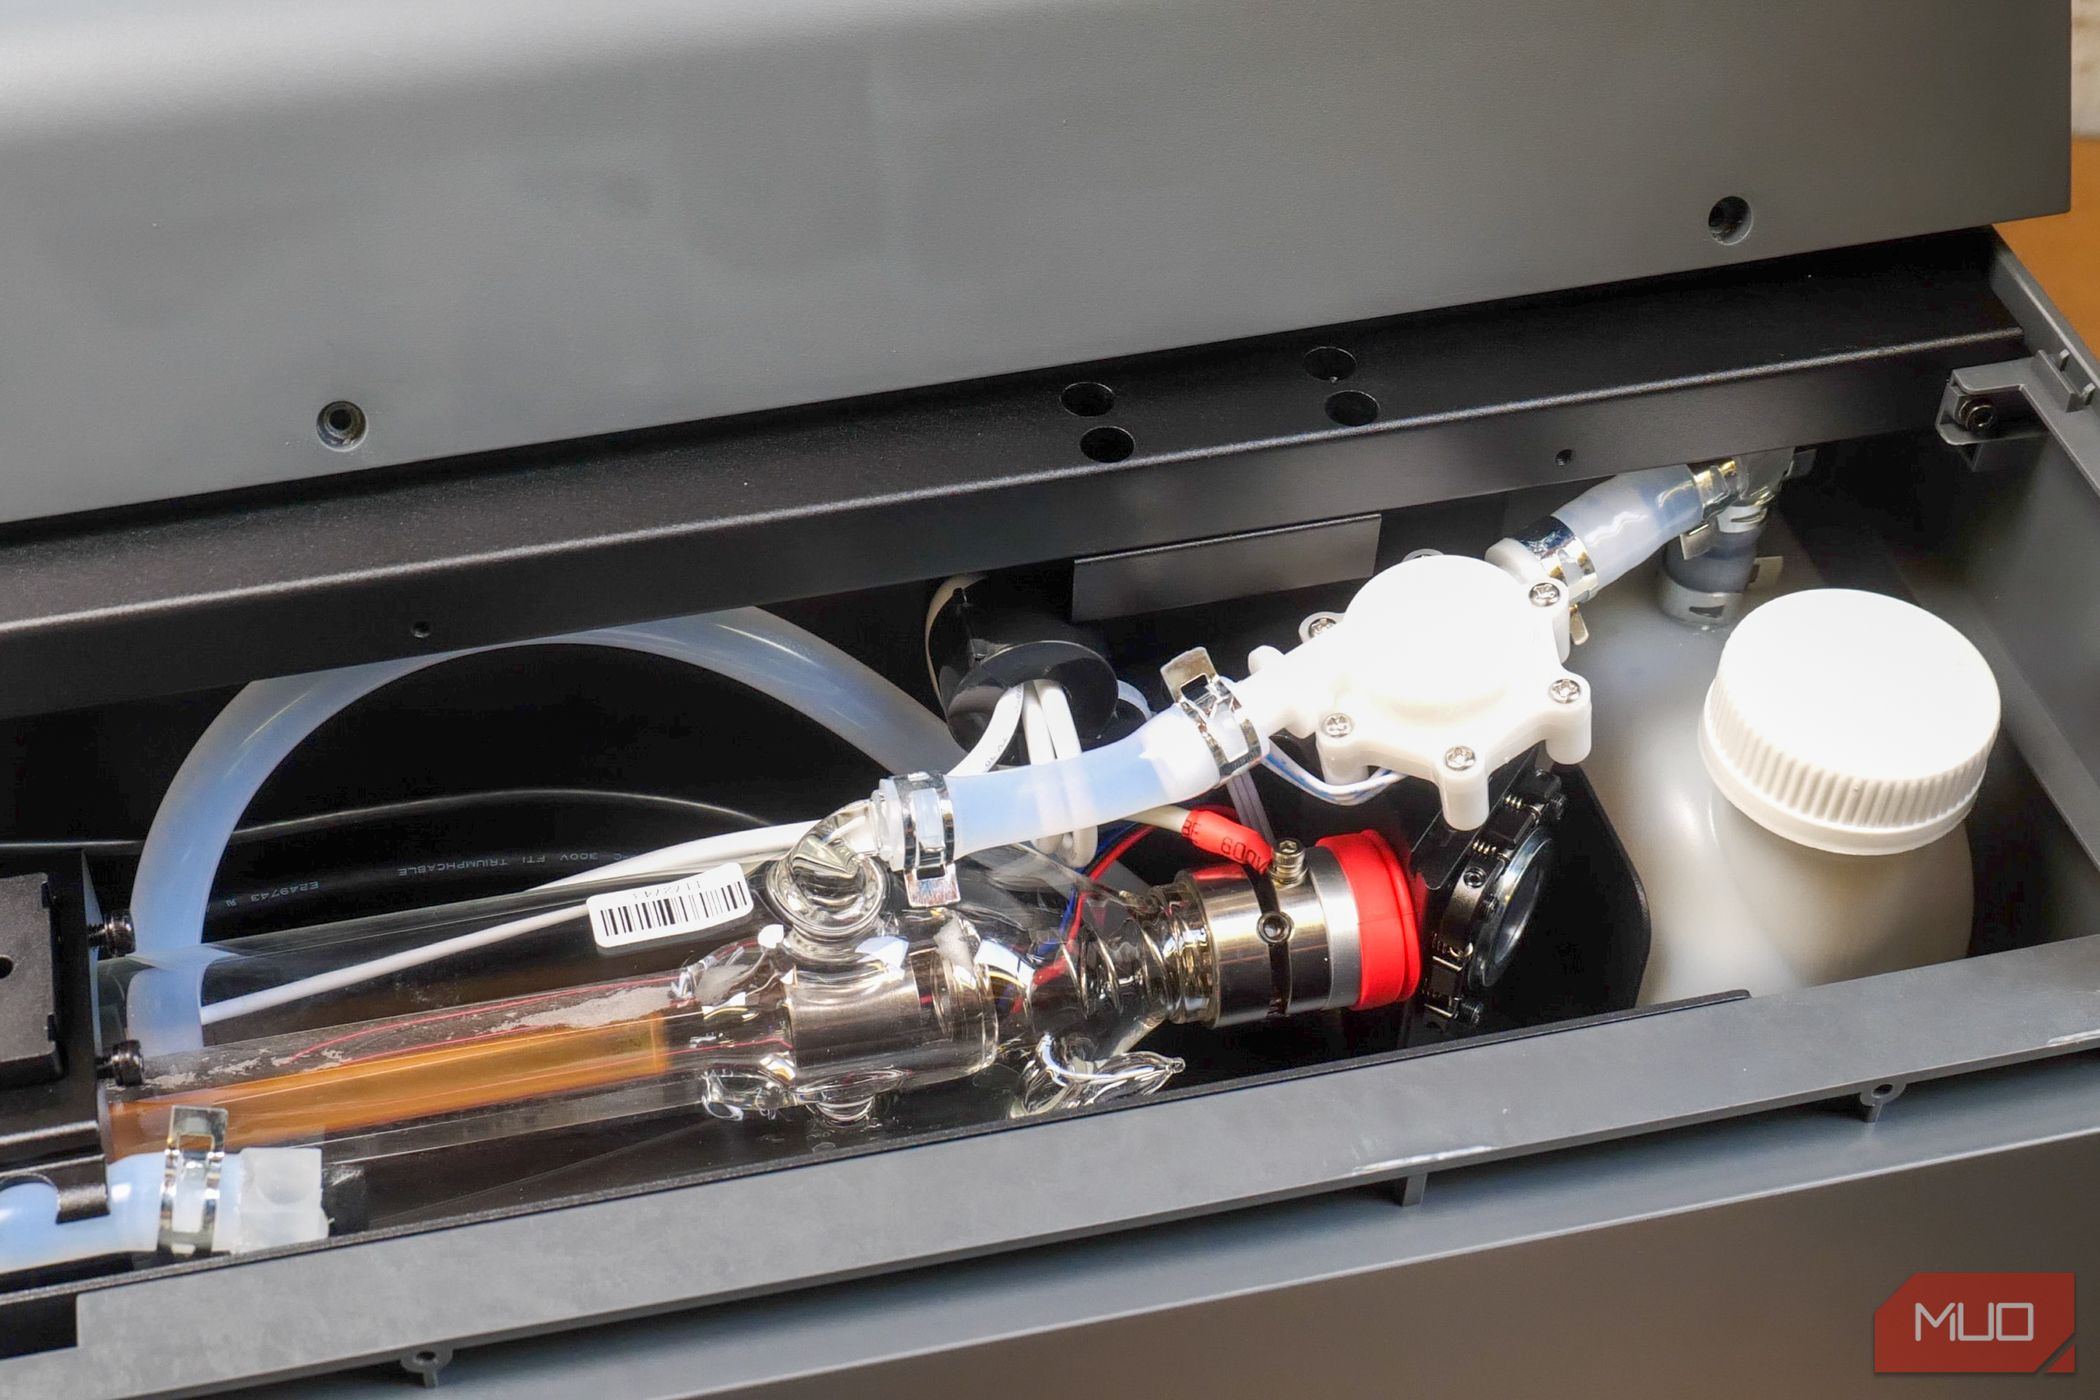
The XTool P2 might be described as desktop-sized, but only because you'd need to dedicate an entire desktop to it. Weighing an enormous 45kg (99lbs) and with a footprint of no less than 100cm wide, 65cm deep, and 35 cm tall (39.4 × 25.1 × 10.6 inches), you'll also need to allow room on the top for the lid to open. This isn't unusually large for a CO2 machine, I'll note—it's a little above average. The tube that generates the laser takes up the majority of the width at the rear of the machine.
And that's just for the base machine—if you add the conveyor feed you'll need a large workspace in front and behind to place the rails on, too.
The large machine size also translates to a sizeable working area of 600 x 308mm (23.6 x 12.1 inches), so an A3 sheet would fit fine. The actual bed for your piece is a little larger at 660 x 360mm (26 x 14 inches), so it can accommodate larger materials, but not engrave or cut the full area.
As for material thickness, the base P2 model can support up to 71mm, but if you need to engrave even deeper objects then the riser base increases that to 215mm. When it comes to cutting capabilities, XTool claims it cut up to 20mm acrylic in one pass, and up to 18mm black walnut wood in one pass. Though I don't have either of those to test the claims, I had incredible results on every material I tested.
The XTool P2 features a 55W laser tube, which is a good entry point for CO2 lasers in a non-commercial setting, and perfect for a home user or small business. It's also significantly higher power than most diode lasers; however, the raw power doesn't tell the whole story.
To help with positioning, the P2 features two camera systems and a laser depth sensor. One camera is situated on the case itself, automatically giving an overview of what you're working with. Usually, this alone is sufficient.
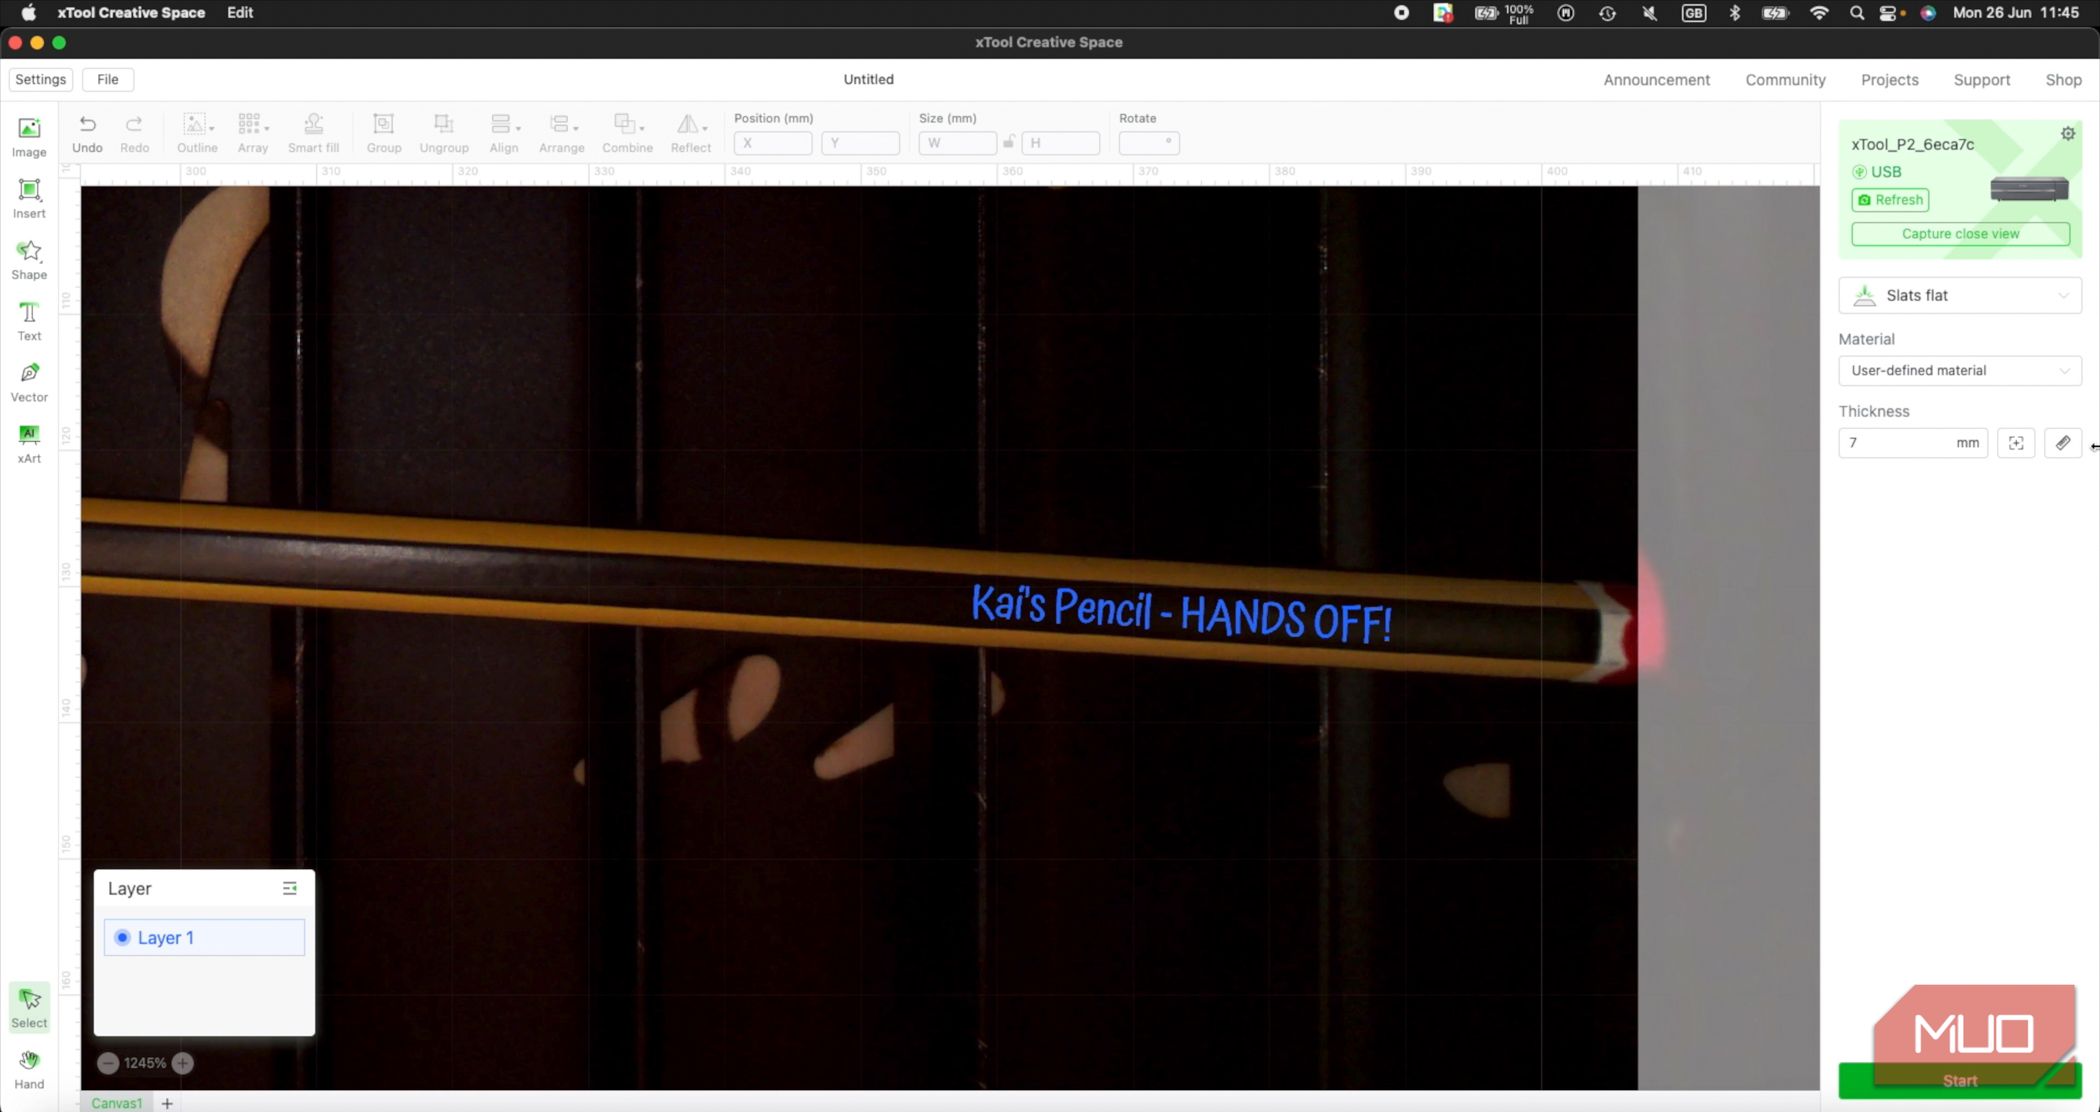
But for detail work, there's an additional camera on the laser head itself. While the case camera view can be distorted and inaccurate at smaller scales, the camera on the laser head itself shows exactly where the laser will point, enabling much more detailed and precise work. The only downside is that you have to manually initiate this detailed view, and it only captures a smaller area of around 10 x 15cm at a time. Meanwhile, the laser depth sensor can automatically detect material thickness.
Lift the lid of the P2 and you'll find a number of removable metal slats. These form an optional grid support for waste material to fall away, and will ensure better cutting on the underside. XTool have now released a honeycomb mesh support system too, which might be better for smaller or lightweight materials, though we didn't get a chance to test that. I have found on occasion that the sheer power of the laser is enough to "blast" loose-cut pieces away, so if you're doing a double-sided cut and engraving, keep the waste to use as a template when you reverse the item.
Why CO2?
Most consumer-grade laser engravers are "diode lasers"—the same sort of laser you might find in a laser pointer or BluRay drive. These can be found anywhere up to around 40W of output power, though most are 5-10W. However, it's not just the raw power of the laser that matters; it's the precise wavelength that's produced.
For instance, the light produced from a diode laser isn't great at cutting acrylics. Sure, you can cut through dark, opaque acrylic if you use a few passes on a diode laser, but it's messy at best, and you'll never be able to cut clear acrylic because of how the light is dispersed.
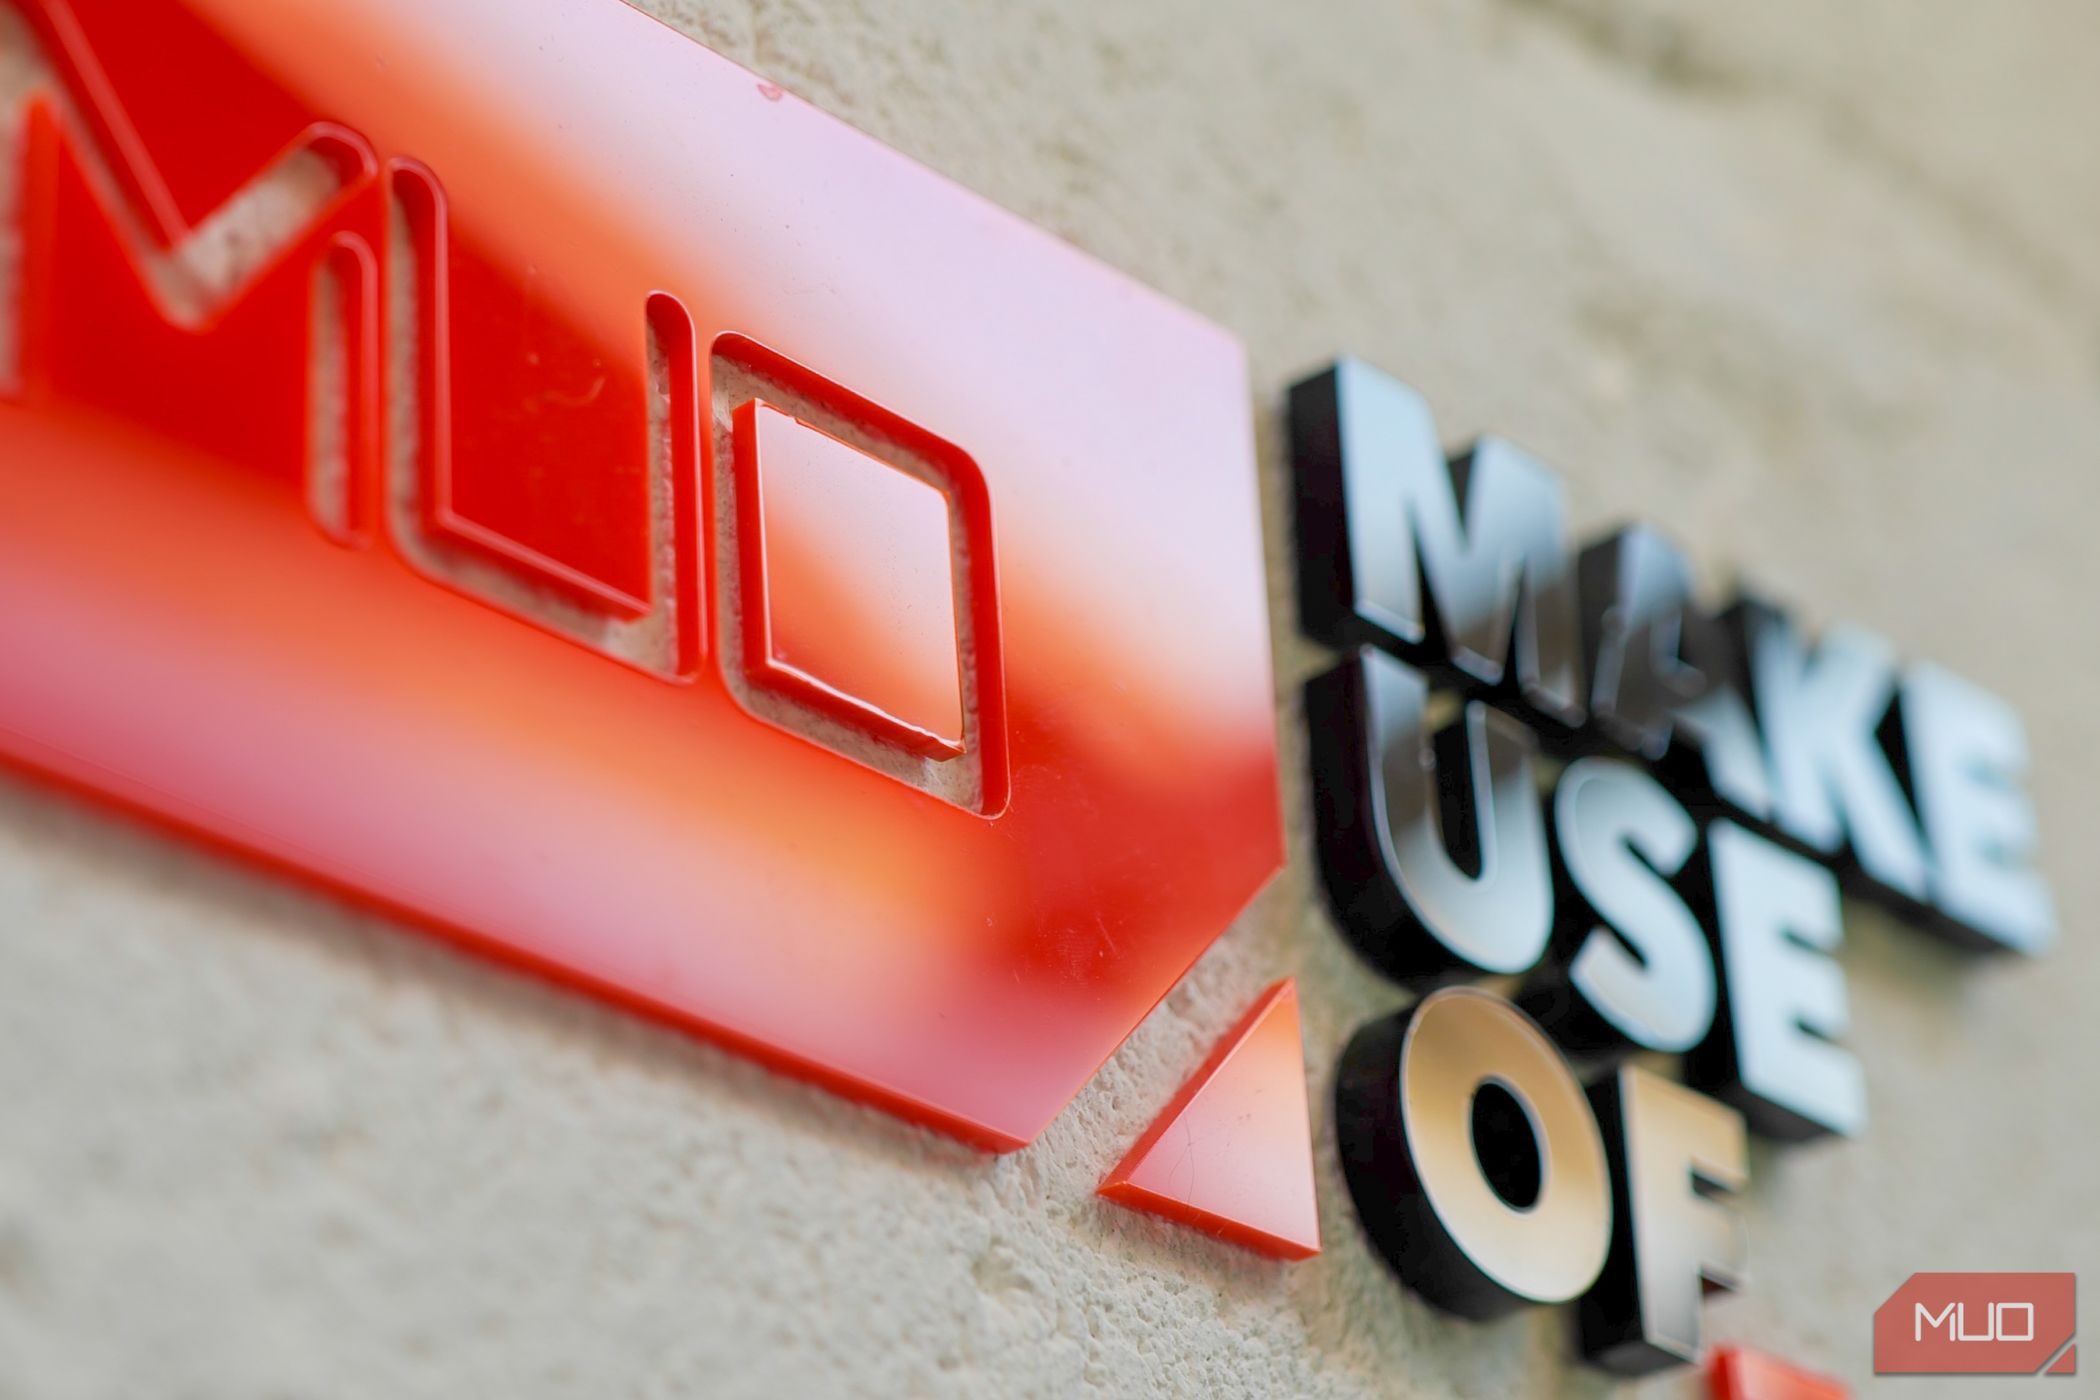
On the other hand, a CO2 laser produces light that is highly absorbed by all types of acrylic, and therefore cuts through it easily. XTool claims the P2 can cut up to 12mm acrylic, though the thickest I attempted was this 8mm black acrylic for this MakeUseOf logo (combined with some 3mm red); it cut beautifully.
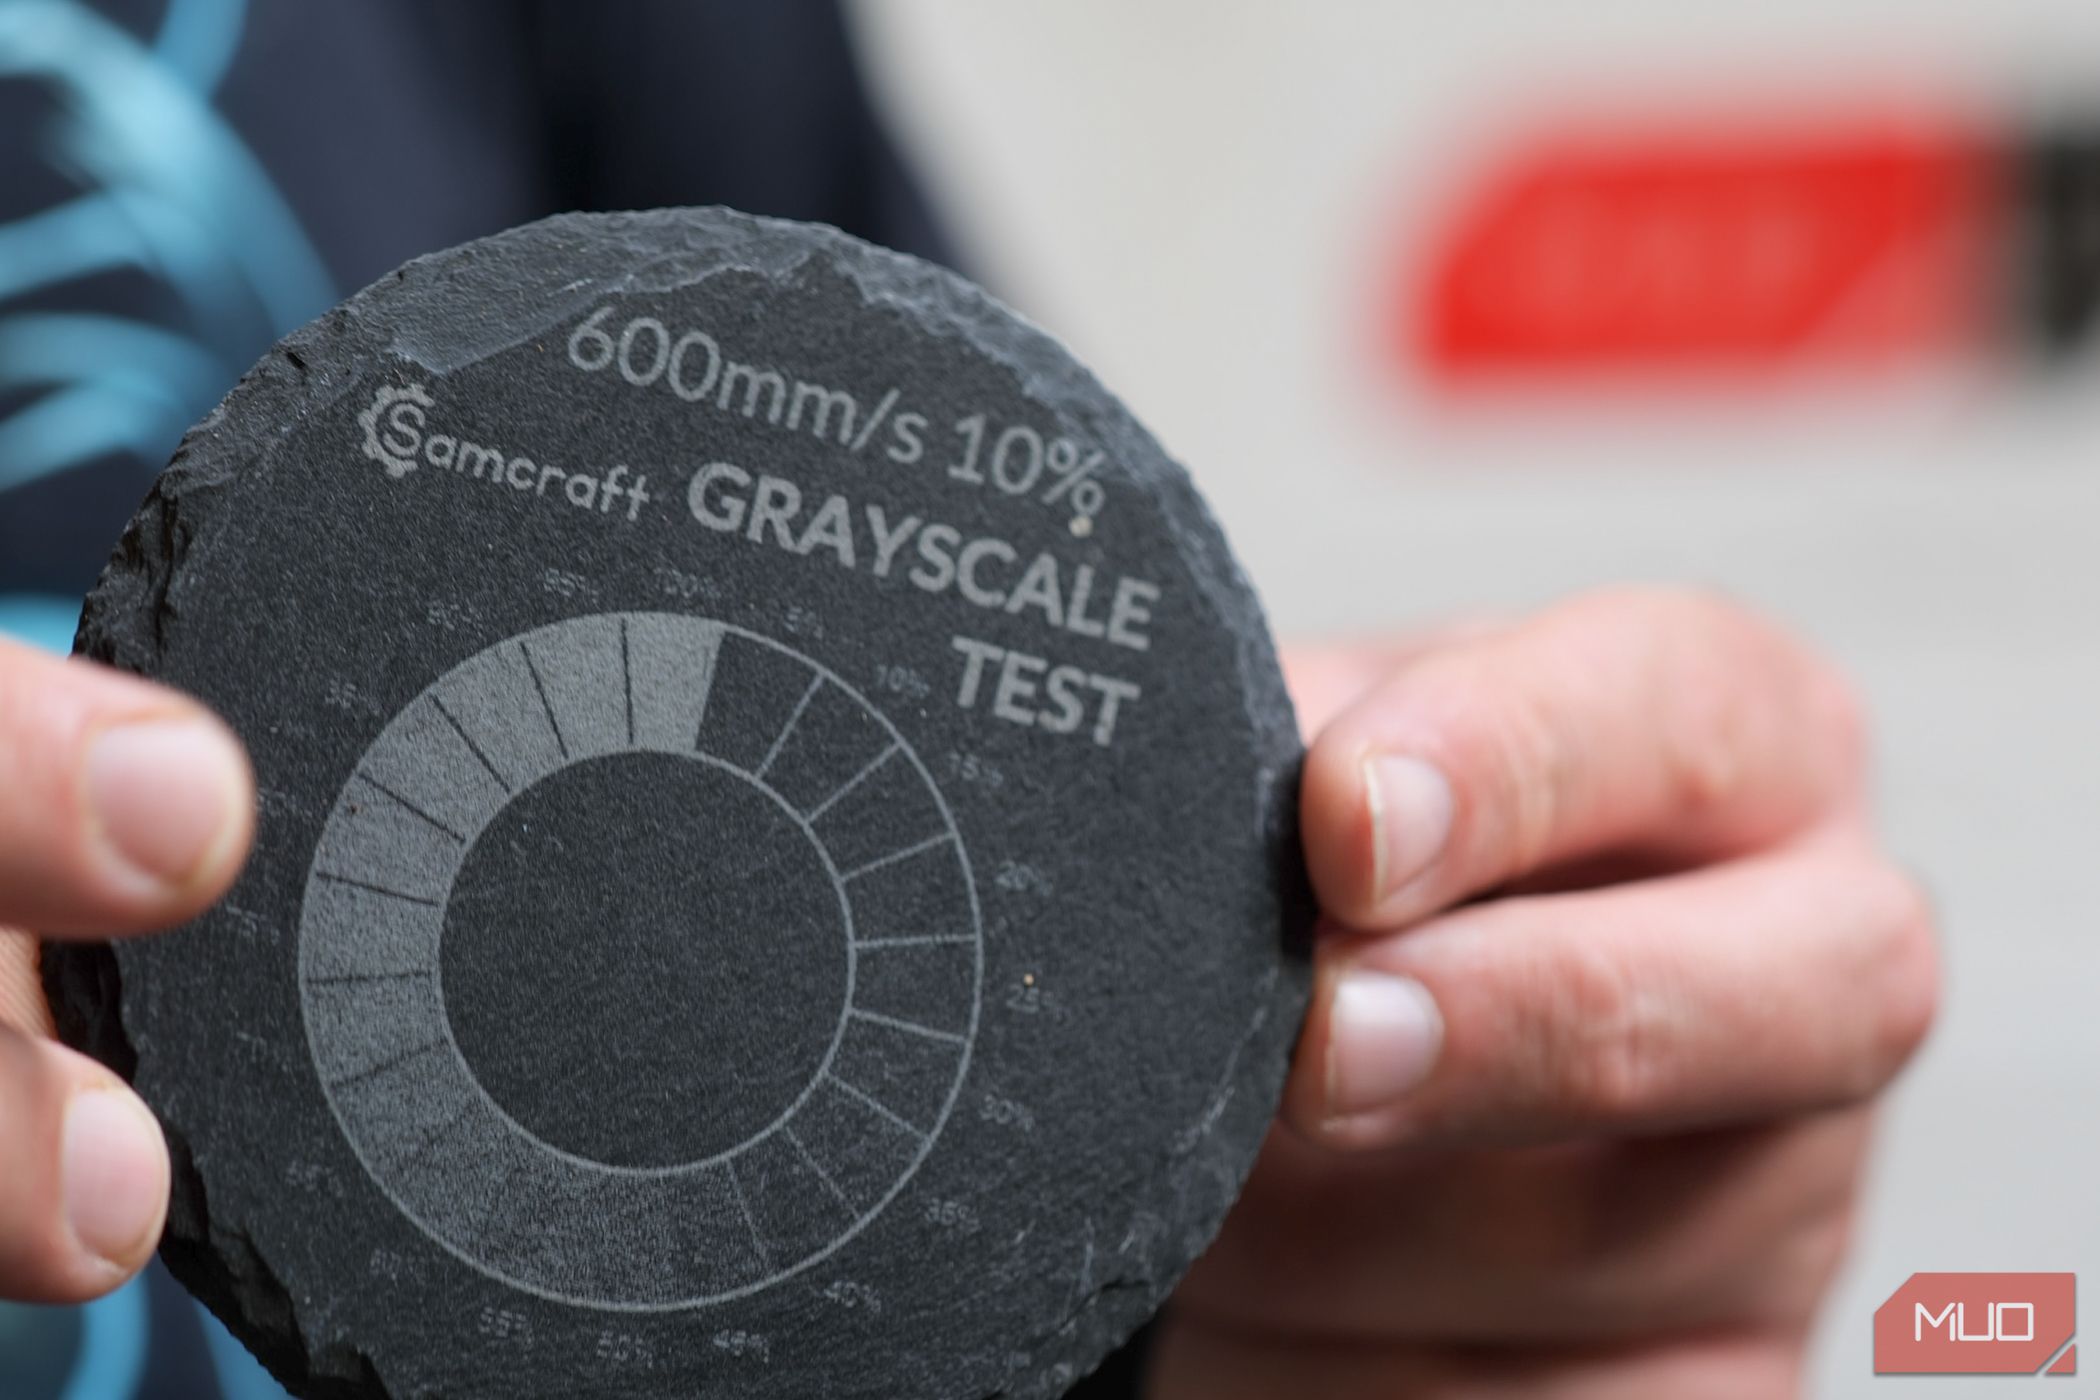
Neither CO2 nor diode lasers can cut metal—for that you need a fibre laser. But those are well out of budget for the average hobbyist. All types of laser can cut wood or leather, as well as engrave on other materials like slate.
So when considering which laser engraver to buy, it mainly comes down to what sort of materials you'll be working with. If you want to work with acrylic sheets of any kind, a CO2 laser is essential. For thin plywood or MDF (up to 3mm), a diode laser would be sufficient.
Setup and Construction
No construction is needed on the P2, but you will need to fill the water tank with purified water plus a little antifreeze according to the ratios specified in the book. Antifreeze is included in the box; purified water is not. This involves unscrewing six screws on the inside and four on the outside, then lifting off the rear panel to reveal the laser tube and water tank on the side. You need to do this in two fillings, and you have to turn the machine on after the first filling in order to pump some around before adding some more.
It's not difficult, but do make sure to get the ratios right, which depend on the lowest temperature your region will reach. You wouldn't want the tube to freeze and shatter over the winter!
The XTool P2 can connect over USB or Ethernet, but I ran into some trouble with the USB connection, and that's likely because it uses an obscure USB-to-Ethernet serial converter chip, rather than a standard USB host device. Mac OS refused to install the provided driver, so I ended up just using an Ethernet cable instead. That worked first time.
Usage and XTool Creative Space
While the XTool P2 is compatible with LightBurn, you're going to lose more features than you gain, so for most people, the native XTool Creative Space (XCS) will be the best option.
When I first tested XCS alongside the XTool M1 last year, I thought it was a little too barebones. It was functional enough as long as you did the majority of your design work elsewhere, but lacked some basics like layers. However, I can happily report that it's received a number of updates since then and has now become very much a fully featured laser cutter software package. For more people, XCS will be the best option with full support for all the hardware features on the P2 and a very user-friendly interface.
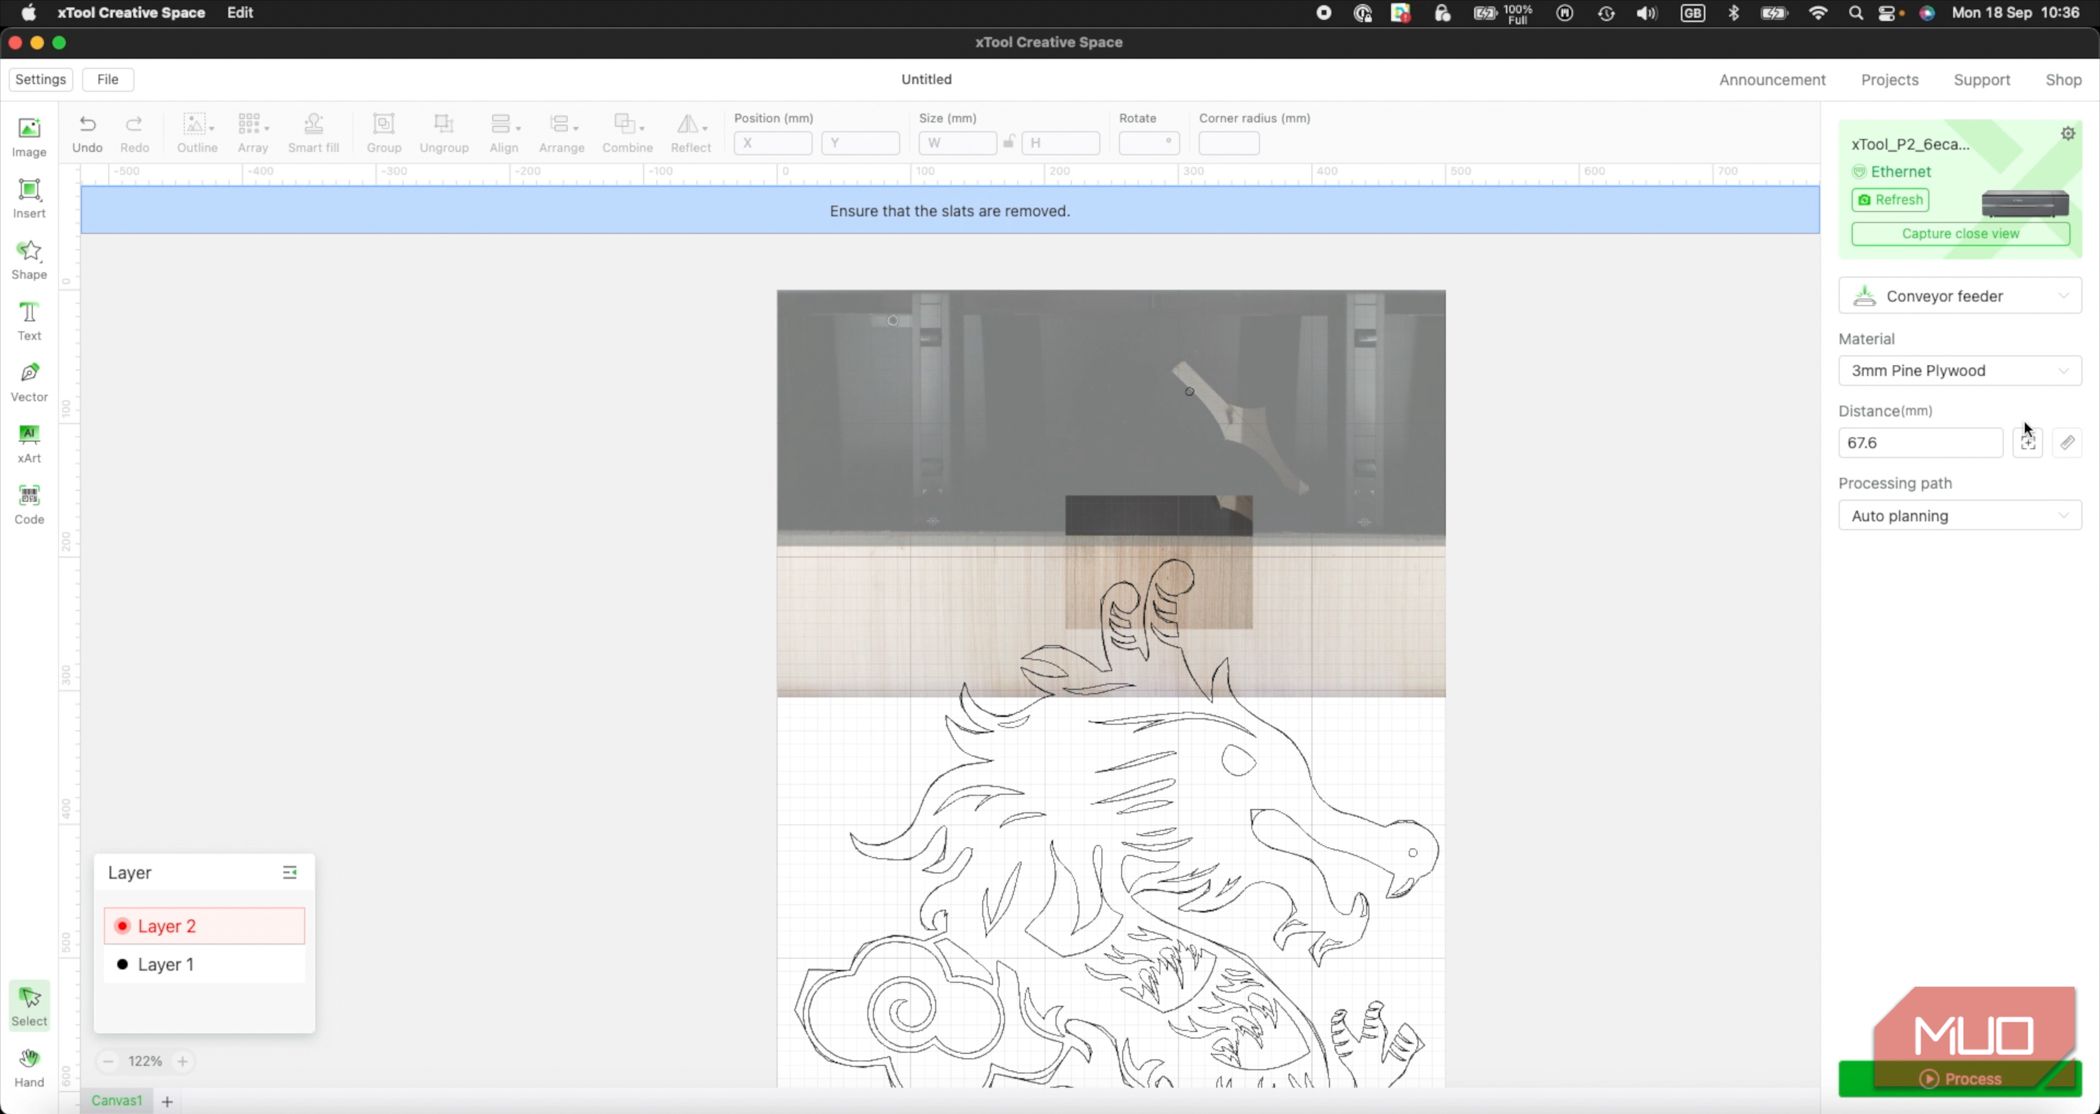
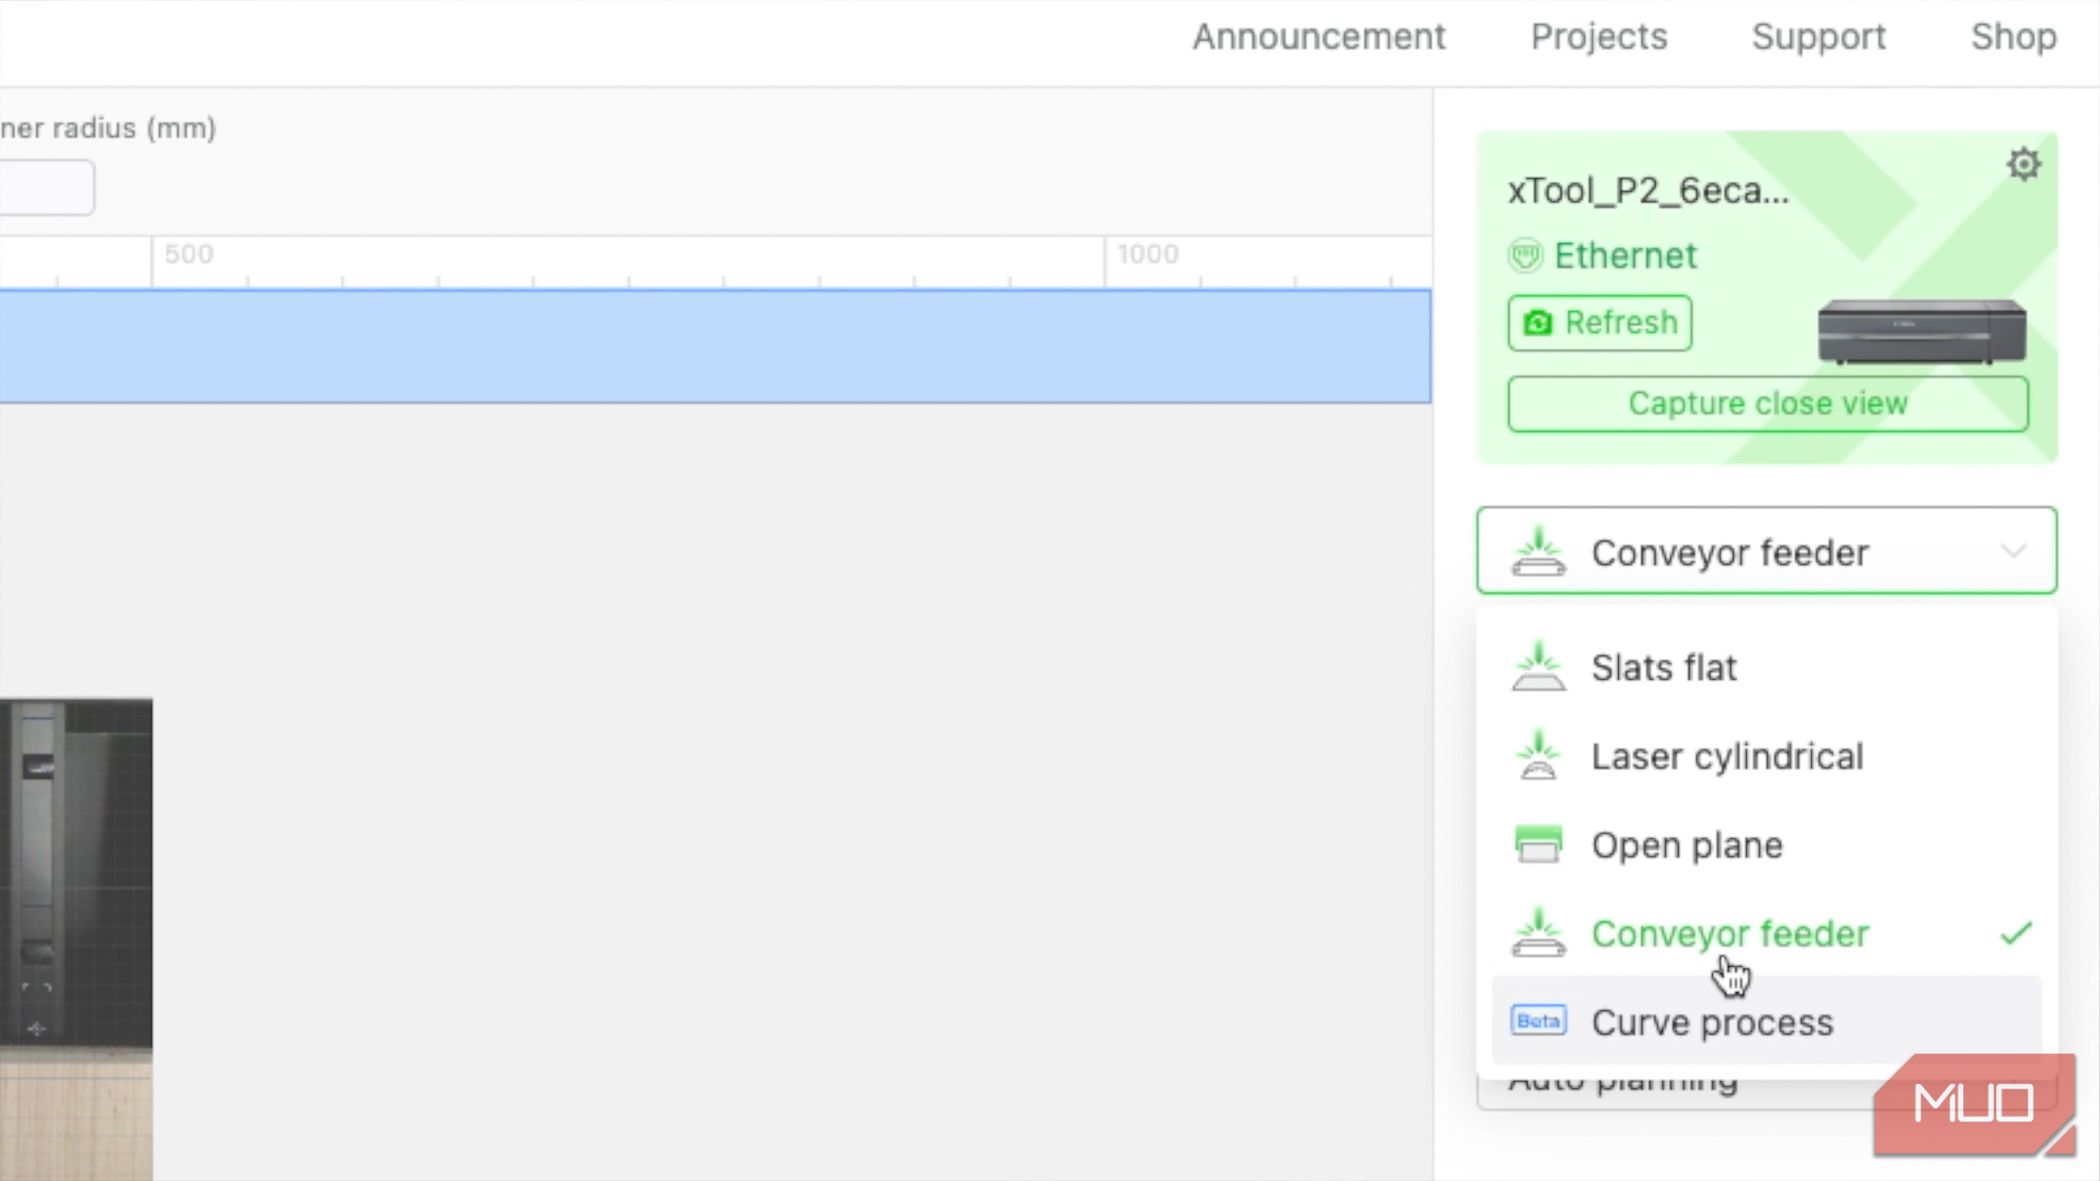
On the main cutting screen, you'll need to first select the current setup—such as using the metal slats or conveyor feeder—then specify the material. You can either manually measure the thickness or material diameter, and distance from the laser (to determine focus point)—or let the machine do it automatically. The only time the automatic measuring didn't work for me was when working with glass.
Once you have a design loaded in, you choose between engrave, score, or cut, and use either the reference values for that particular material, or input your own parameters. It's all remarkably simple for such a powerful machine.
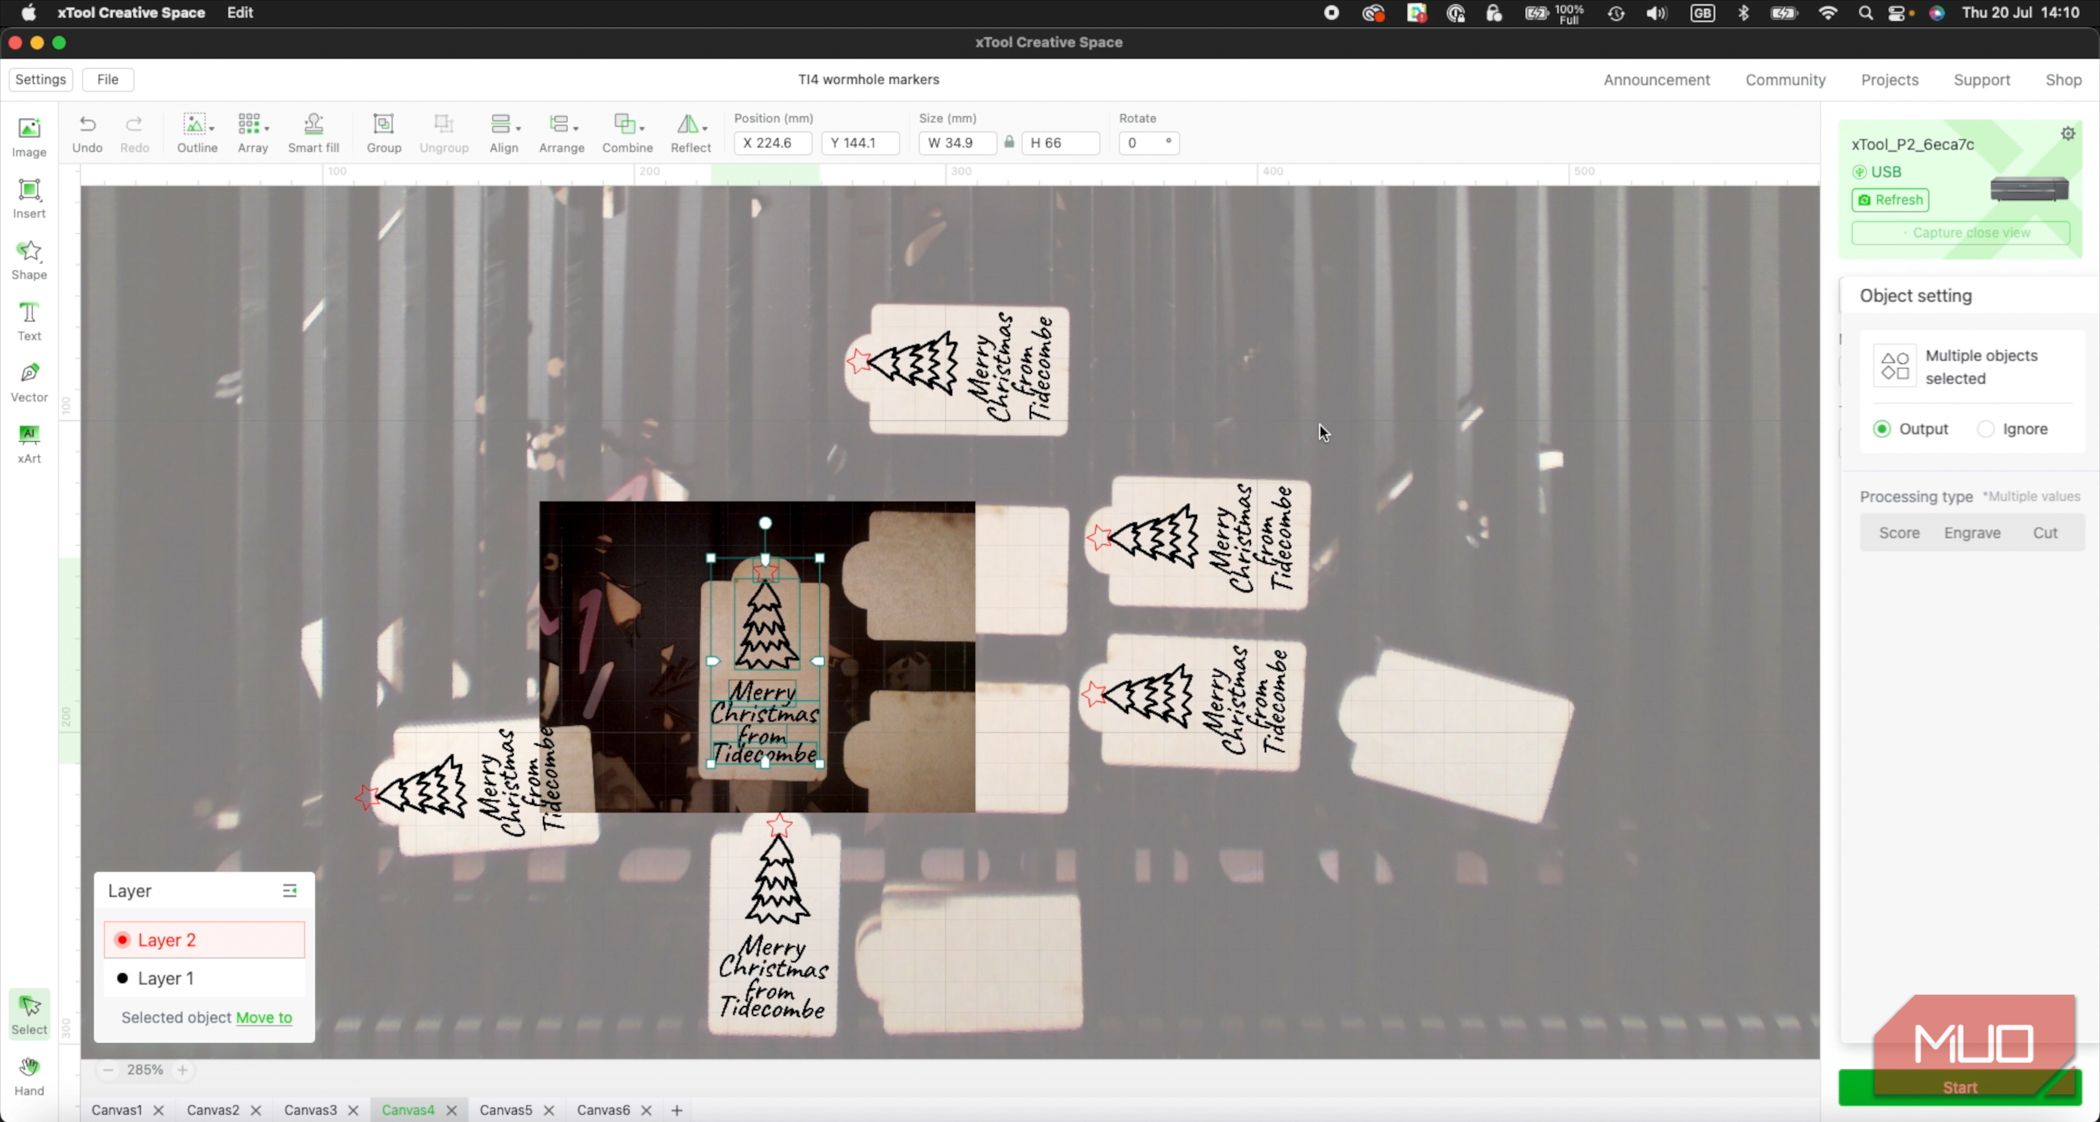
You can have multilayered designs, with each layer assigned a different color. However, be aware that if you select and individual object rather than an entire layer, any changes you make to that object won't transfer to layer it's a part of. It's best to double-click the layer instead to select all the objects in that layer at once, and move objects to their own layer if you want different parameters for them.
XCS is still a little sparse on design features compared to LightBurn, so you'll probably still be using something like Illustrator to create the initial design. But it does have a few built-in projects and basic drawing abilities. You can even do text on a curve too (but not line following).
Curve Process is a beta feature I haven't had a chance to test yet, but in theory it allows you to scan the 3D surface of a curved object, and the laser head will move up or down to maintain focus as it passes over the material.
For most people, XCS will be more than sufficient with a very shallow learning curve. I'd recommend using it unless you have a good reason not to.
Samples
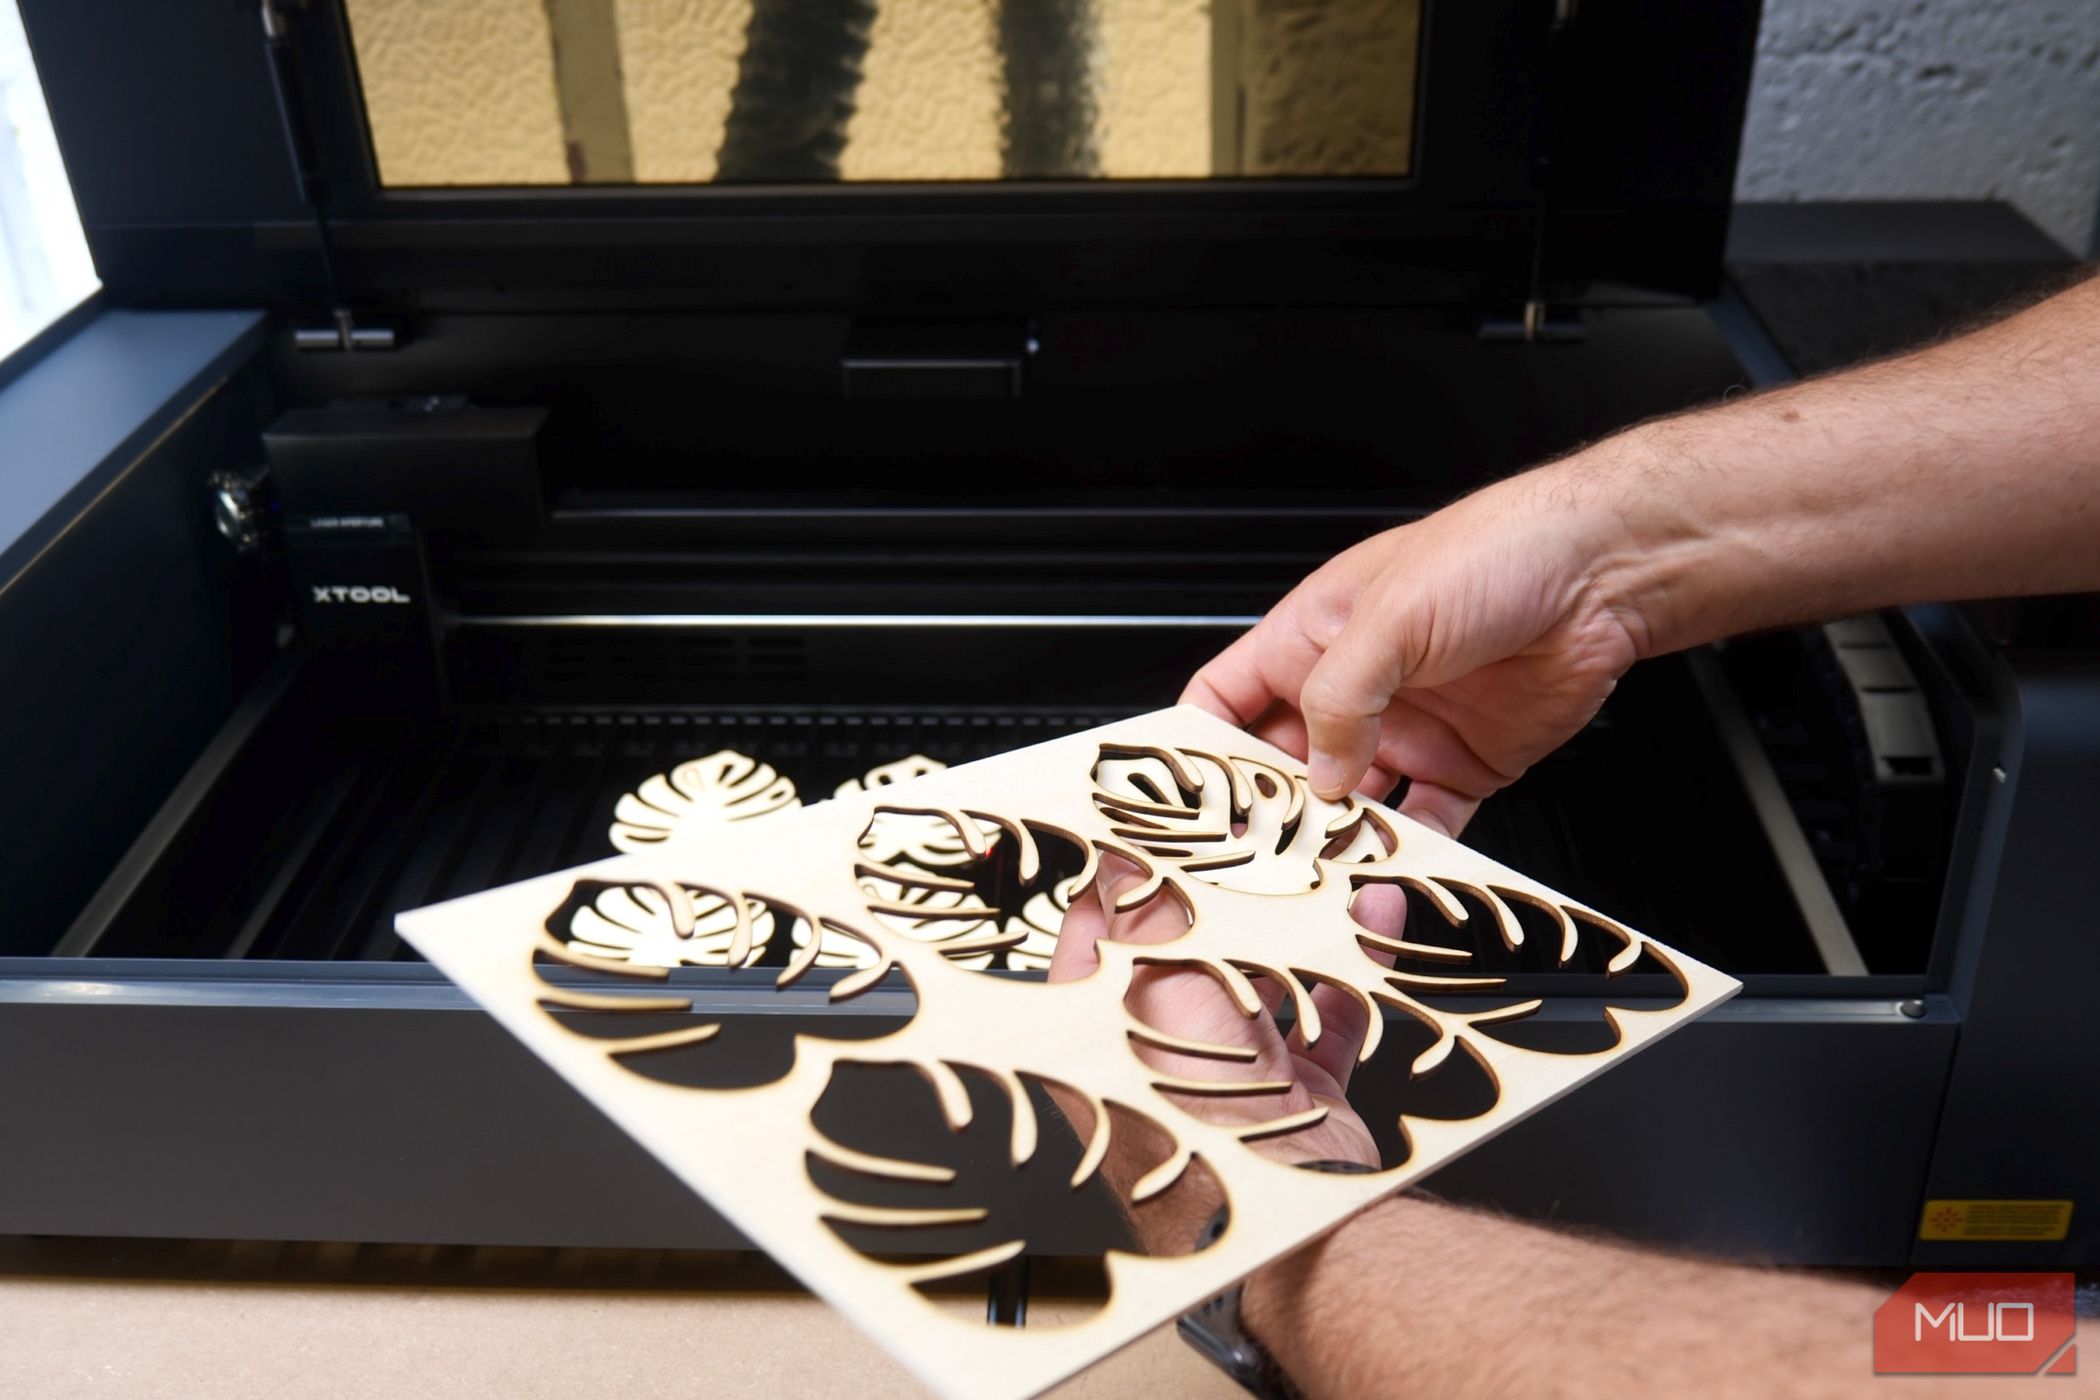
As a very first project, I made a set of six coasters from 3mm Balsa wood in under five minutes. For basic vector cuts, it's a fast machine, at up to 600mm/s.
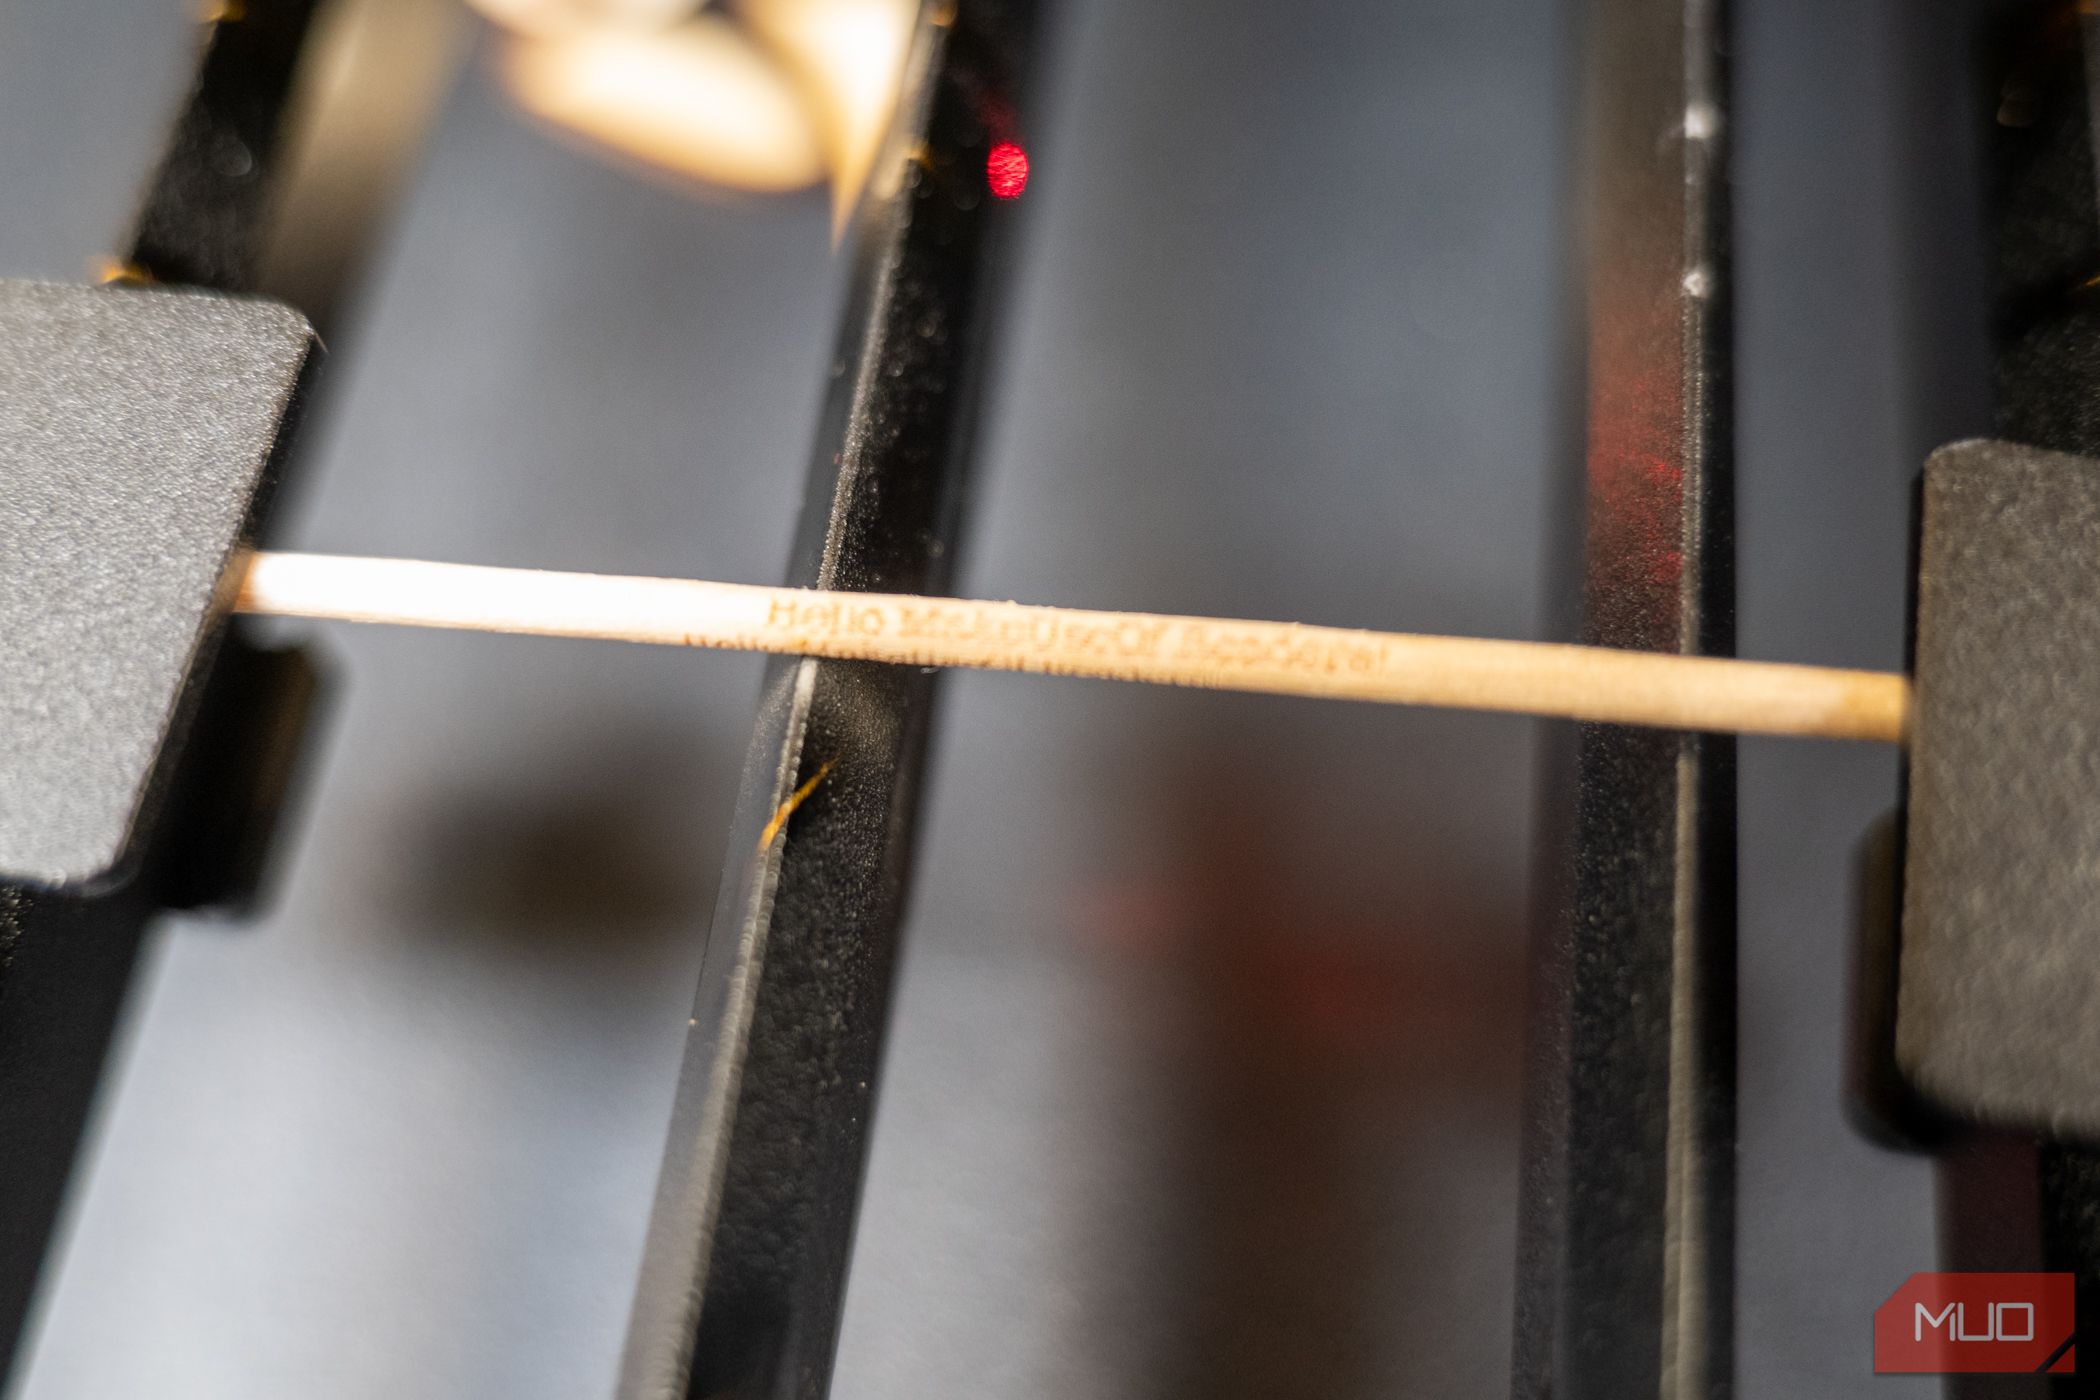
To test out the headline feature of a detail engraving and super fine accuracy thanks to the close-up camera, I burnt a quick hello message onto a toothpick. I can't imagine you'll need much more detail than that. The biggest difficulty was getting it to stay still (and focussing my camera, which was sadly a fail)!
Further to that, I customized a pencil with my son's name, a little bigger than a toothpick but still a good test of positional accuracy.
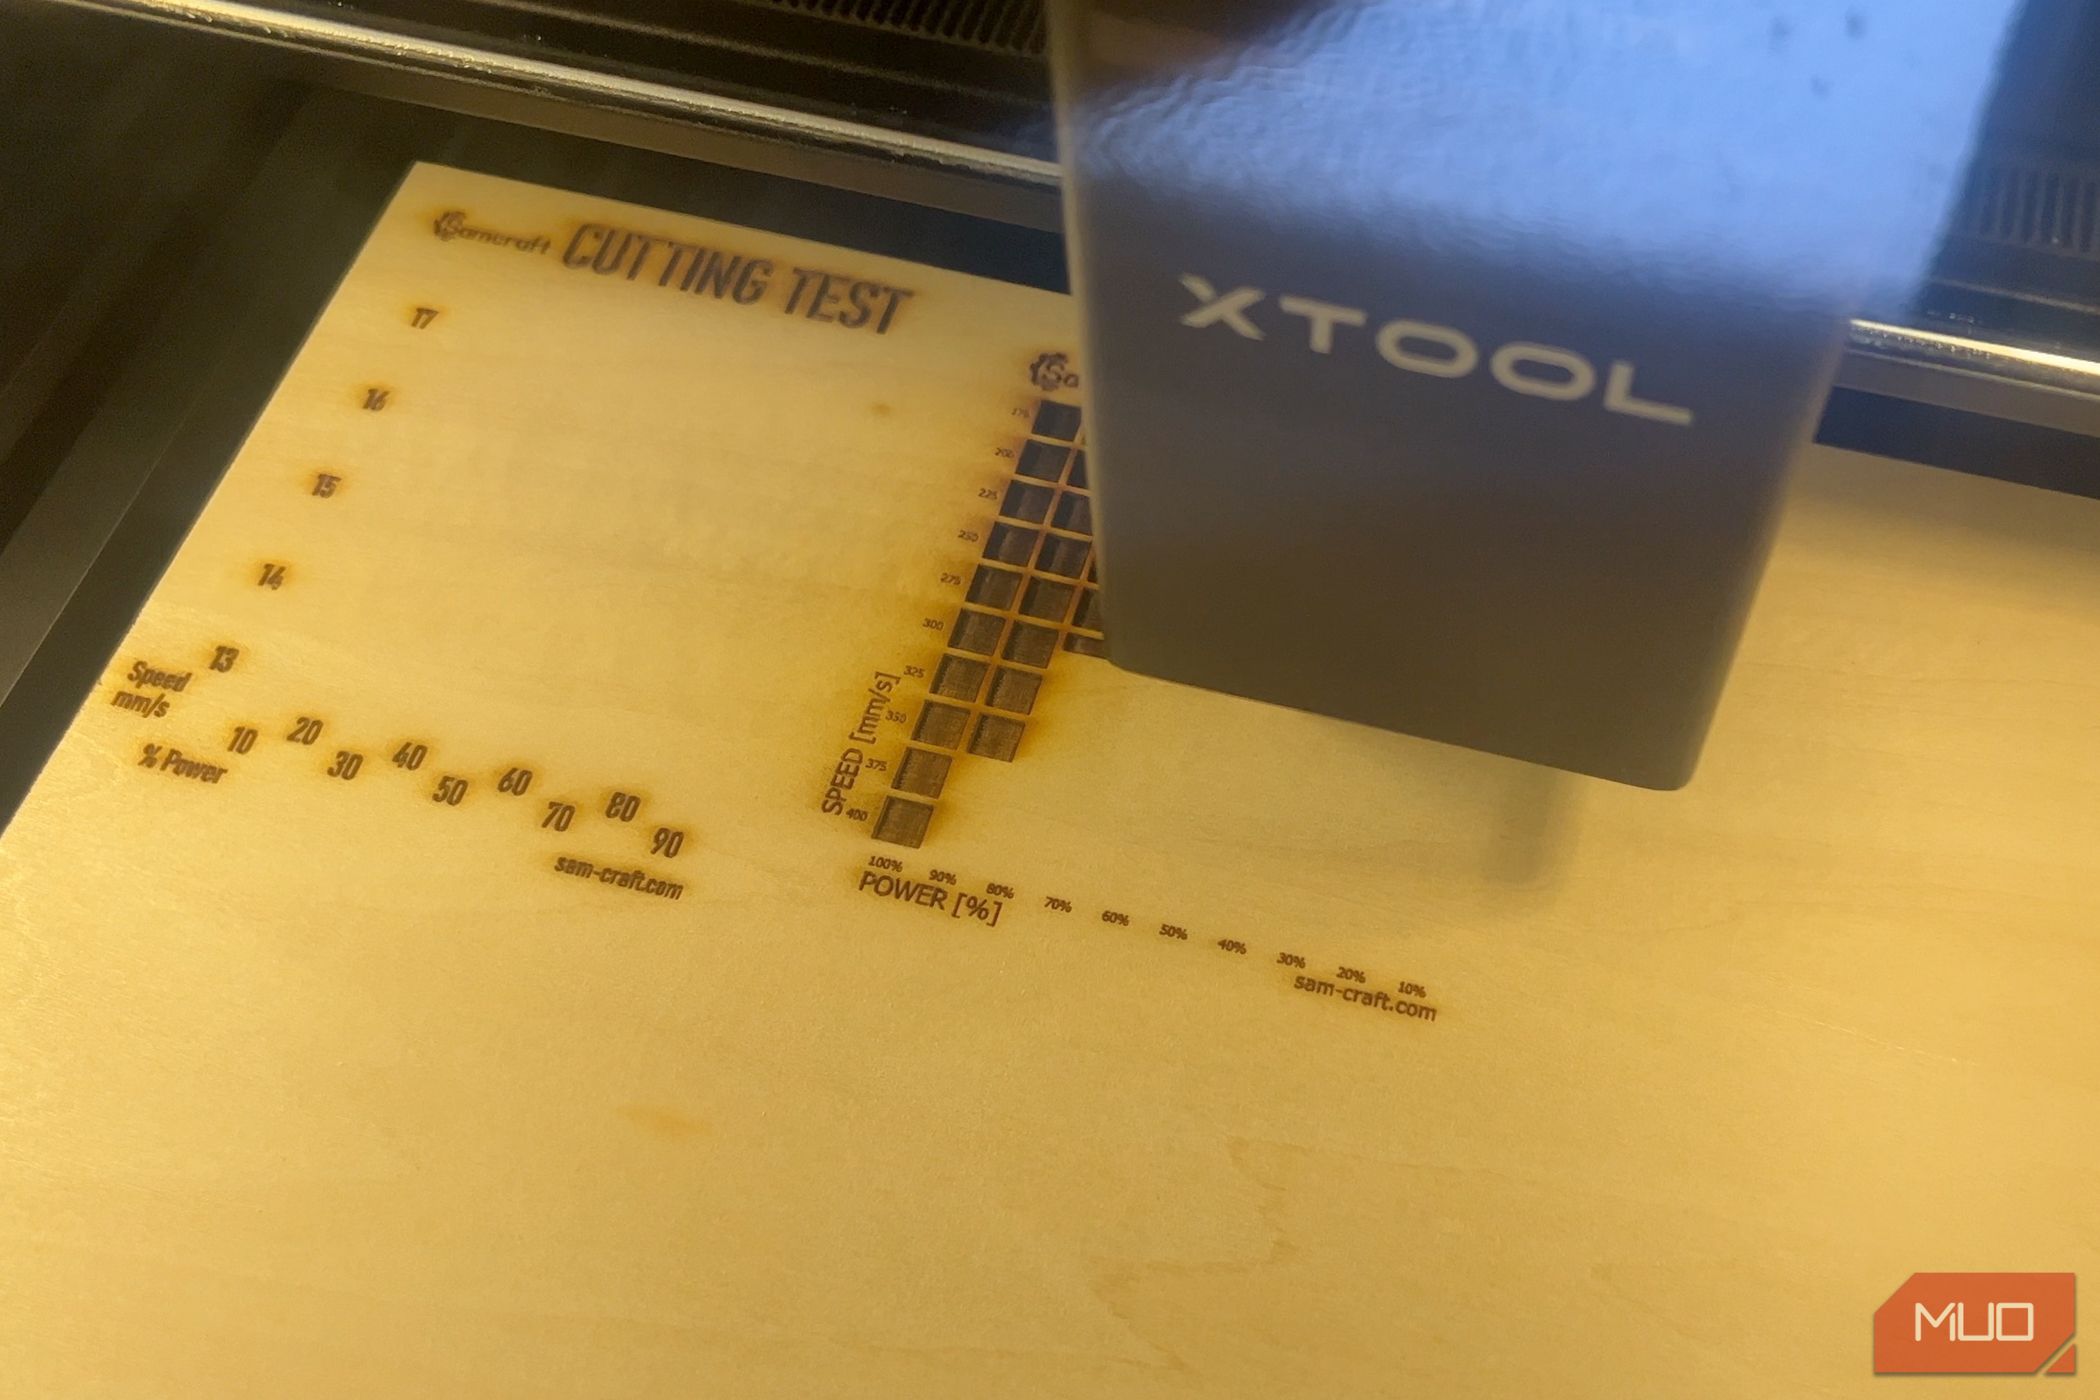
At this point, I'd like to thank Sam from the SamCraft YouTube channel, who's produced an all-in-one material test project file, which is available to purchase for $8. When tackling a new material, you can load up the file and see how the results vary when changing the speed and power for cutting and engraving. Instructions are built into the project, and everything is ready to run.
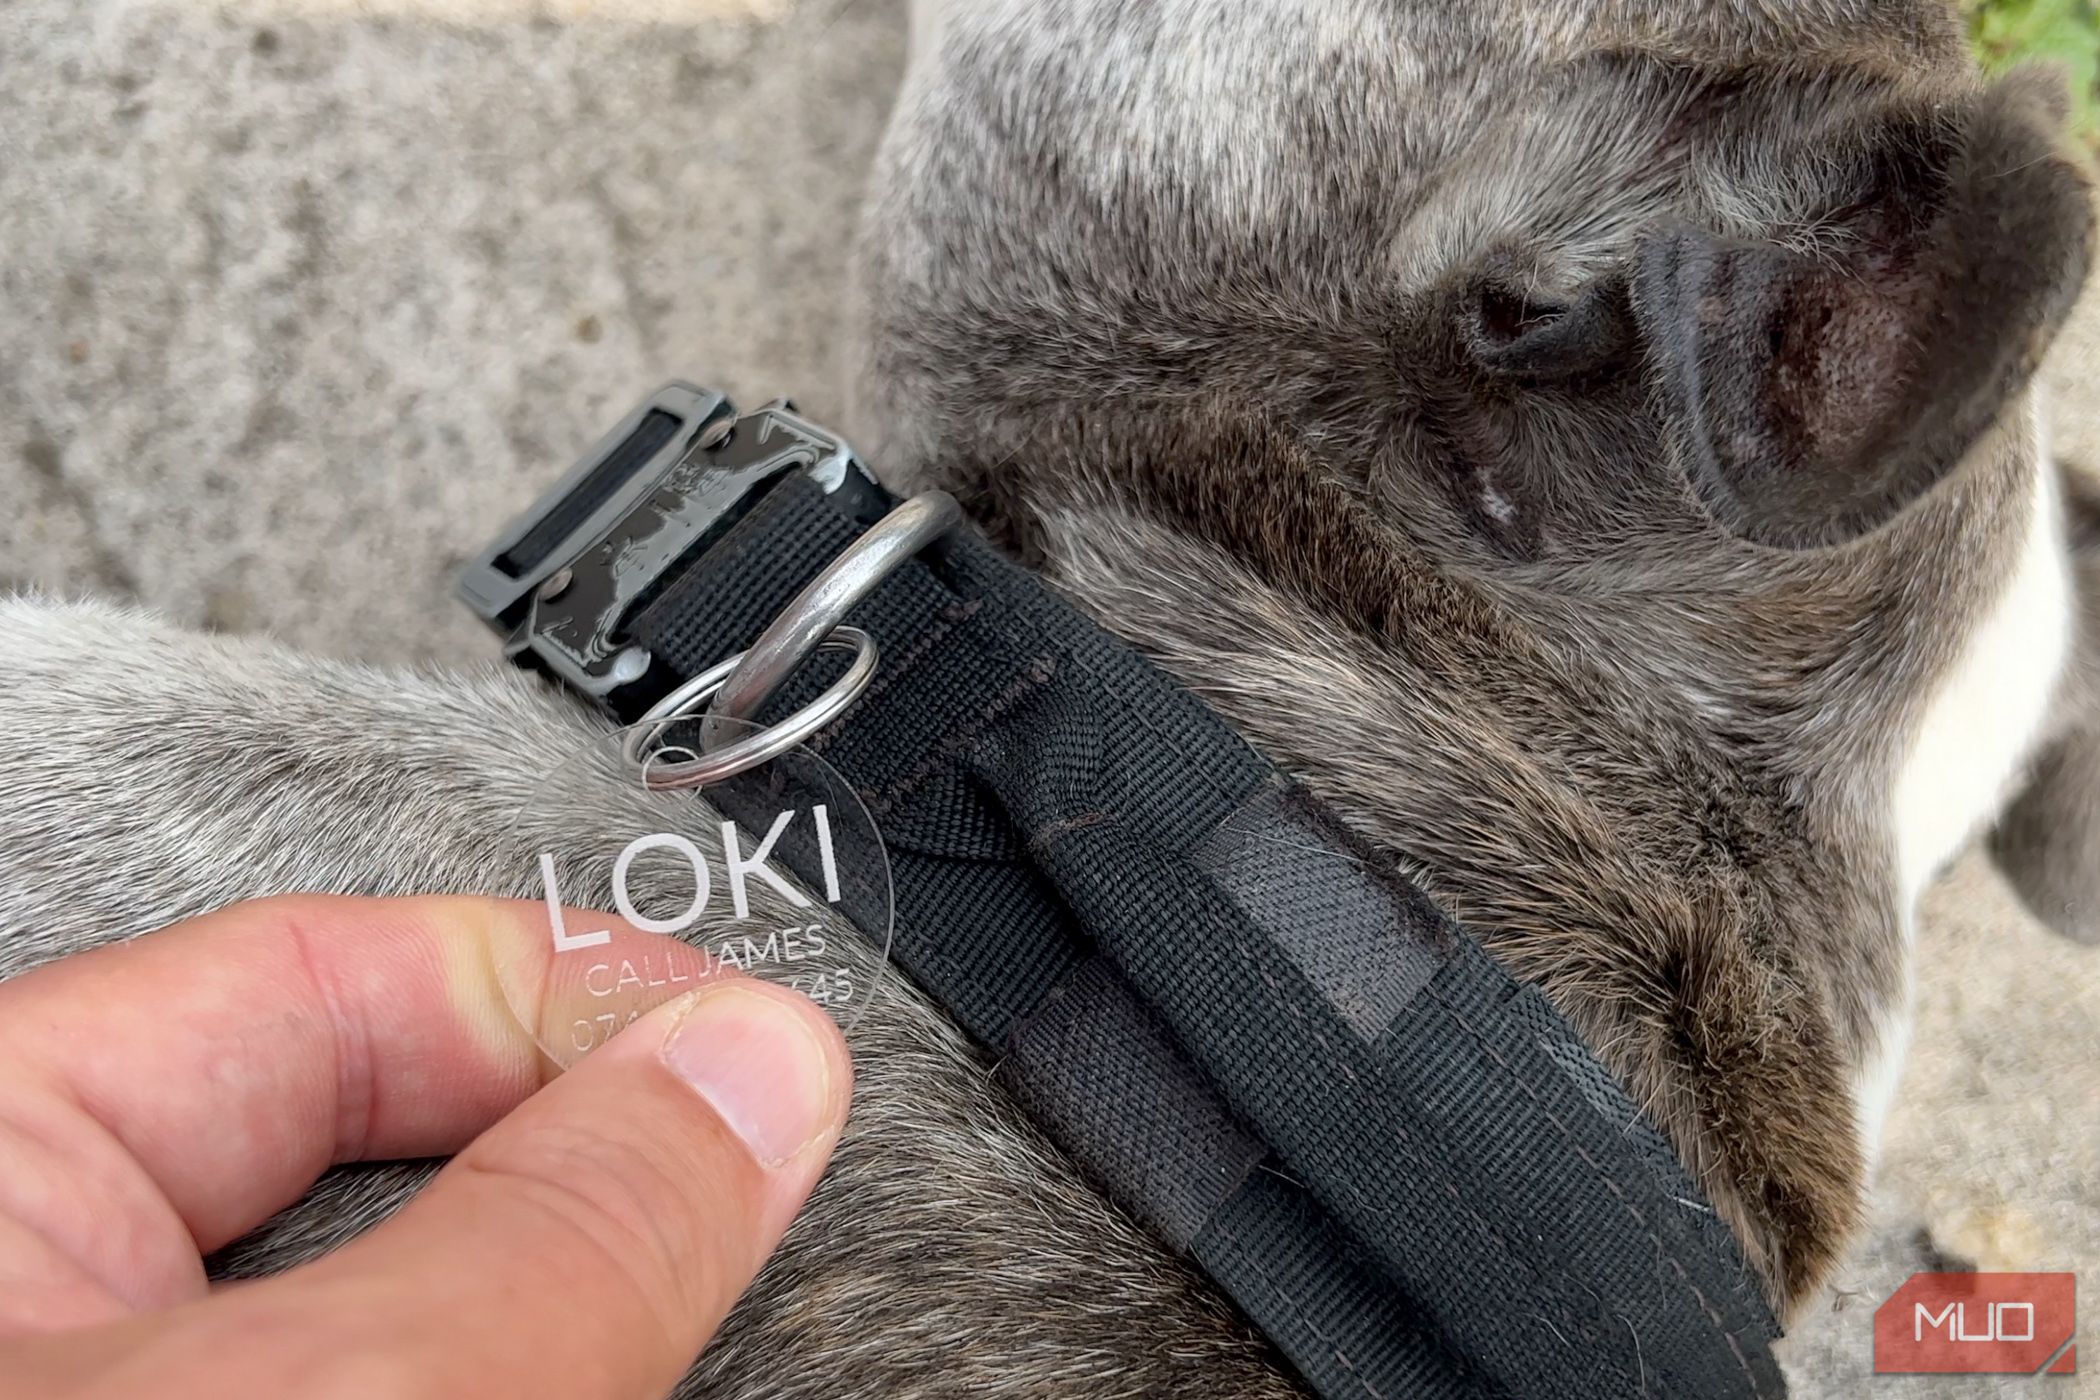
Until now, I've struggled with acrylic—especially transparent acrylic—so I was really happy to see this could cut through it like butter and engrave beautifully too. I tried a basic dog tag first, two simple circles and some text, which I then reversed so it could be seen on the other side.
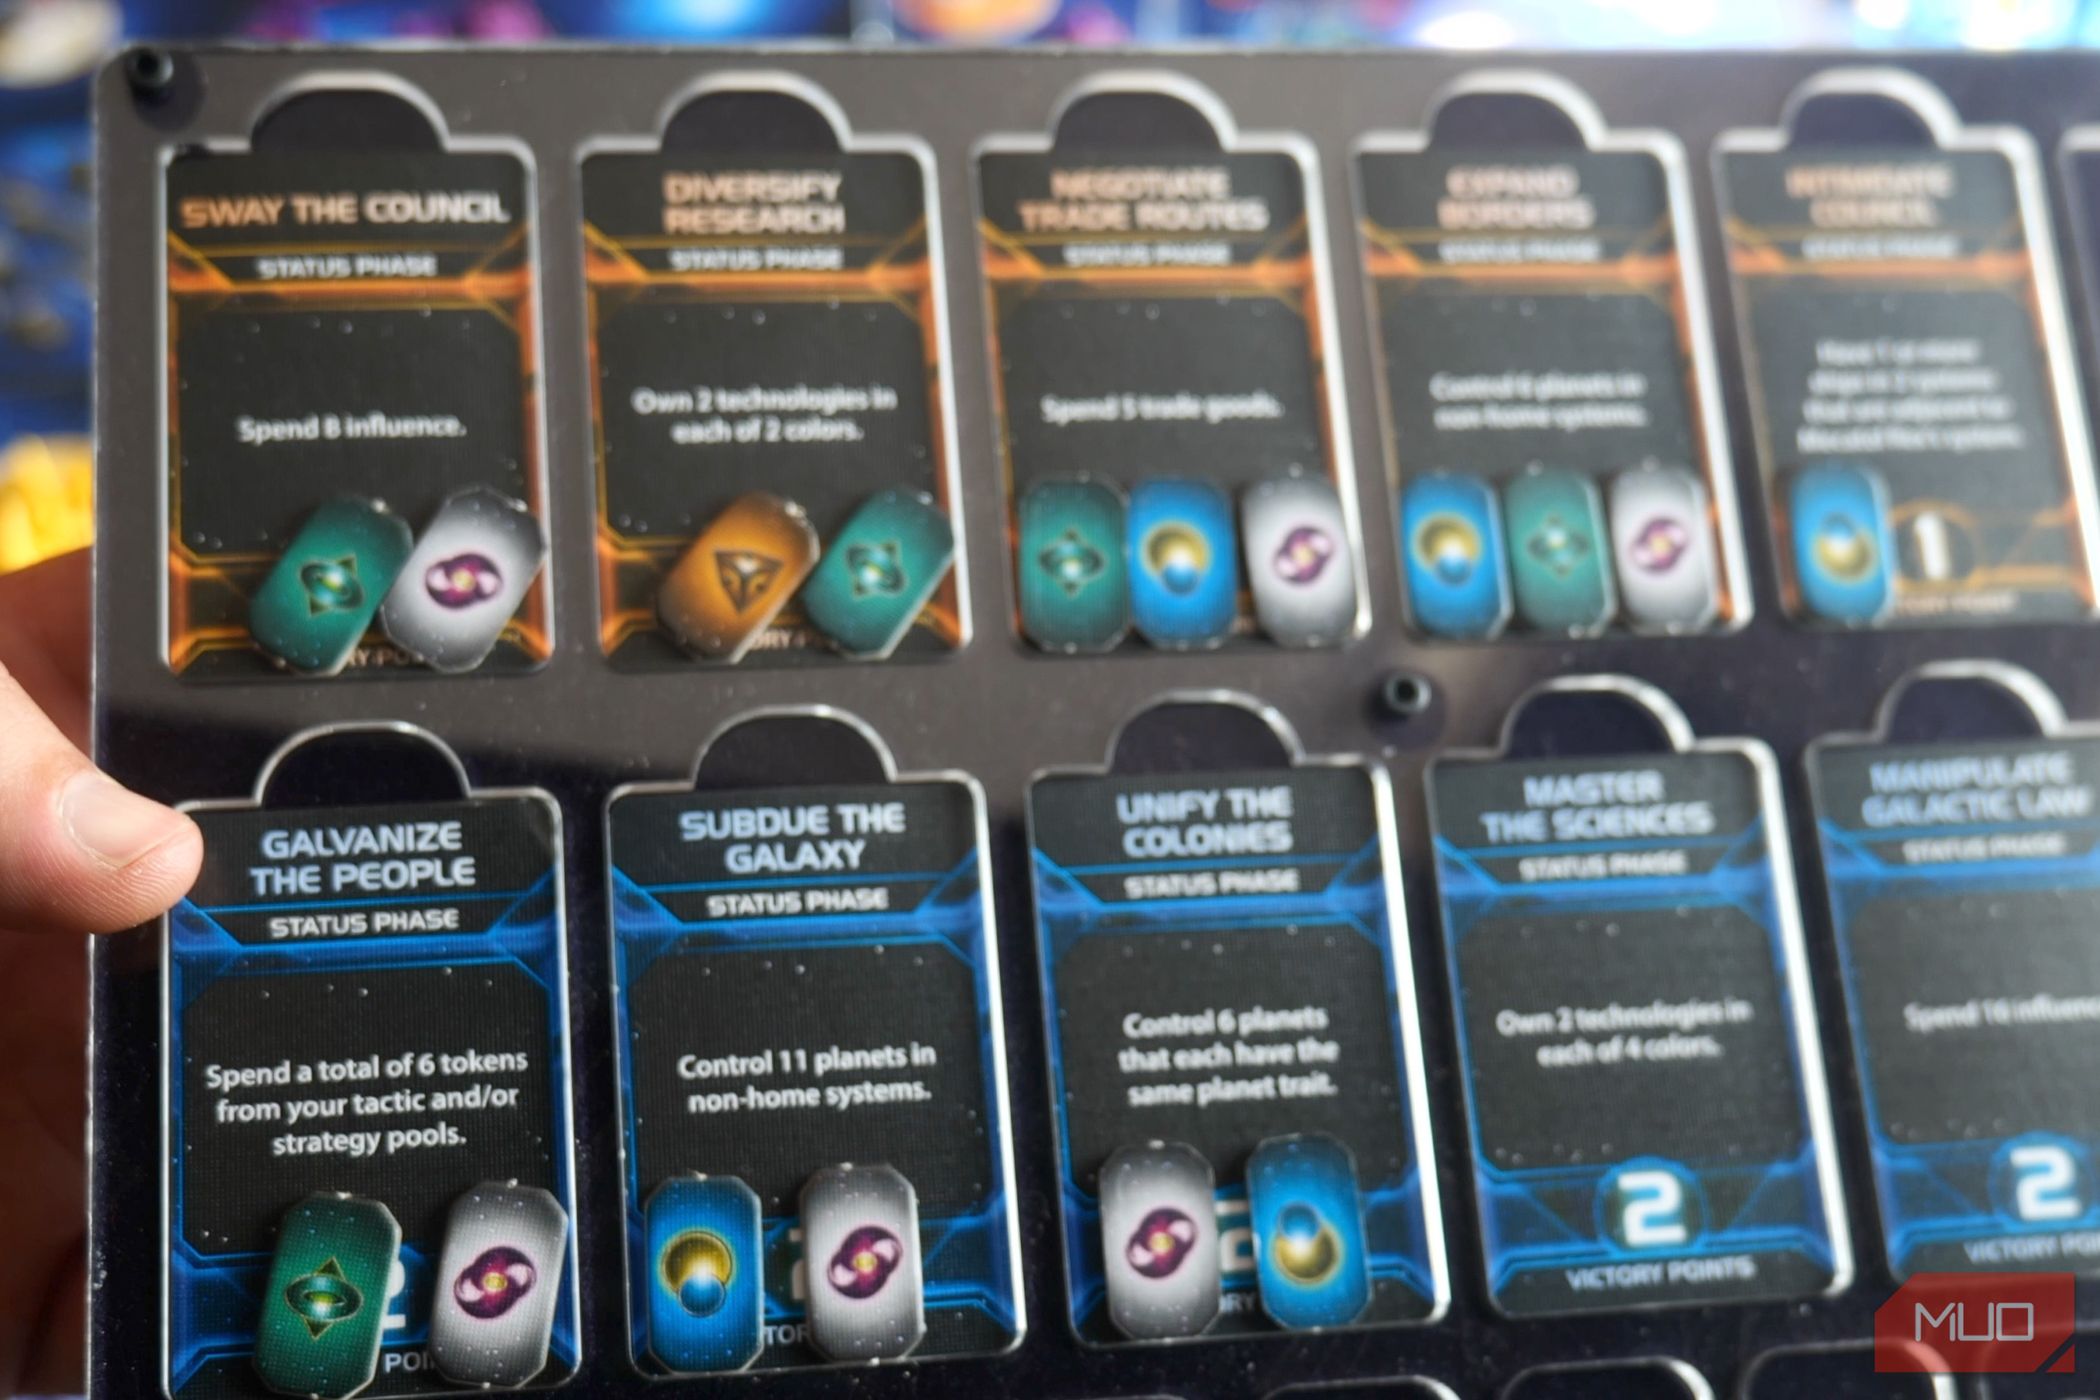
Then I progressed to some multi-layer projects, which is a great way to increase the range of products you can make without too much complexity. With two layers of acrylic and some machine screws, I made this Twilight Imperium objective tracker:
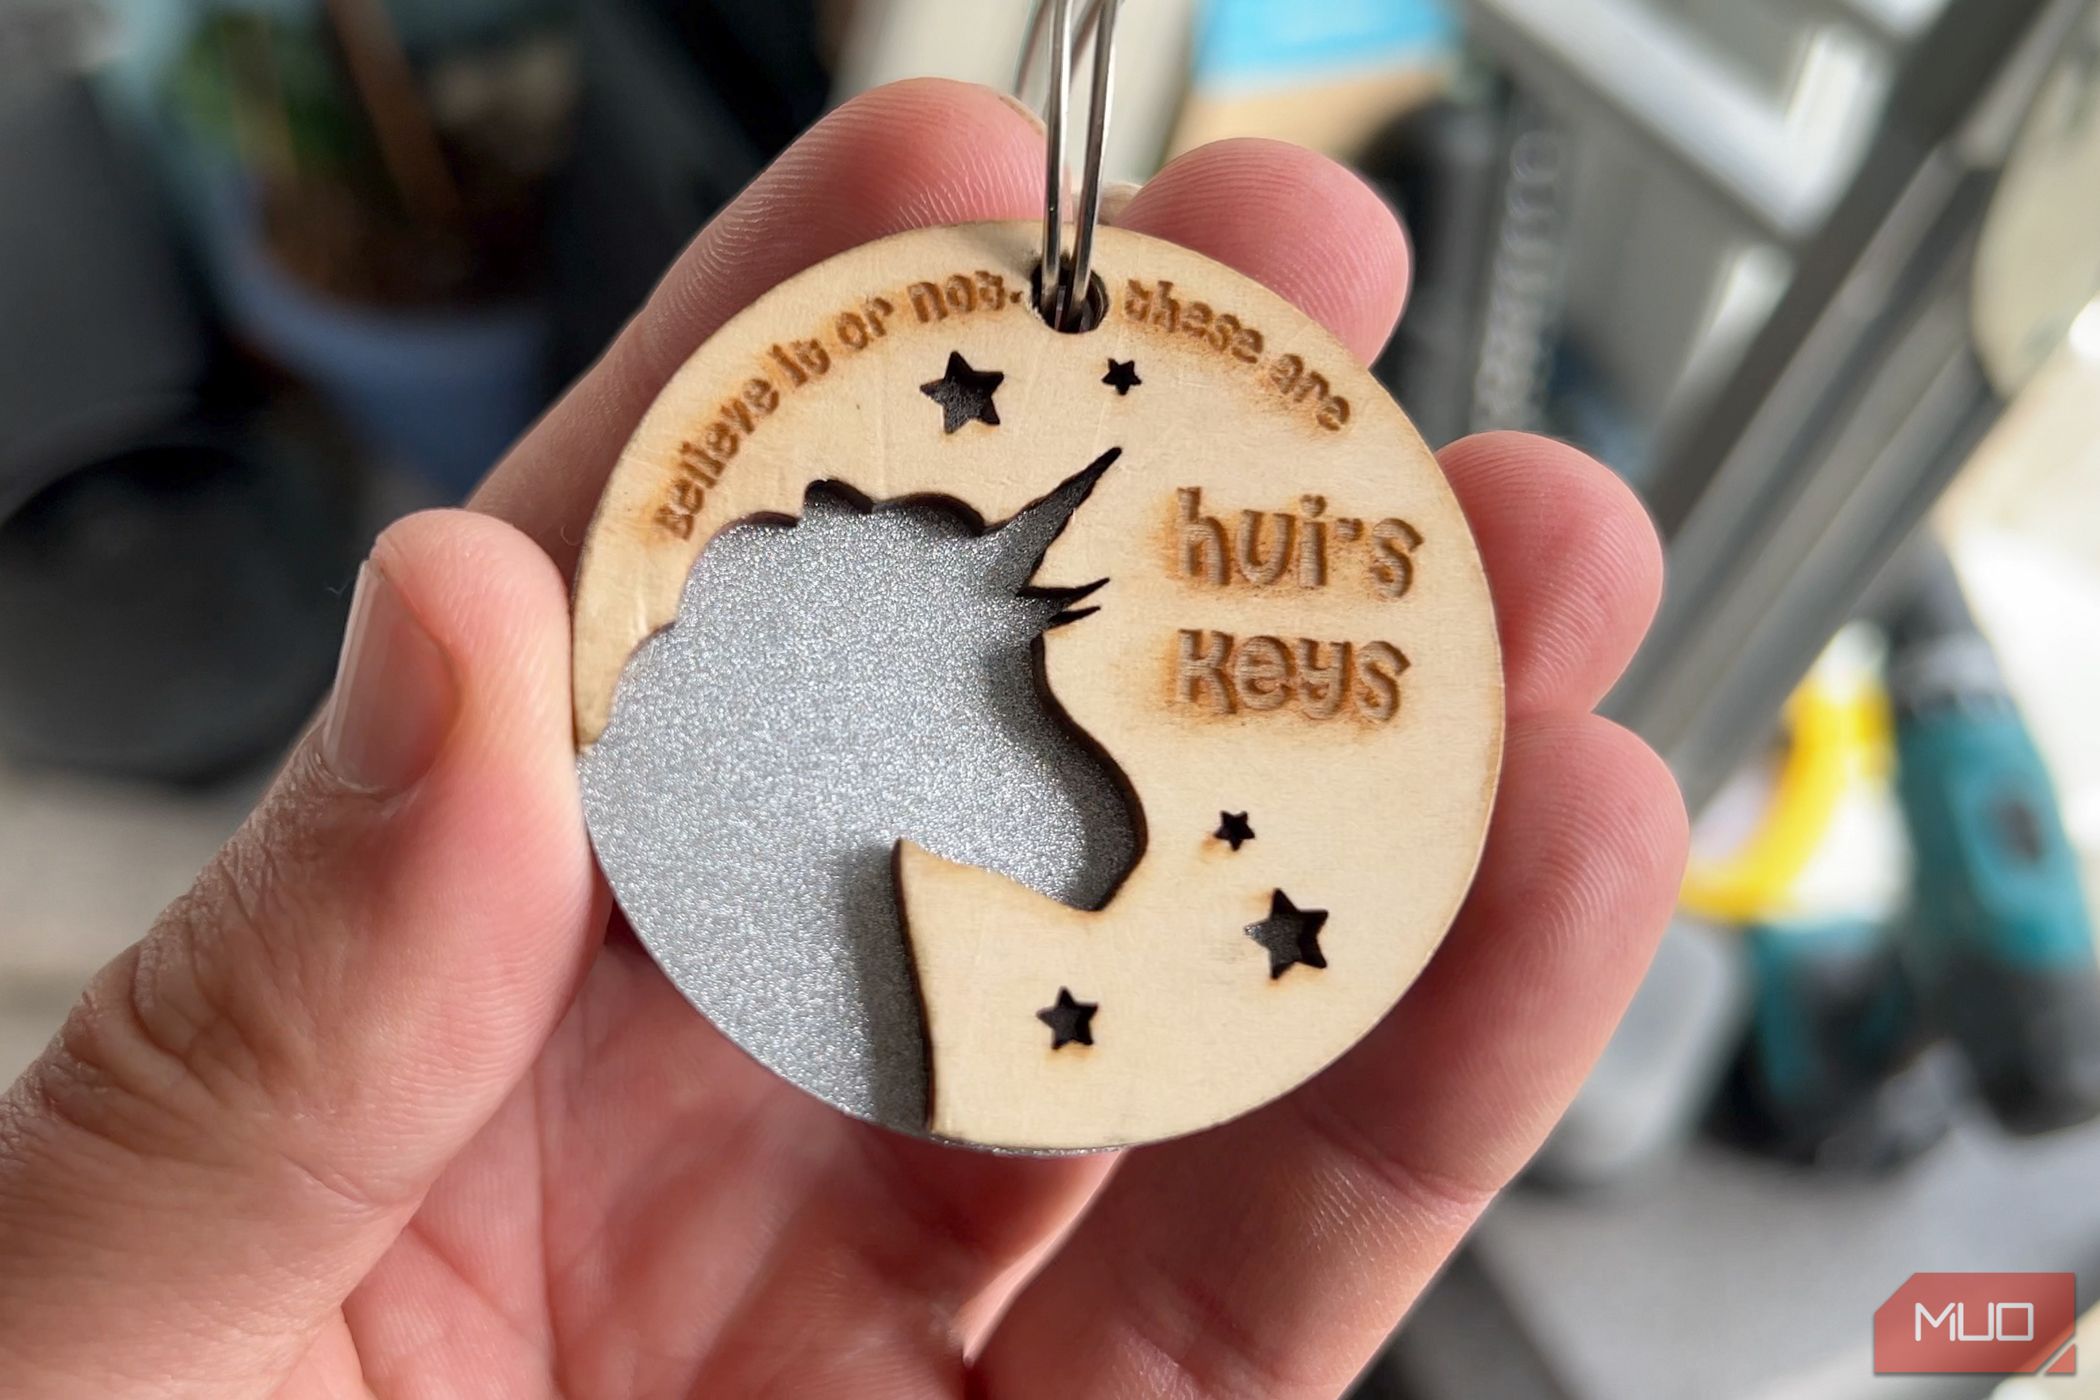
You could also try mixing materials in a multi-layer project, such as this keyring, consisting of a cut and engraved wooden top layer, glued onto a piece of sparkly acrylic behind.
I also tried some 8mm MDF because that's another material I've had trouble with in the past. I was able to cut through with two passes at 100% power and the slowest 10mm/s speed, but the sides were quite charred. I should also note there was a lot of smoke produced and the occasional flame, which highlights the fact that you must keep an eye on the machine when it's operating. I don't suggest trying to cut thick MDF though—it's a mad-made fibreboard that's glued together, and the glues may be toxic. Stick to thinner MDF that's specifically designed for craft work.
Air Purifier
A number of accessories are available to improve your laser-cutting experience and expand the possible projects you can tackle. The simplest of which is an air purifier.
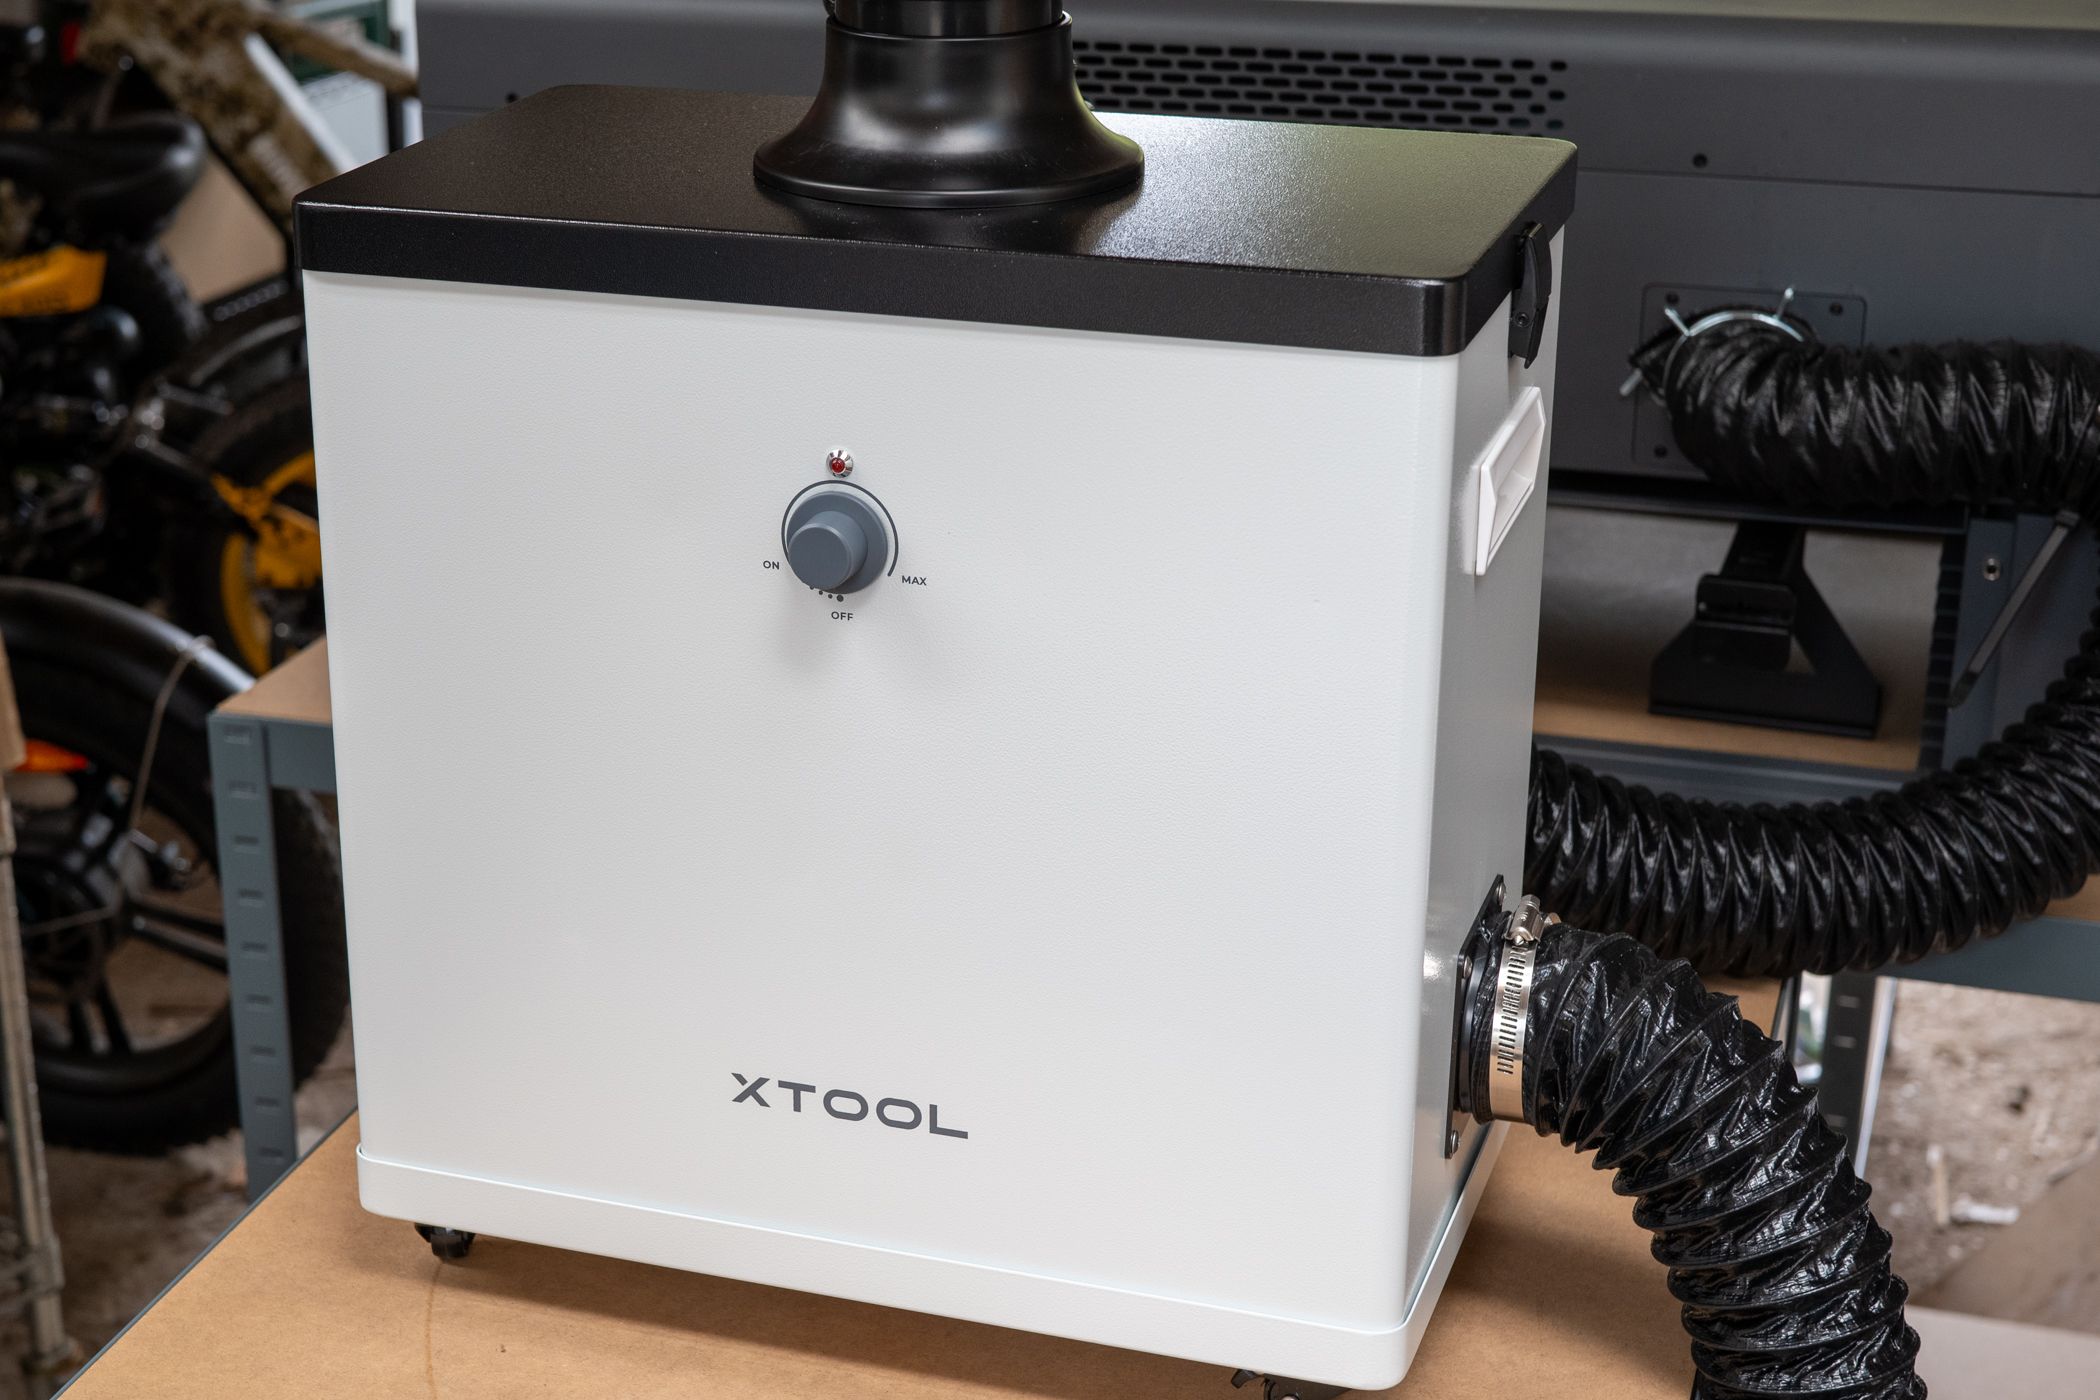
While the XTool P2 has a standard exhaust hose that you can vent outside, if that's not possible or you don't want potentially toxic fumes escaping, XTool also offers an air purifier, which you can feed the exhaust into. It'll then travel through multiple layers of replaceable filtration foam, before exhausting clean air into another hose.
The purifier has two controls: a power switch, and dial to adjust the flow volume. Unfortunately, it's not automatically triggered when the P2 turns on, so you'll need to switch it on and adjust the flow rate manually (and remember to turn it off again).
As far as I can tell—by which I mean, I stuck my nose up to the secondary exhaust and took a deep sniff while tackling a very smokey woodworking project—the air that comes out is perfectly breathable (don't do that at home though, dear readers). You can vent this in turn to the outside.
Riser Base
Requiring about an hour or so of construction and made of solid metal throughout, the Riser Base slots in underneath the P2 and allows you to engrave materials up to 8.4 inches or 215mm in height. The Riser Base is also required if you're planning on using the RA2-Pro rotary tool, or Conveyor Feed, which we'll get to in a moment.
On the right-hand side, the Riser Base also adds a helpful cavity to store the slats or tools, while the front and back sides latch open to fit in the conveyor feed or move the tray. There are some fairly large gaps between the riser and the main P2 machine, which you'd assume smoke would be able to escape from. But in my experience, the extractor fan was strong enough to prevent this from happening.
Rotary Accessory
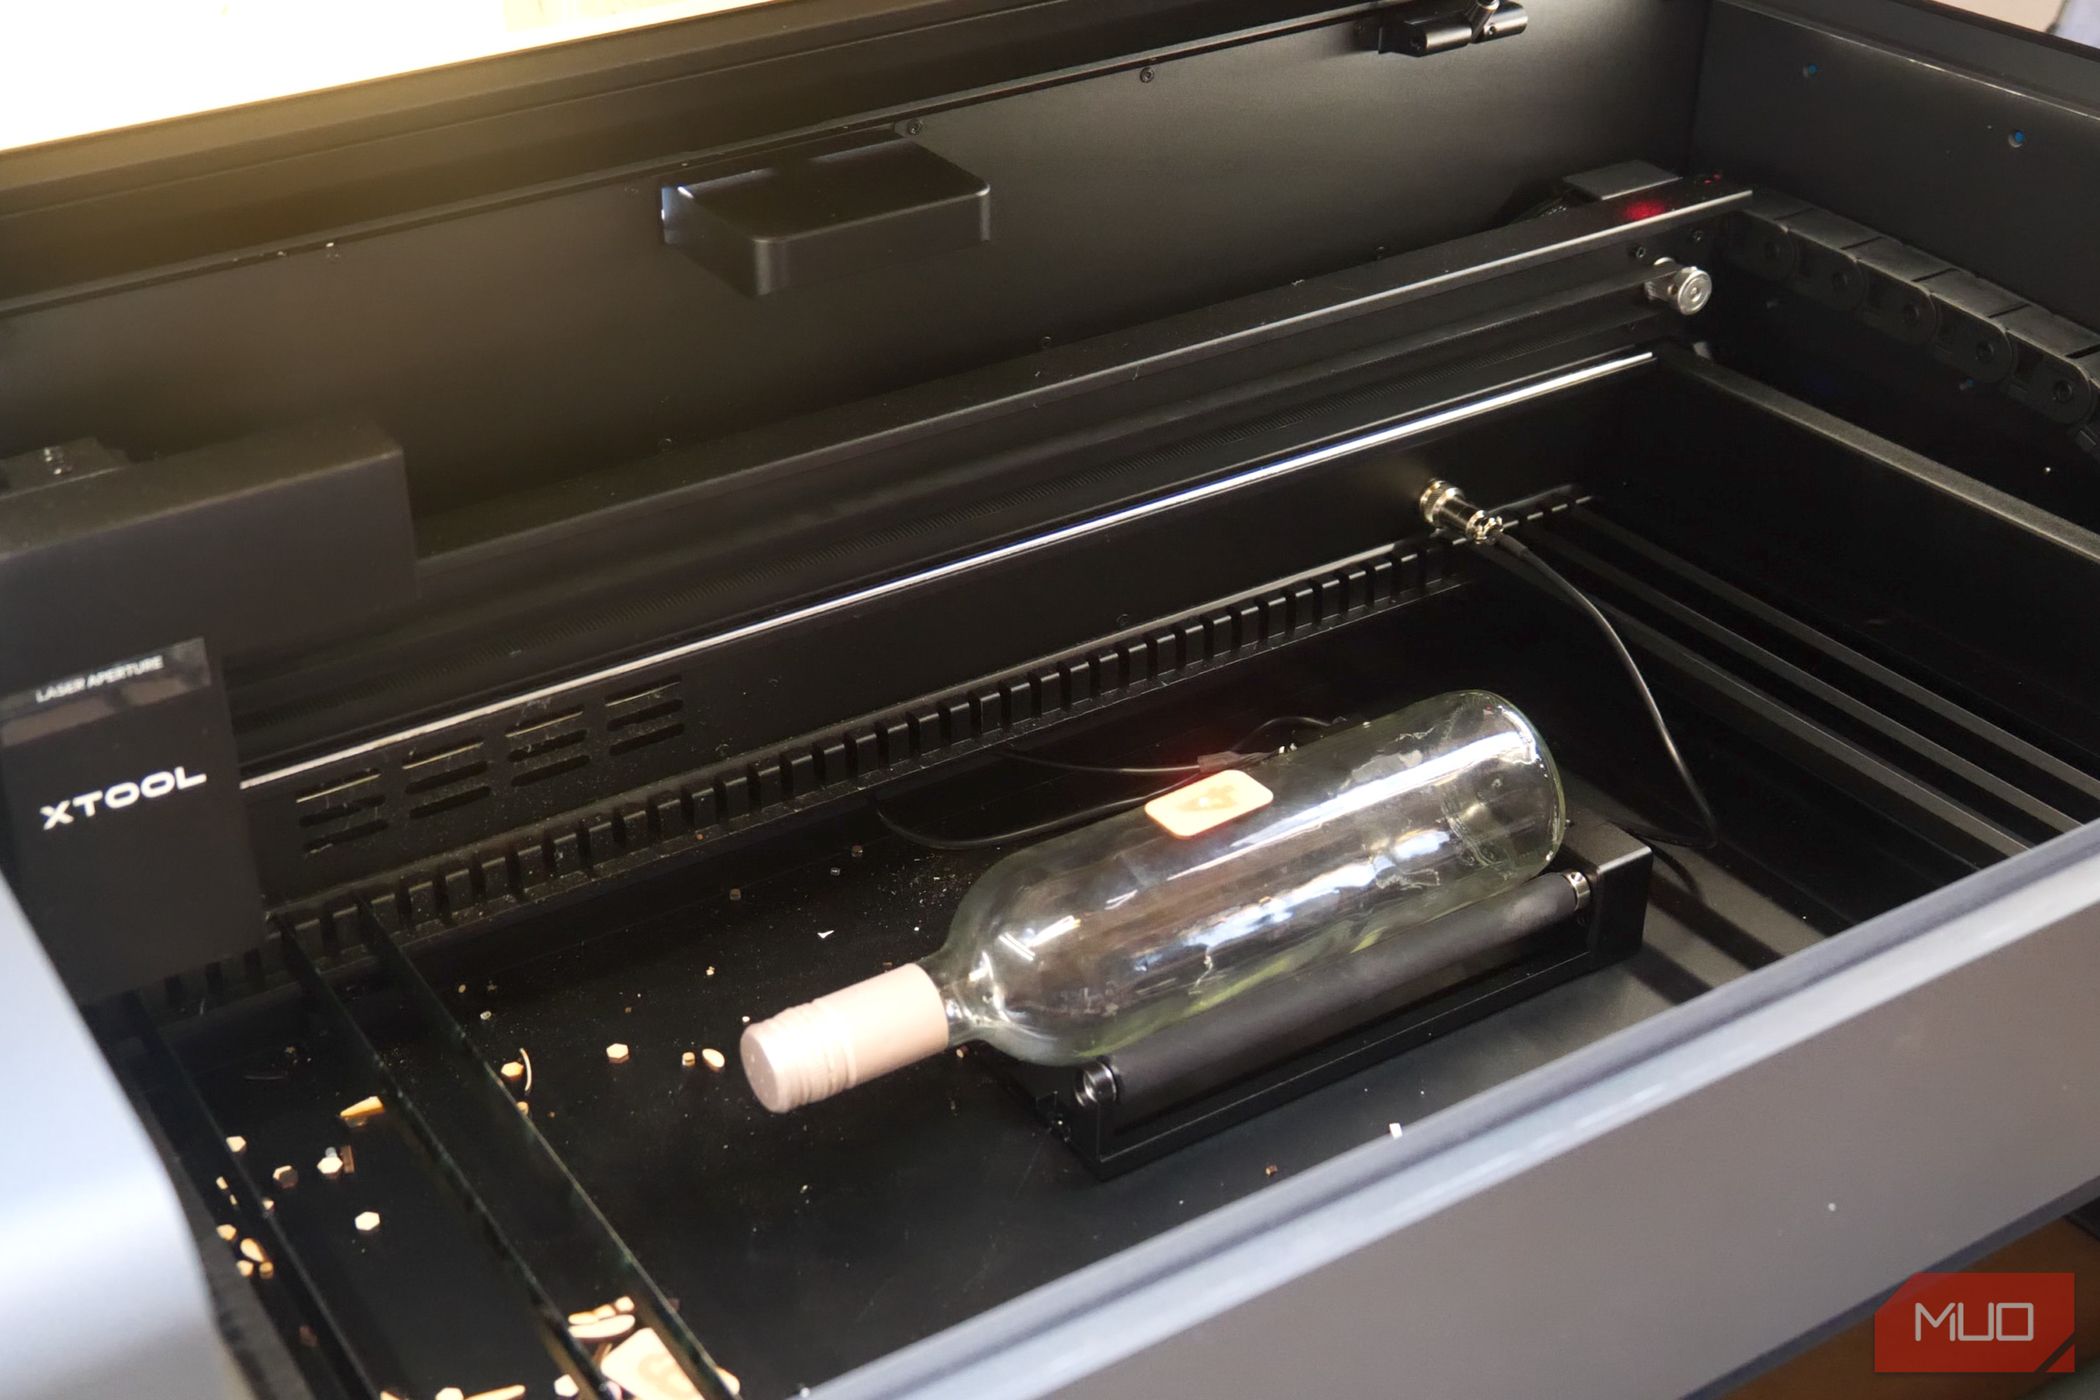
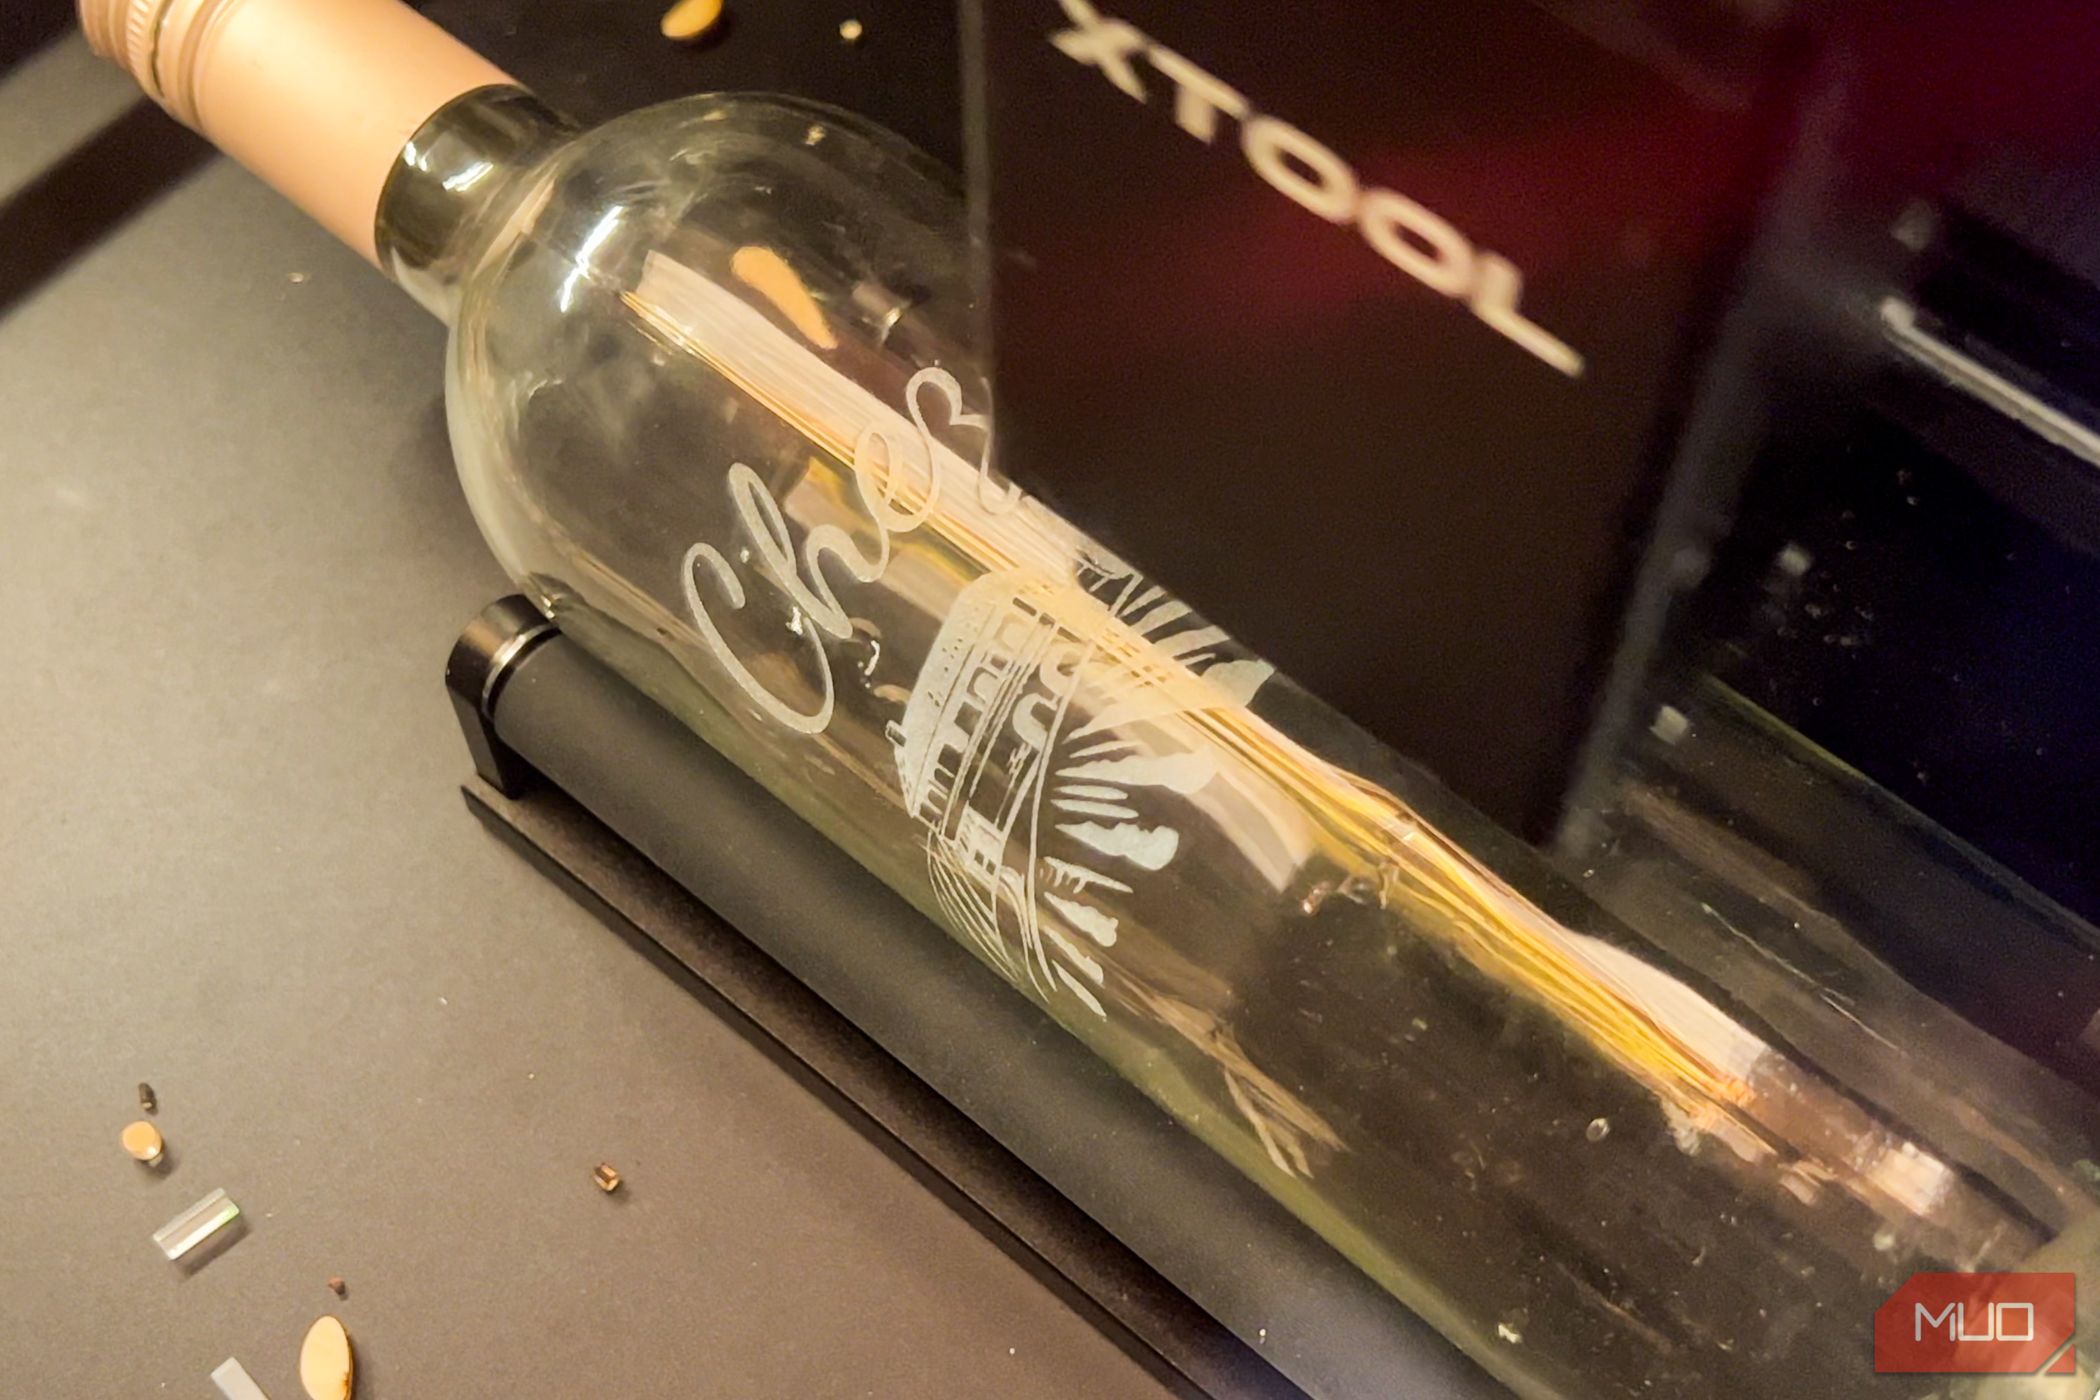
Another optional upgrade is the RA2-Pro for cylindrical objects like glass bottles or tumblers. This sits inside the machine in a fixed position, and the rollers replace the Y-axis. During operation, the laser moves along a fixed line, while the rollers rotate your object.
There are three main components included with the RA-2 Pro: the main rollers, which can be adjusted to suit various diameter objects; a support roller, which doesn't move independantly but just offers support for any conical objects you might be working with; and a chuck, which goes inside an object and pushes outwards to grip it.
The RA2 rotary attachment lets you engrave cylindrical objects up to a maximum of 180mm in diameter (when used alongside the Riser Base).
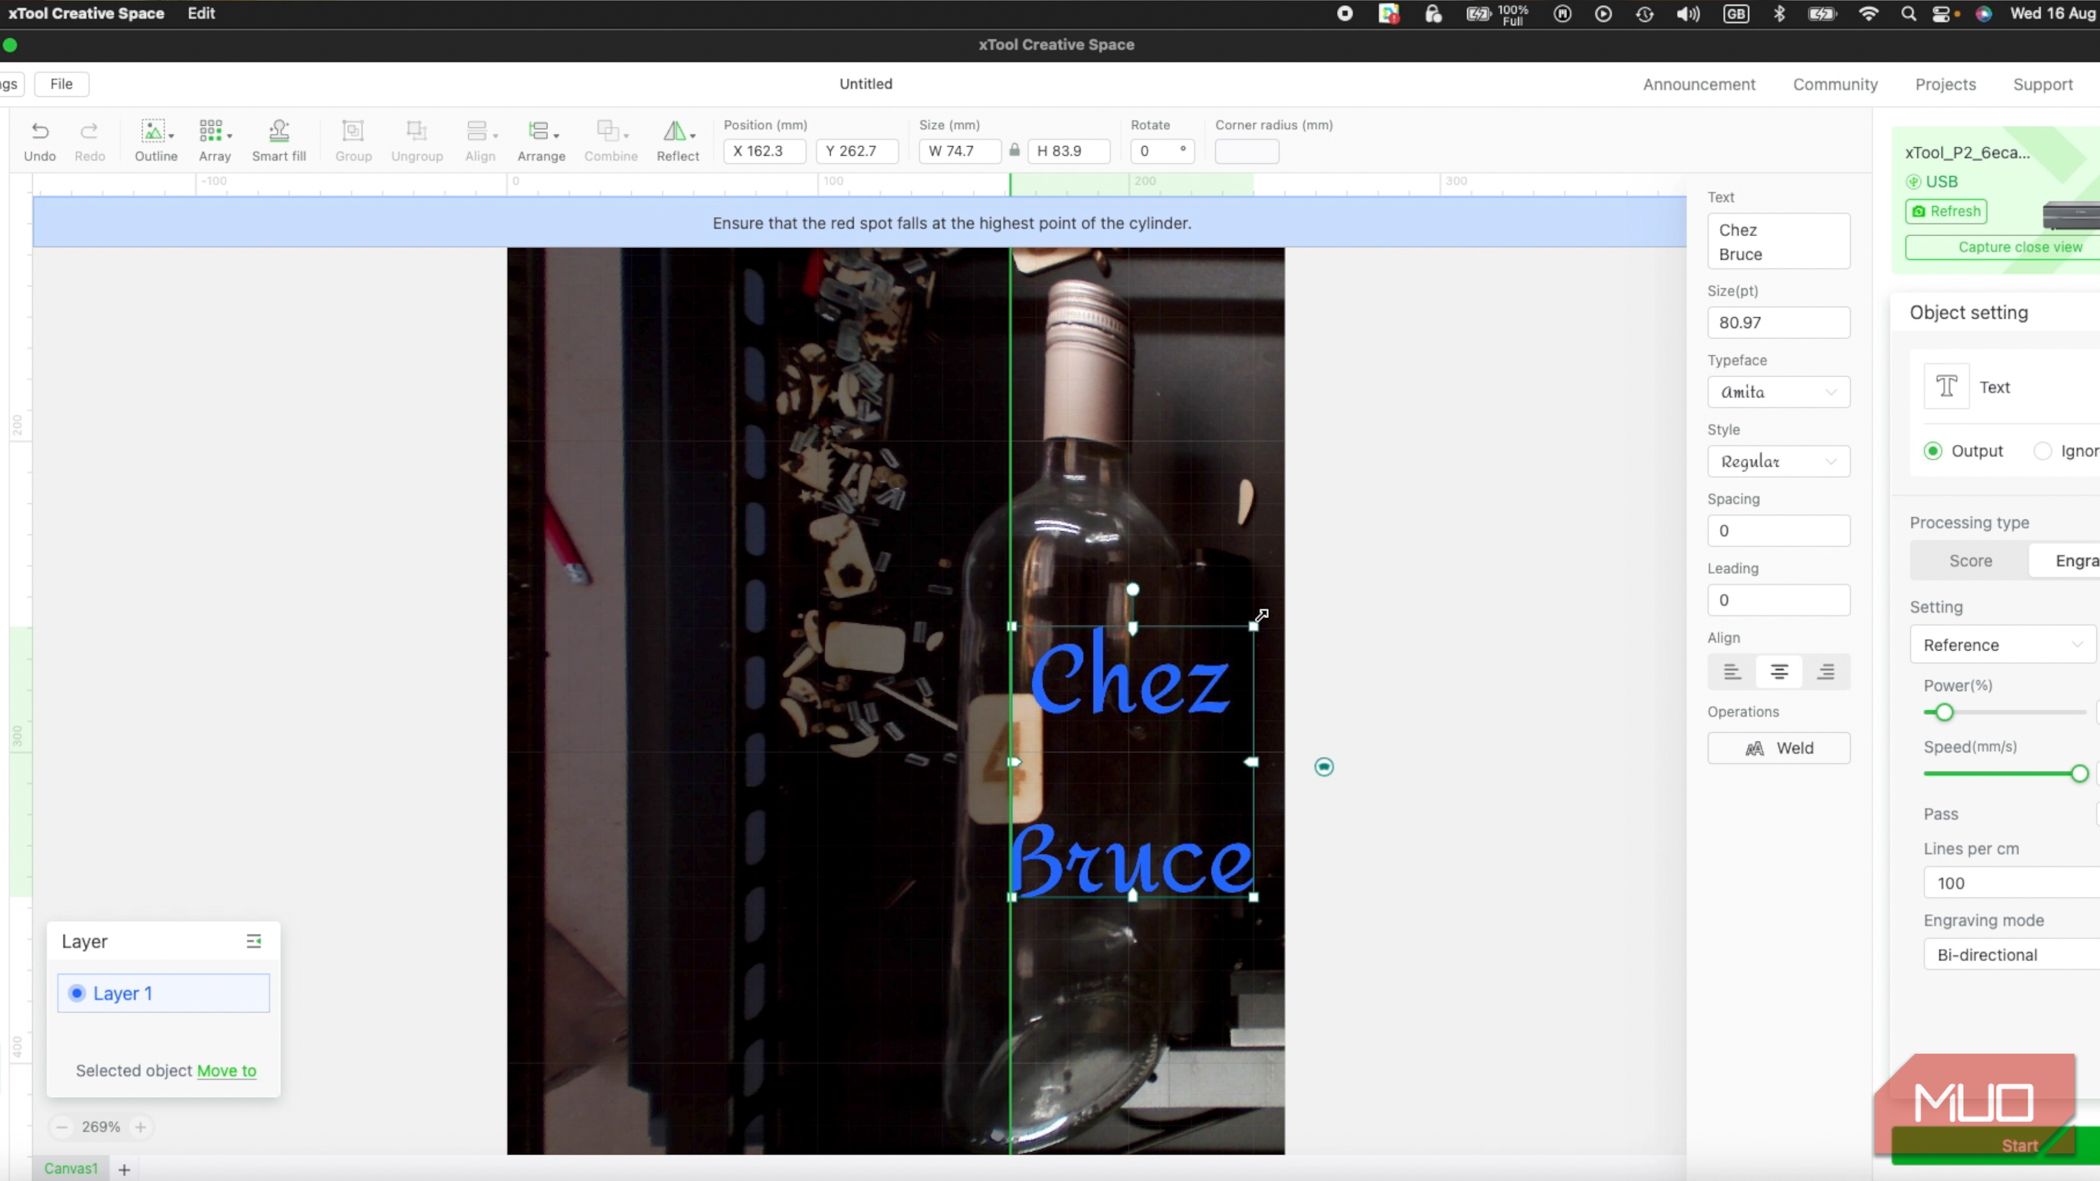
In terms of software and setup, when it comes to engraving on a cylindrical surface things get a little bit messier, and the camera interface makes a lot less sense compared to a flat surface.
Depending on the diameter of your object you'll need to set the height of the tray manually—refer to the documentation that came with the Riser Base to know which shelf it should be placed on. You should also plug in the rotary module to the internal connector and align the red positioning laser to the highest point of your object. Use auto-measure to check the distance if possible. In my experience, this failed on glass (obviously), however, I carefully balanced a small piece of wood on top, then added the thickness of that to the measured result.
You'll also find the interface in XCS has rotated, and there's a large green line down the middle. This is the path of the laser—and you can drag and drop this to align with the highest point of the object. This can also be tricky as the view from the camera is distorted. If possible, draw a pencil mark on your object; in my case, I used a toothpick for alignment. The green line represents the furthest left point of your design, so line up your design on the right of it.
If you've used the RA2 rotary upgrade with a lower power diode laser, you might have found you can't engrave glass without some kind of interface, like white spray paint or tracing paper. That's seemingly not necessary on the P2—you can just engrave straight onto the glass. Within 30 minutes of plugging the RA2 in, we had some great results on a generic wine bottle.
Conveyor Feeder
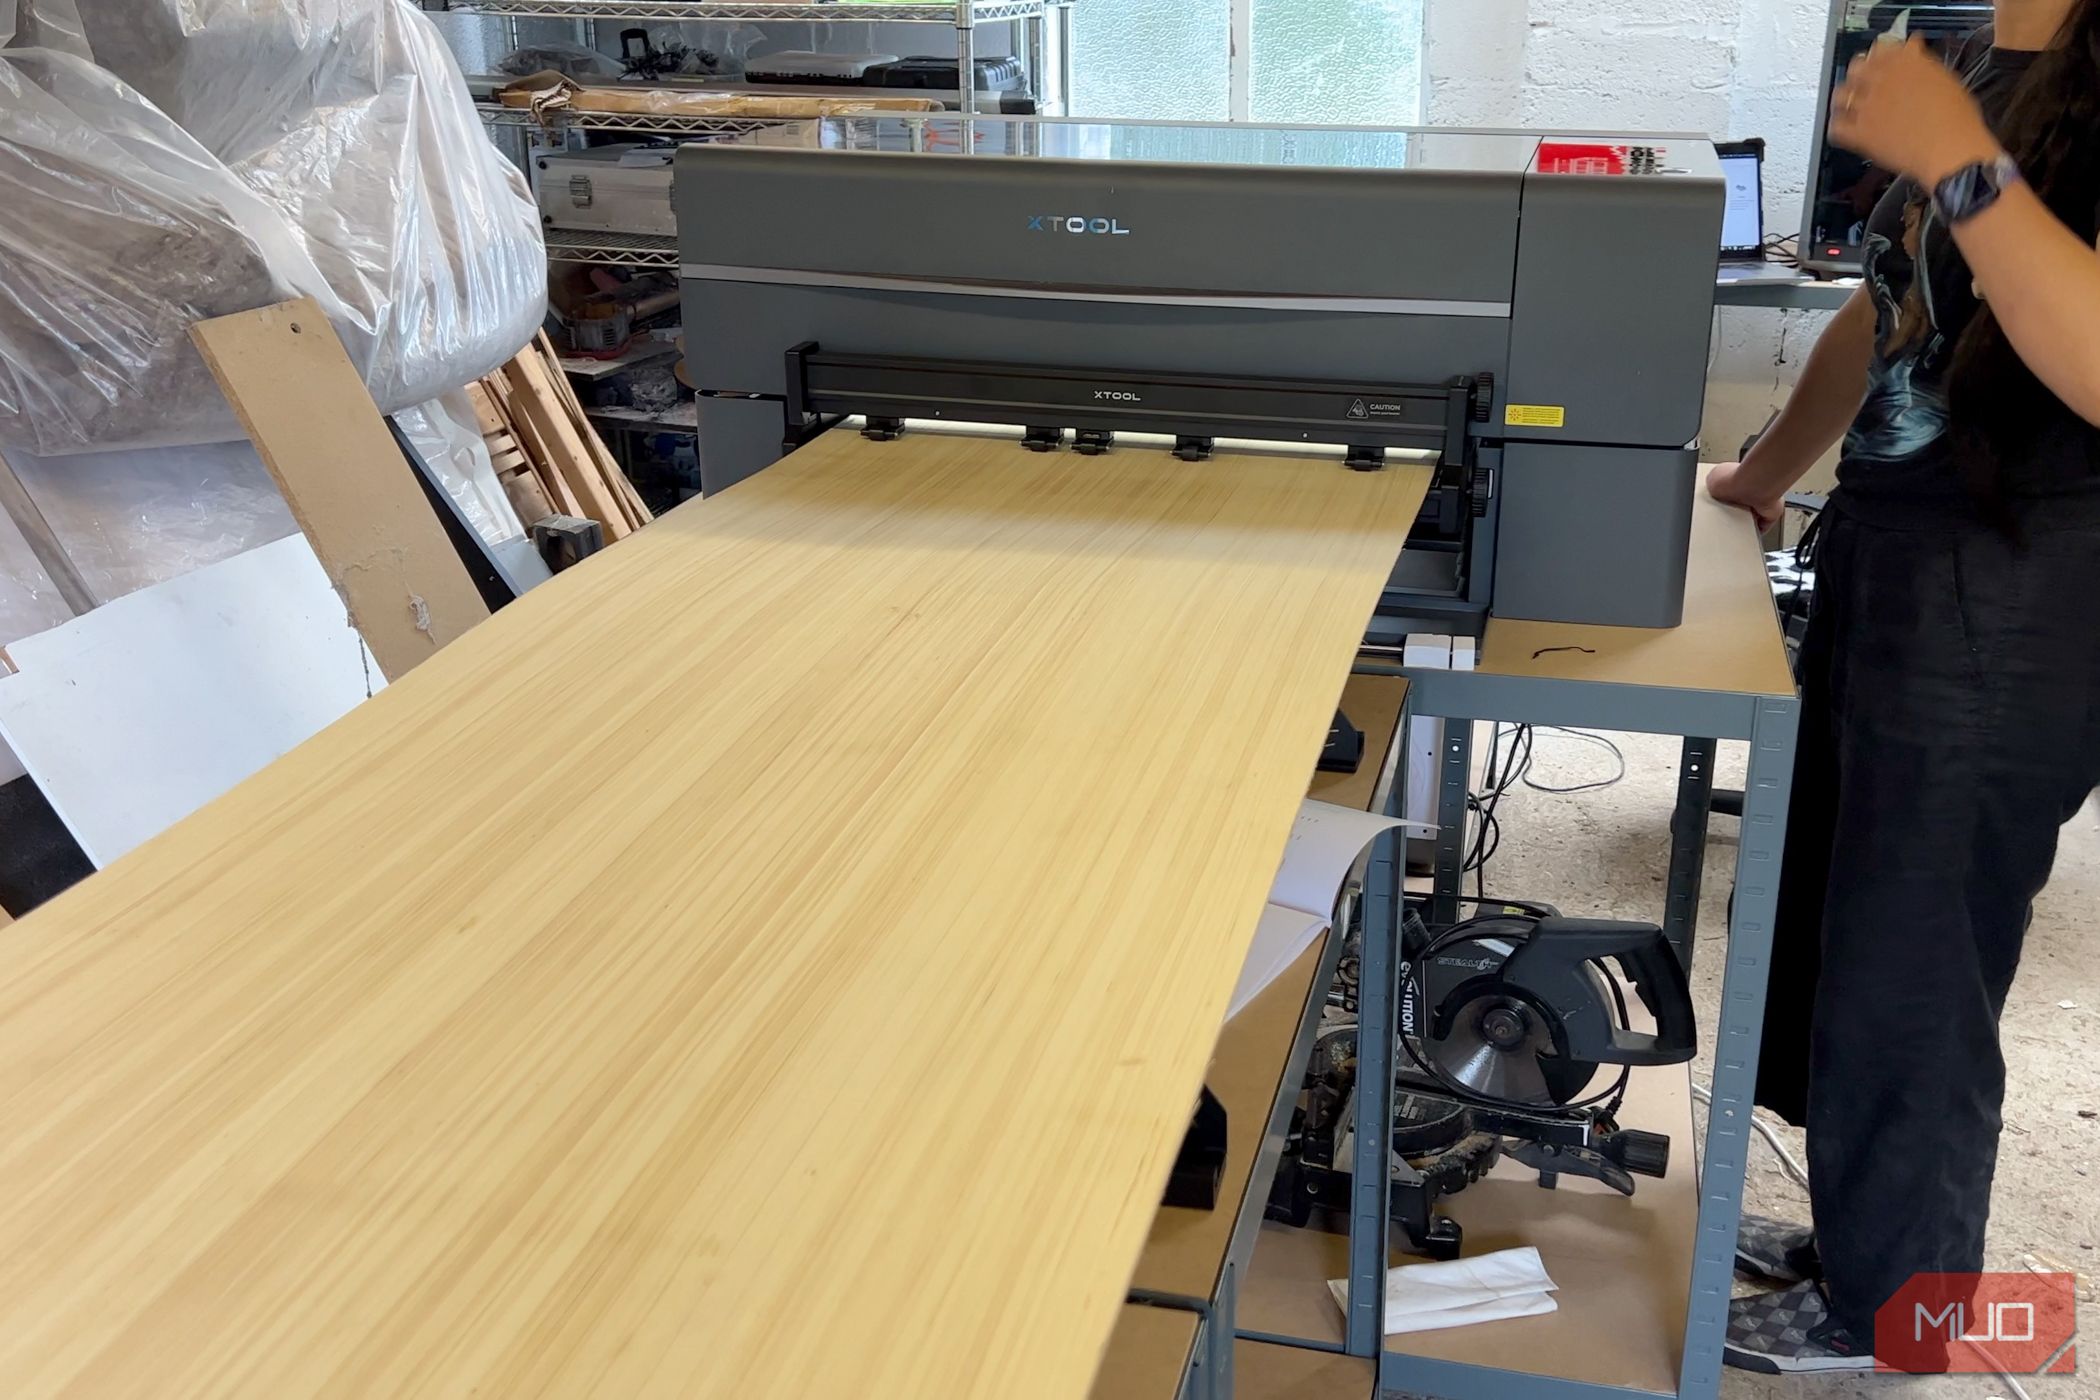
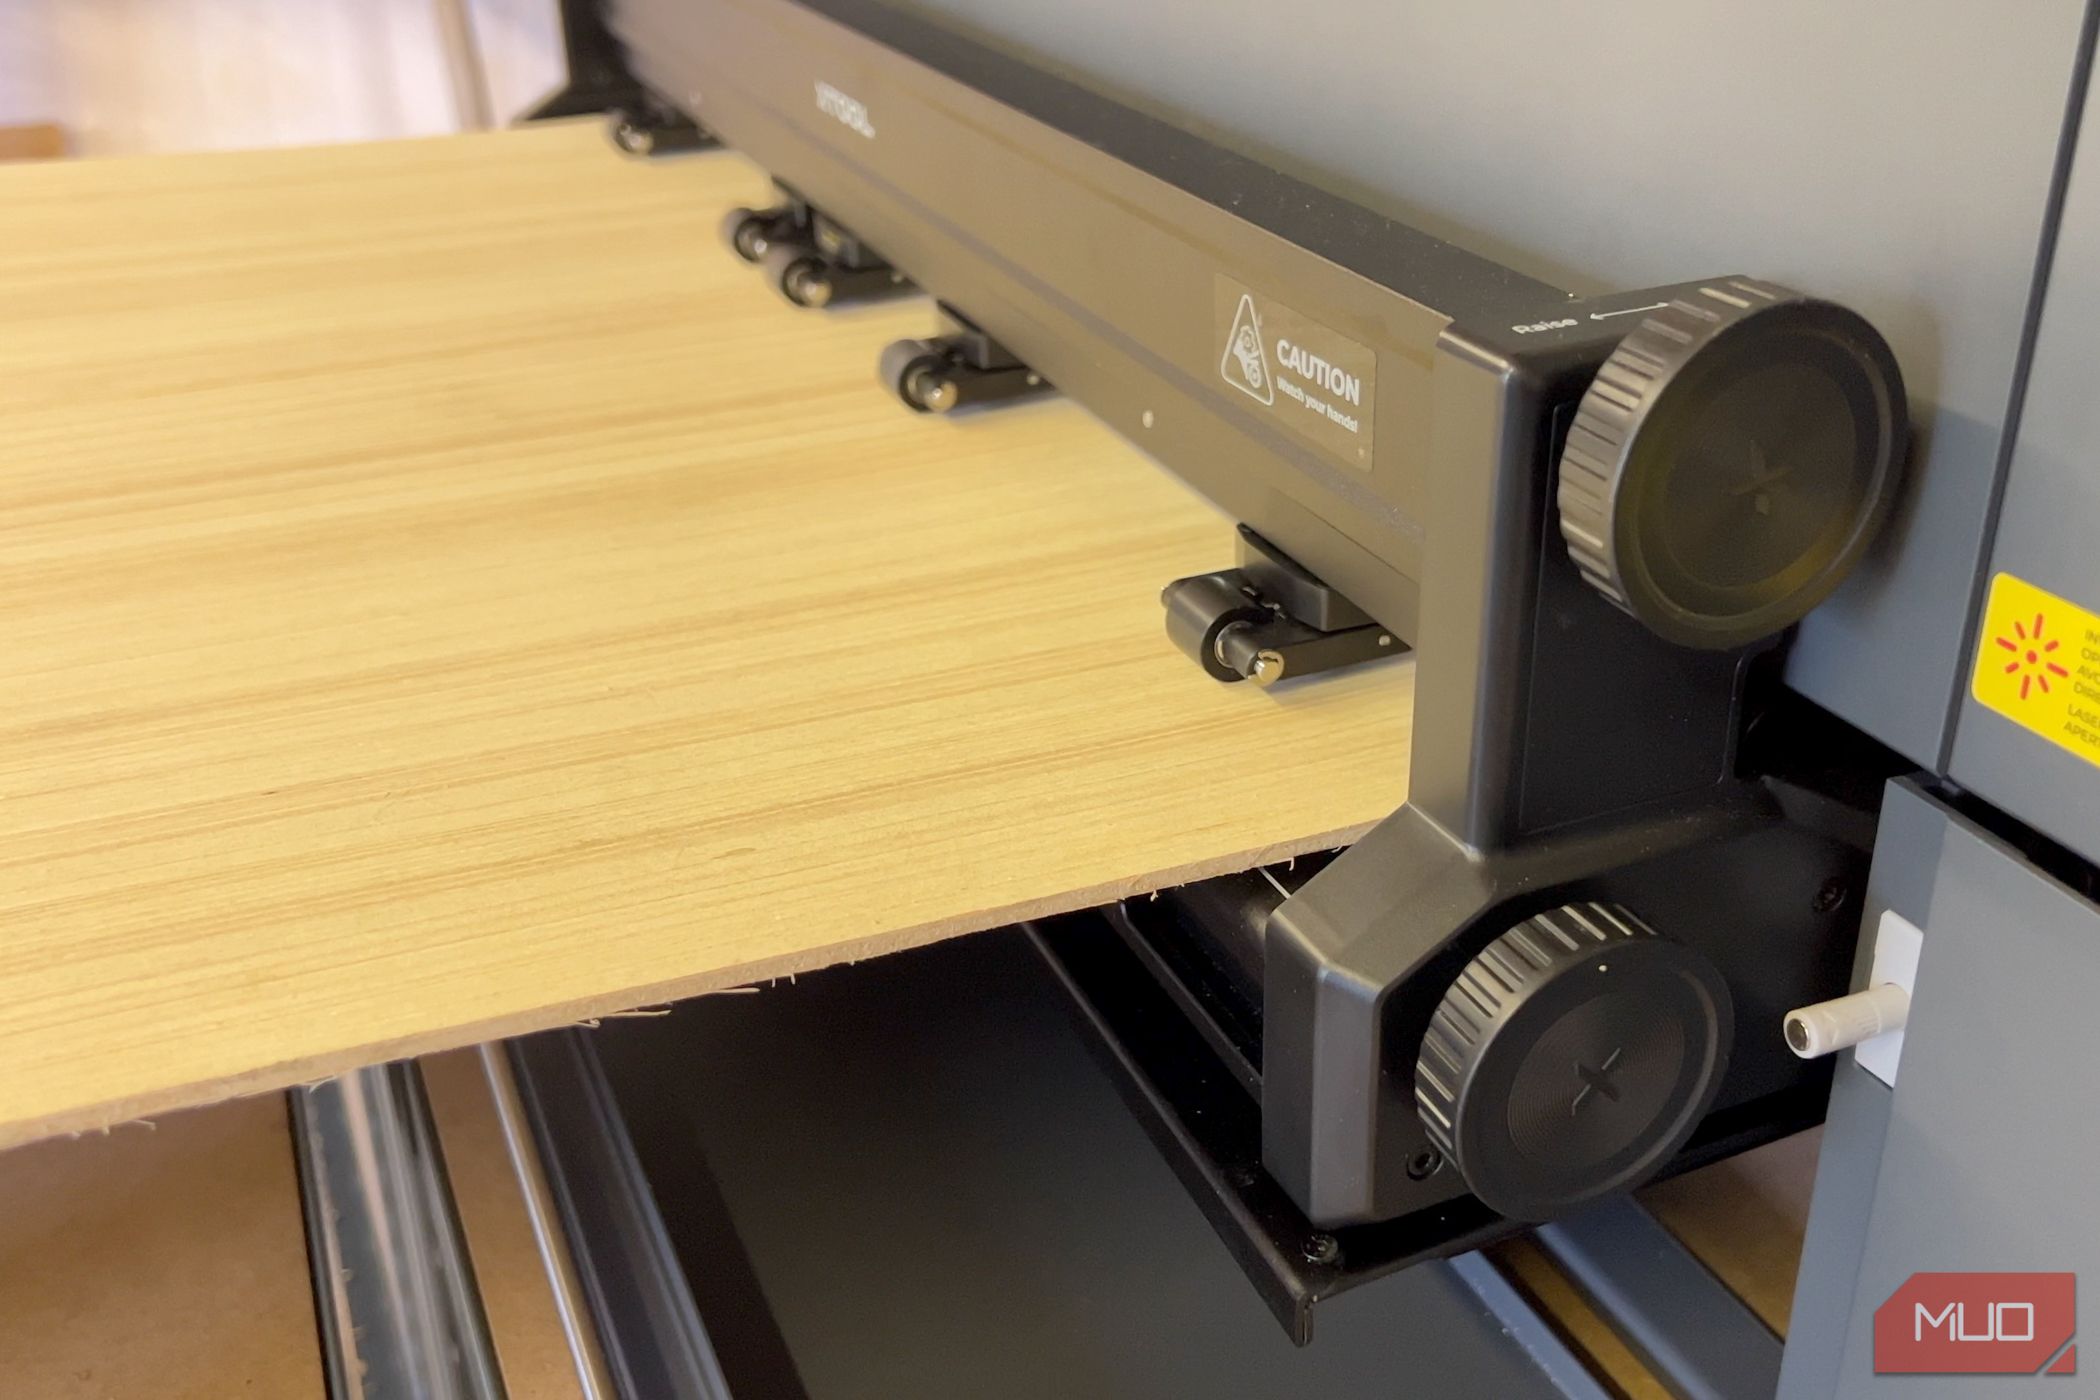
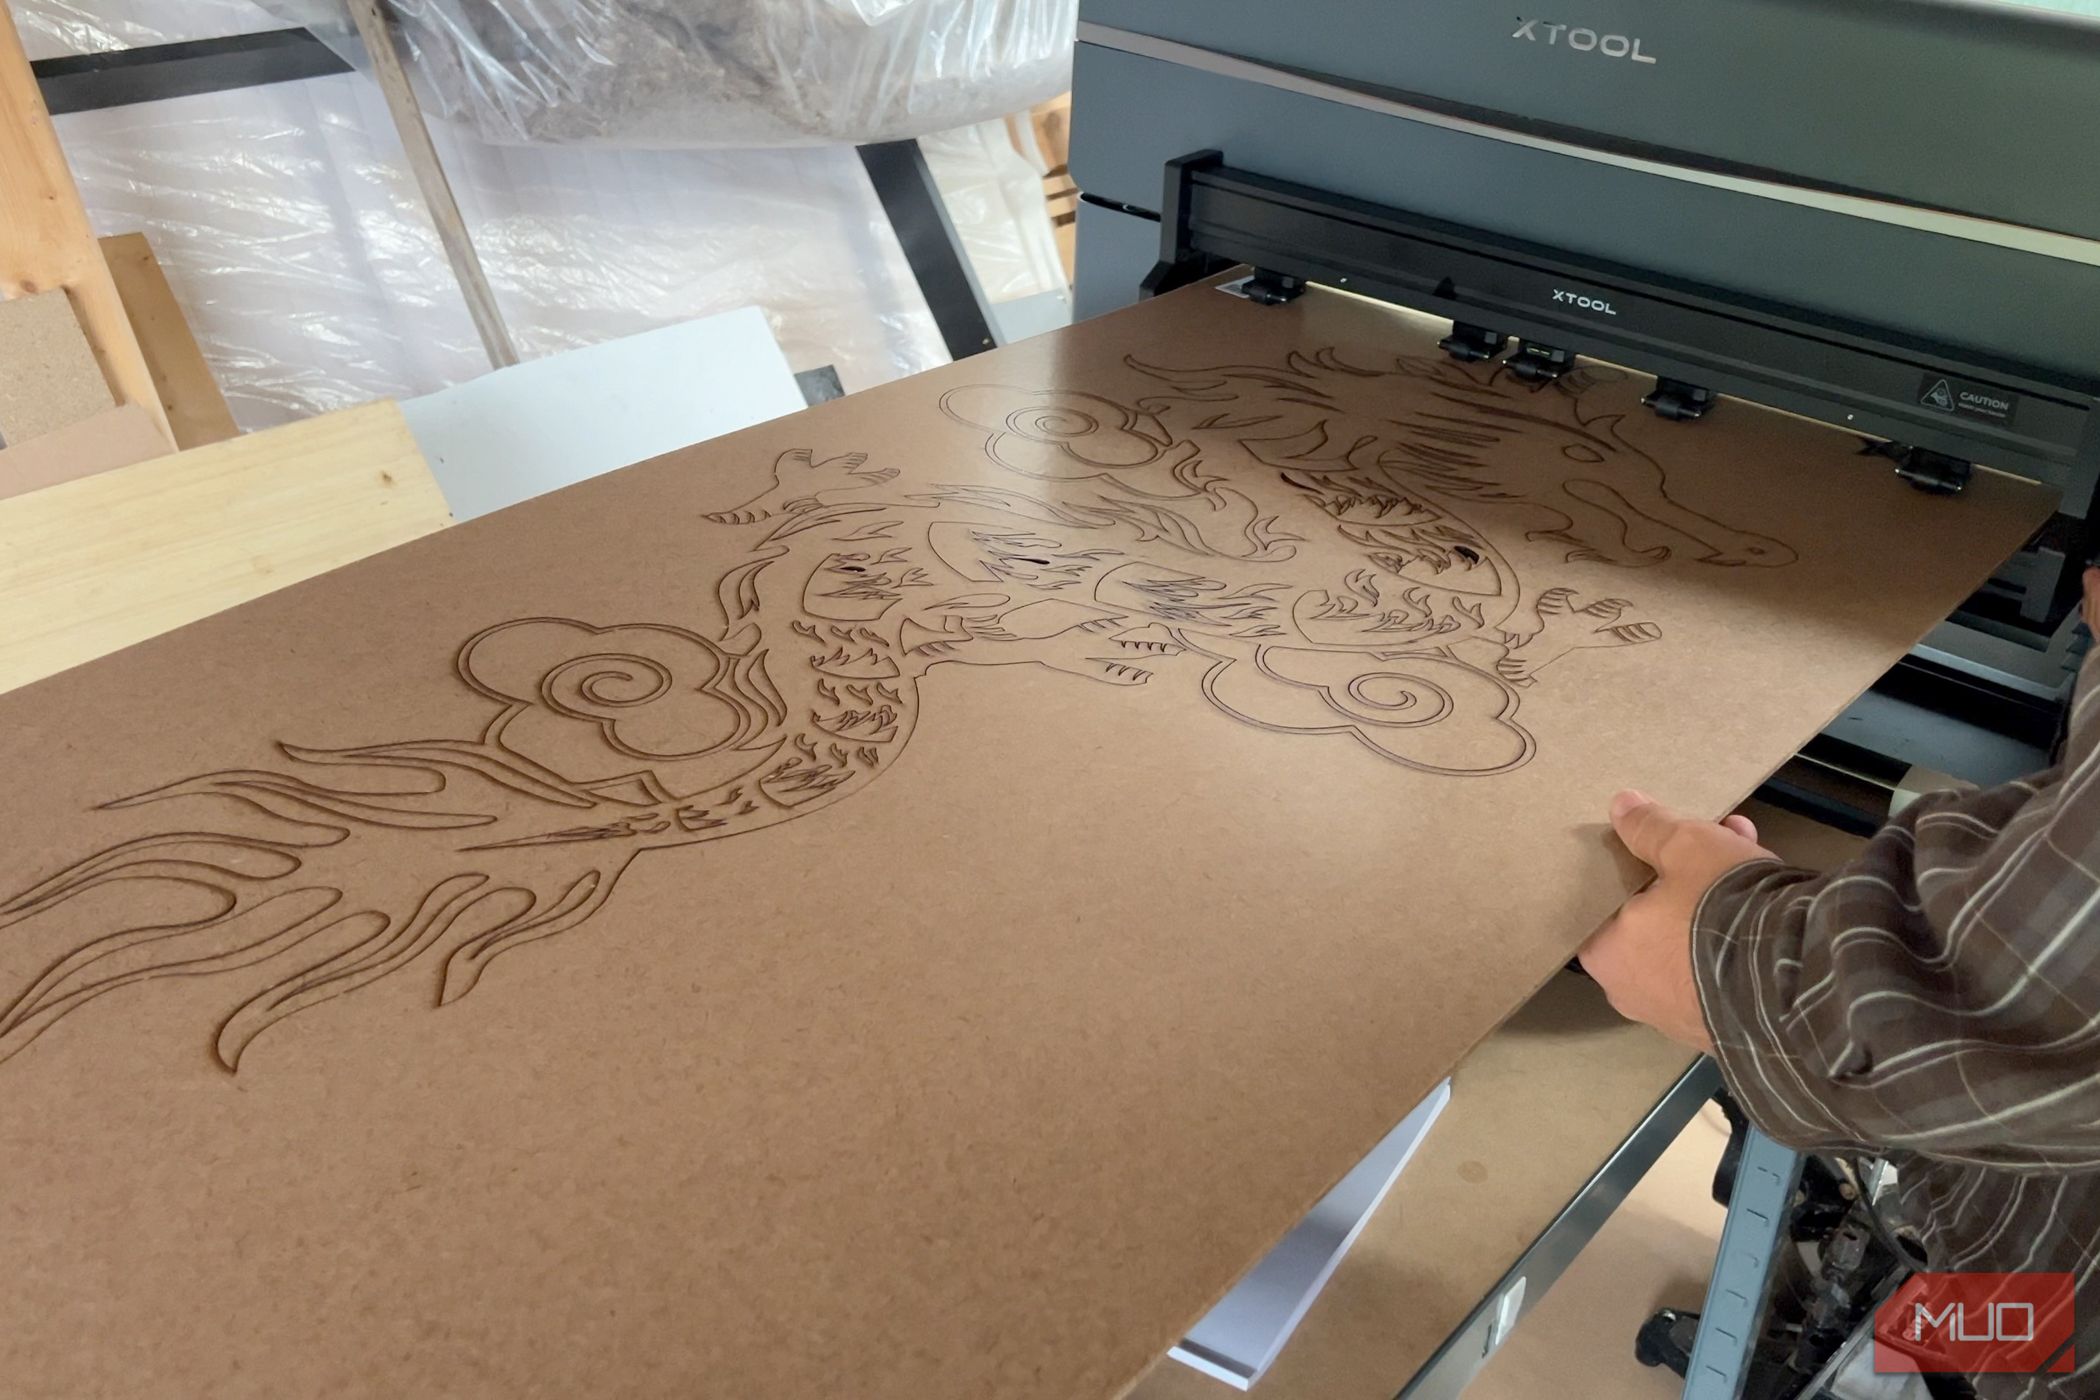
The conveyor feeder really opens up possibilities when it comes to the size of projects you can cut, enabling you to feed in sheet materials nearly up to the full width of the machine: 620mm or 24.5 inches wide, and up to 3 meters or 188 inches long!
To maximize the potential, you'll need the main conveyor kit, plus two extension units, but the extension kits are modular, so you needn't purchase a full set if you only need perhaps half the length. In theory, you could also build out a larger set of rails, but the limitation of 3m appears to be in software.
Similar to the rotary attachment, the conveyor feeder takes the place of the Y-axis, moving your material back and forth while the P2 laser does its business along a fixed line. This also requires the use of the Riser Base, and you're limited to 14mm maximum thickness, but this should accommodate the most common sheet materials.
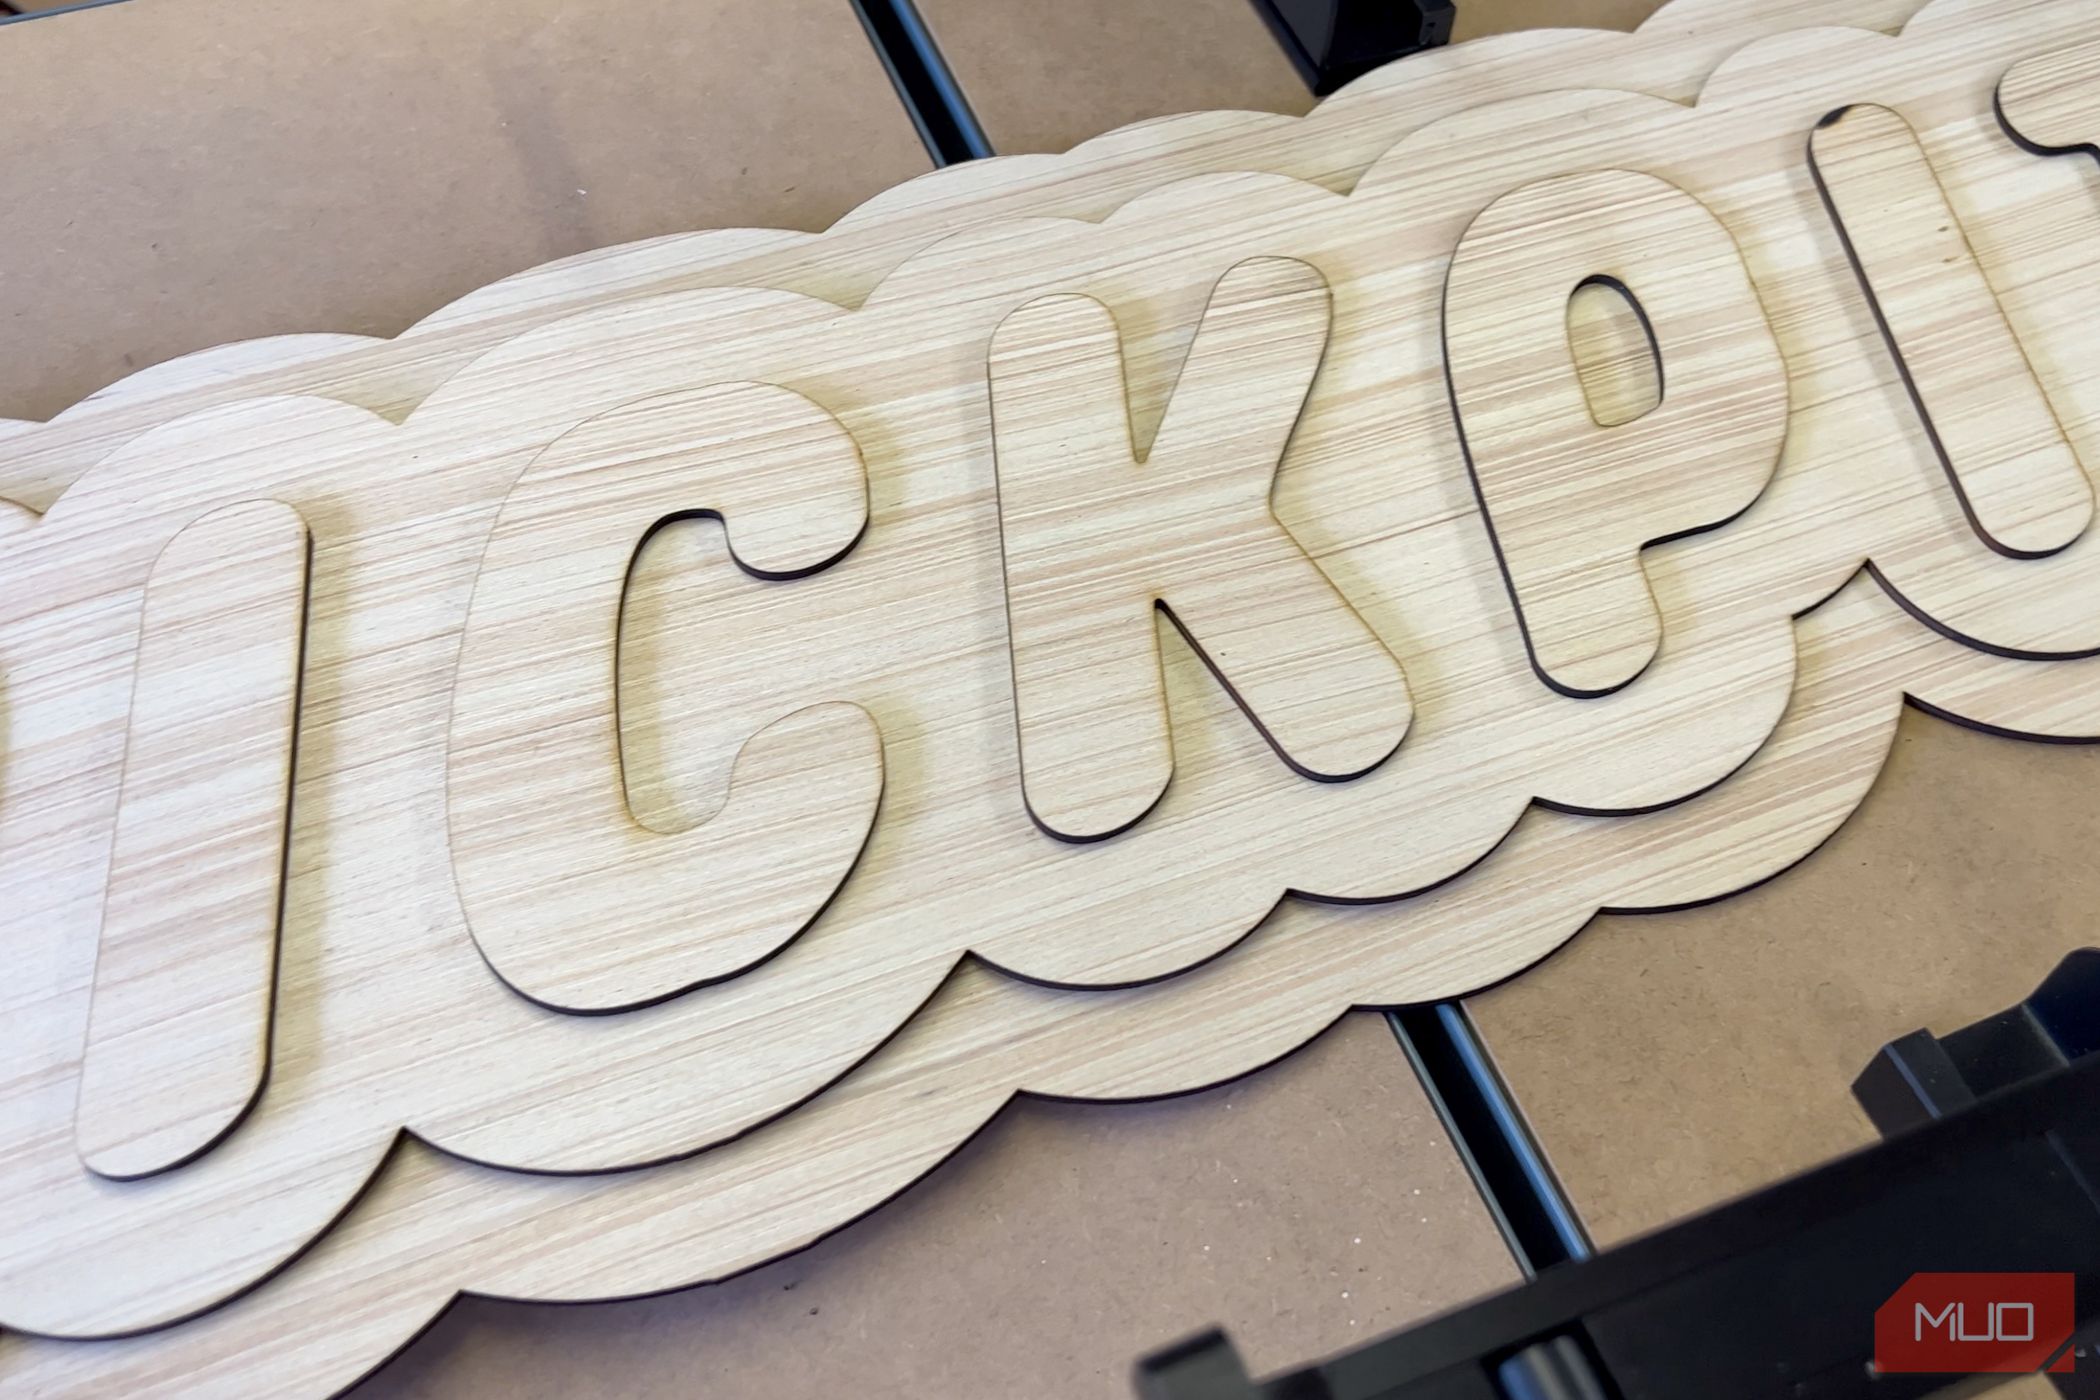
Our first attempt with the conveyor feed was a large sign for our LEGO cabin. This was a multi-layer cut from 3mm plywood, which I later spray painted.
The results were impressive, but I soon ran into some problems. Since you don't use slats or a honeycomb bed to support the cut pieces, they can fall down and become stuck. If those stick up, they can block the laser head, at which point your design is ruined and can't be recovered from.
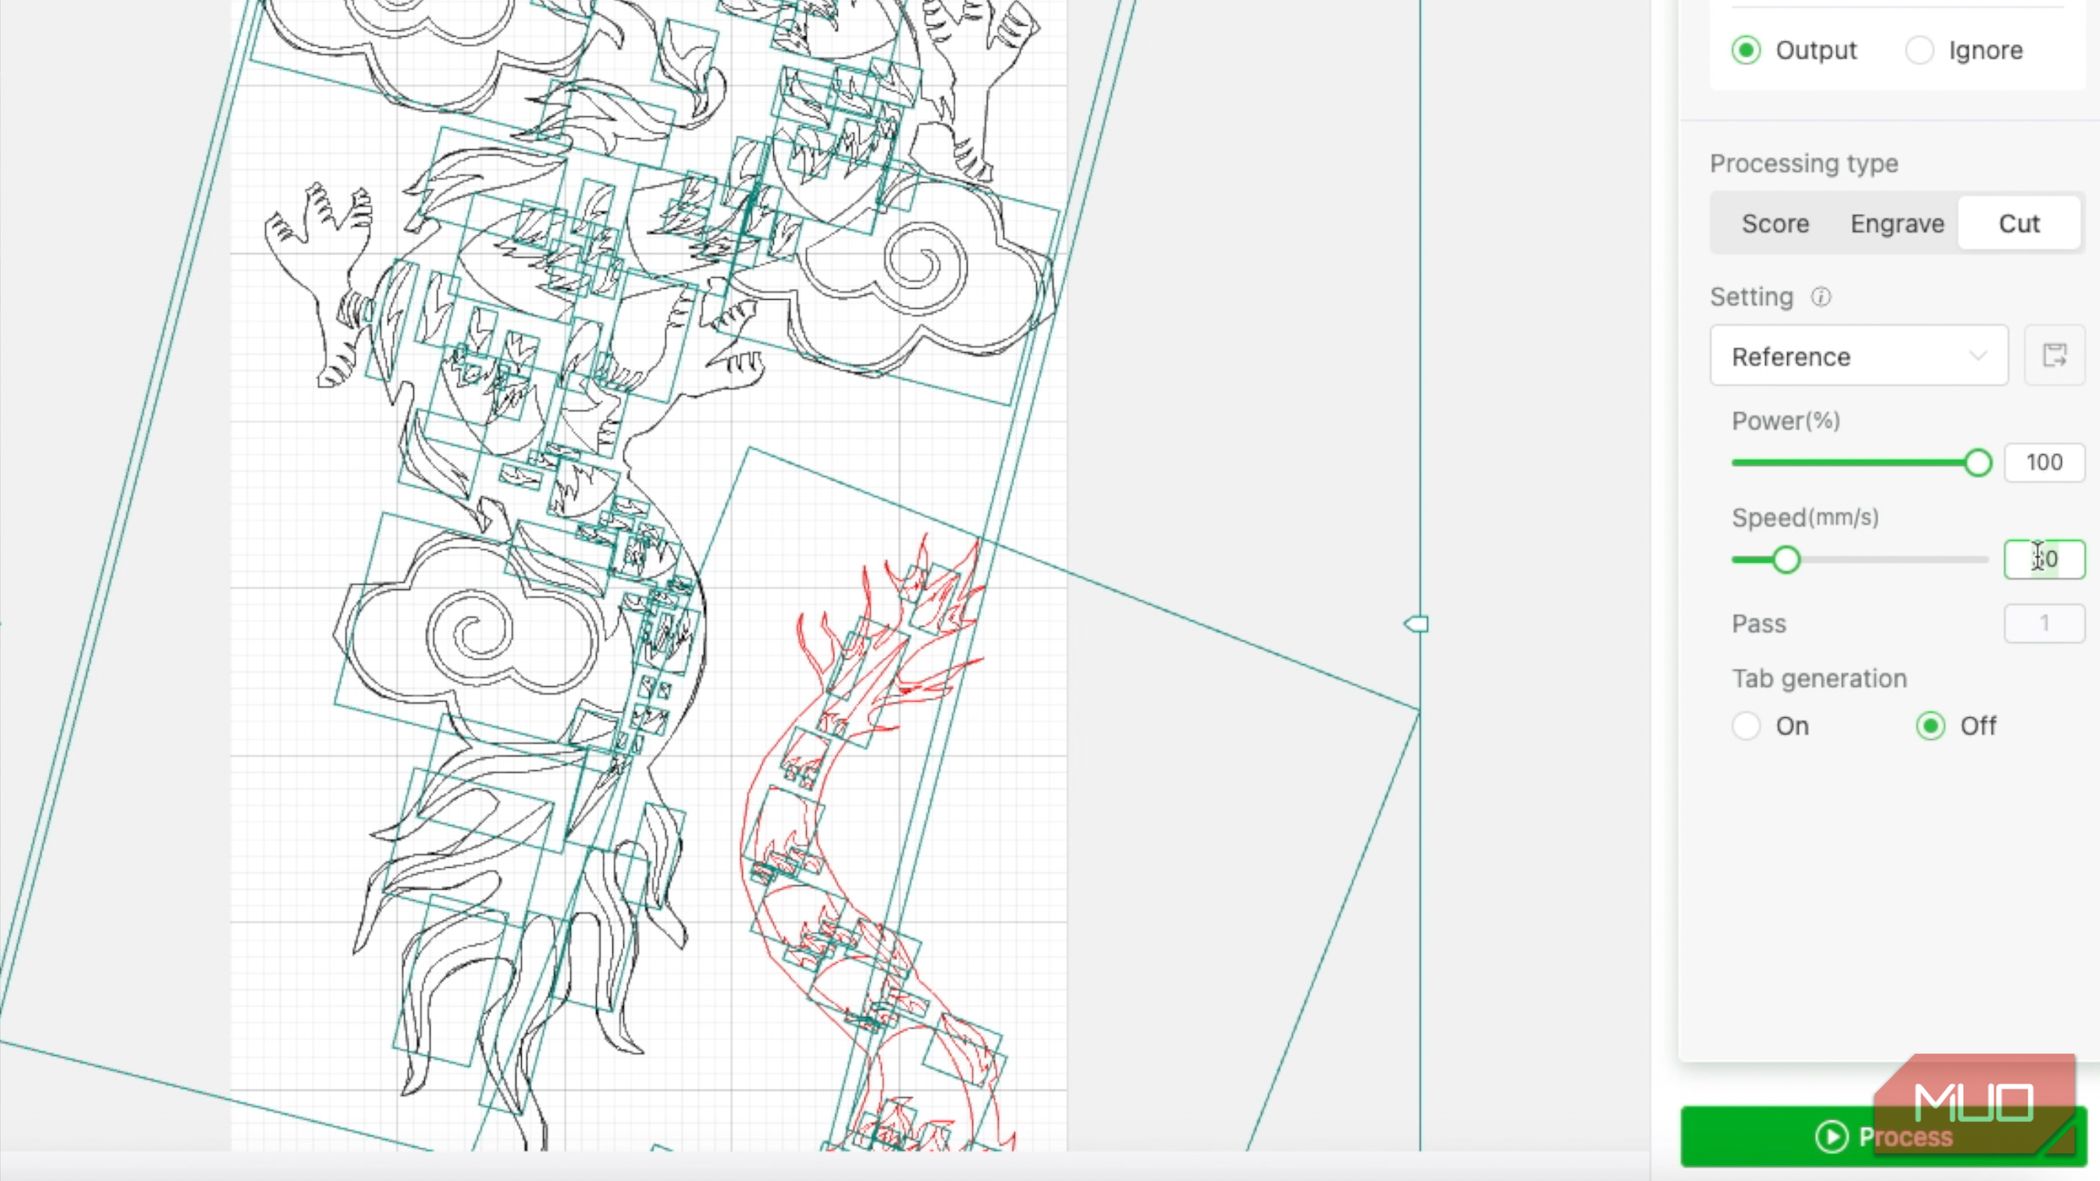
Thankfully, a quick email to support guided me to a setting called Tab Generation, which is curiously only available when using the conveyor feed. This allows you to leave some tiny uncut lines at certain intervals. This ensures they don't fall out, and can instead be easily pushed out by hand once the piece is finished. I do wish this feature would be enabled for non-conveyor use too though (something that LightBurn can do).
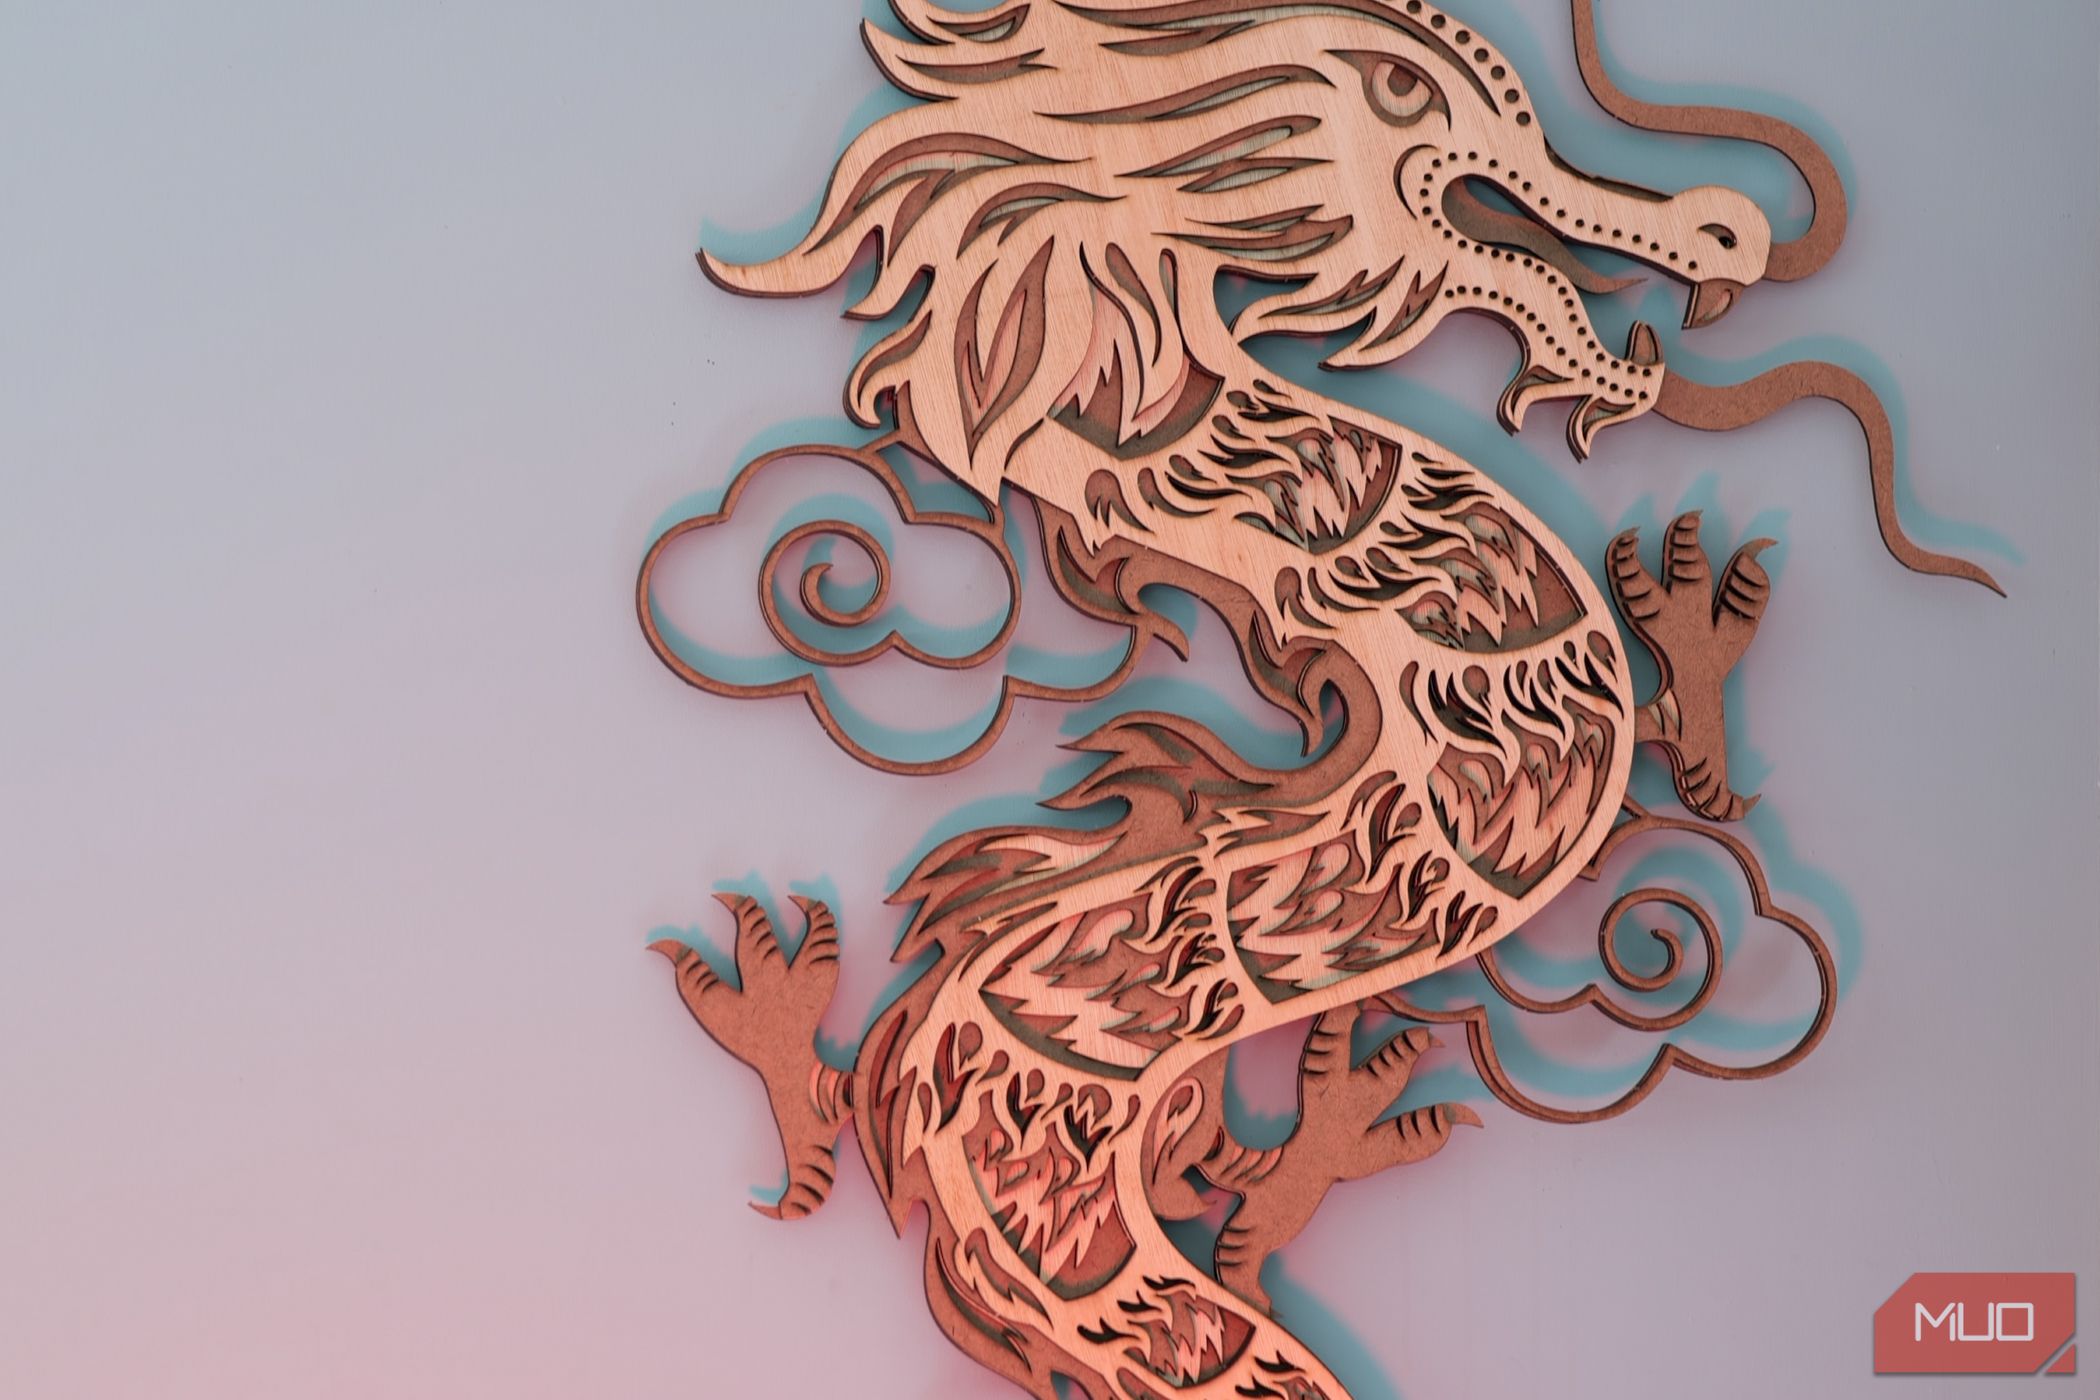
In my experience, pieces could be pushed out cleanly and didn't need any further cleanup. So I tested again, this time with a complex dragon design for the Chinese New Year, which came out beautifully.
It's not just huge designs either; for batch production, it's a lot more efficient to pack those designs together and cut from a larger sheet than fiddle around with smaller sheets. Without doubt, the conveyor feed adds an immense level of functionality to the P2.
Should You Buy the XTool P2?
The XTool P2 is a fantastic choice for hobbyists with a big budget and for daily small business use. The software package is the same one used on their more budget-level machines, so if you're upgrading, you'll already be familiar with how powerful and easy to use it is. Higher-end machines typically have arcane software requirements, so it's unique to find a machine that can produce results of such a professional quality, with such user-friendly software and operation.
If you've been frustrated by a diode laser and its limitations when it comes to materials like acrylic and glass, you're an ideal candidate to update to the XTool P2.
As for the accessories, the Riser Base and Air Purifier I would class as essentials. The Conveyor Feed and RA2 Pro rotary tool will both expand your potential projects immensely, but it might be worth waiting until you're intimately familiar with the base P2 machine, as they add a level of complexity to both the hardware and software side of things. However, at the time of writing, you can buy the complete set—the P2, Riser Base, Conveyor Feed, RA2 Pro, and Air Purifier—for around $6,000. Considering the base P2 price of $4,500, that's a great deal, and comes with a selection pack of materials to get you started.
It's a big investment compared to a budget diode laser, but the possibilities are endless.

Xtool P2
The XTool P2 an incredibly powerful laser cutter, paired with the same user-friendly XCS software package used on all the XTool machines. The dual positioning cameras ensure accuracy for details, even down to engraving on a toothpick. Meanwhile, the autofocus laser means you'll rarely need to specify material thickness.
It's an ideal upgrade for those looking to work more with acrylics or glass engraving. A number of accessories are available for engraving cylindrical objects and working with huge sheet materials, as well as an air purifier.
- Brand
- XTool
- Laser Power
- 55W CO2 laser
- Working Area
- 23.6 x 12.1 inches (600 x 308mm)
- Software
- Xtool Creative Space (lightBurn compatible)
- Positioning Camera
- Two - one for overview and one for close up details; plus an autofocus laser.

